Crochet a giant doily rug
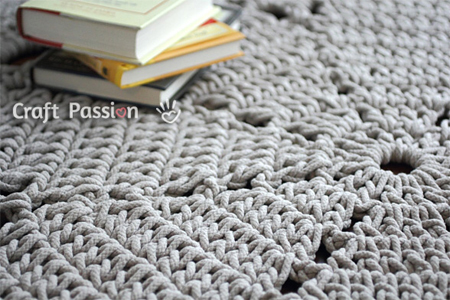
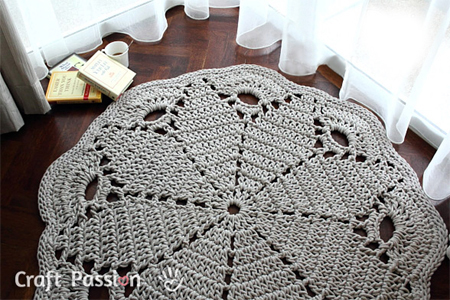
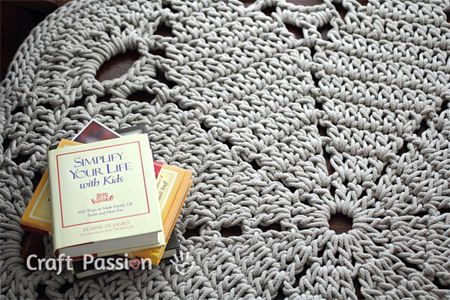
Joanne at Craft Passion shows how to make your own gorgeous doily rug that measure just over 1,2 metres in diameter and uses sash rope or cord clothesline and a large crochet hook. A giant doily rug or floor mat is one of the most sought-after and you will find plenty of doily rugs on the Internet. The rug featured here is the nicest one that I have seen so far, and I hope Joanne doesn't mind my sharing with you...
Joanne advises that some crochet experience is necessary, such as a knowledge of the basic stitches, but this is also a great way to get started in crochet because you're mistakes are so much easier to spot ! You will need a large crochet hook for this project, one that allows you to crochet with the thickness of rope you will be using, and you may need to make your own giant crochet hook. You will also find crochet abbreviations, as well as demo videos in the Home-Dzine Craft section.
YOU WILL NEED:
7 Hanks cotton sash rope or clothesline ( you will need to join for continuous length)
Crochet hook: 10mm, N hook or
make your own
Sewing thread and needles (for joining cord)
Scissors
Abbreviations:
ch = chain
sc = single crochet
dc = double crochet
st = stitch
slst = slip stitch
sk = skip st from previous round
sp = space
rnd = round
prev = previous
HERE'S HOW:
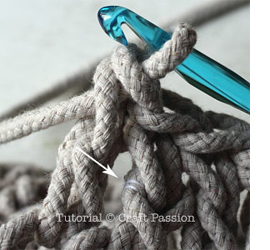
Giant Doily Rug Crochet Pattern:
R1 : magic ring1, ch3, dc in the ring, ch, *2dc in the ring, ch* repeat* 7 times, slst to the 3rd ch at the beginning round to create the base ring for the doily.
R2 : ch3, 1dc in the same st, 2dc in next dc, ch2, *sk ch, 2dc in each of next two dc, ch2*, repeat* 7 times, slst in 3rd ch at the beginning round.
R3 : ch3, 1dc in the same st, 1dc in each of next two dc, 2dc in next dc, ch2, *sk ch, 2dc in next dc, 1dc in each of next two dc, 2dc in next dc, ch2*, repeat* 7 times, slst in 3rd ch at the beginning round.
R4 : ch3, 1dc in the same st, 1dc in each of next four dc, 2dc in next dc, ch2, *sk ch, 2dc in next dc, 1dc in each of next four dc, 2dc in next dc, ch2*, repeat* 7 times, slst in 3rd ch at the beginning round.
R5 : ch3, 1dc in the same st, 1dc in each of next six dc, 2dc in next dc, ch2, *sk ch, 2dc in next dc, 1dc in each of next six dc, 2dc in next dc, ch2*, repeat* 7 times, slst in 3rd ch at the beginning round.
R6 : ch3, 1dc in the same st, 1dc in each of next eight dc, 2dc in next dc, ch2, *sk ch, 2dc in next dc, 1dc in each of next eight dc, 2dc in next dc, ch2*, repeat* 7 times, slst in 3rd ch at the beginning round.
R7 : slst on next st, ch3, 1dc in each of next nine dc, ch3, 1dc in ch sp, ch3, *sk dc, 1dc in each of next ten dc, ch3, 1dc in the ch sp, ch3*, repeat* 7 times, slst in 3rd ch at the beginning round.
R8 : ch3, 1dc in each of next eight dc, ch3, 2sc in ch sp, 1sc in next dc, 2sc in ch sp, *ch3, sk dc, 1dc in each of next eight dc, ch3, 2sc in ch sp, 1sc in next dc, 2sc in ch sp*, repeat* 7 times.
R9 : *ch5, sk dc, 1dc in each of next six dc, ch5, 1sc in ch3 sp, ch5, 1sc in ch3 sp*, repeat* 8 times, slst in each of next three ch.
R10 : *ch3, sk dc, 1dc in each of next four dc, ch3, slst in 3rd ch of ch5, “1dc in next ch5 sp, ch1″, repeat” 8 times, 1dc in same space, slst in 3rd ch of ch5*, repeat* 8 times, slst in each of next three ch.
R11 : *ch3, sk dc, 1dc in next two dc, ch3, slst in 1st ch of ch3, 1dc in next seventeen dc/ch sts, slst in 3rd ch of ch3*, repeat* 8 times.
R12 : ch1, sc in each st around, slst in ch at the beginning round.
R13 : slst back loop only in each st around. fasten off. Weave and hide yarn end.
GOOD TO KNOW
You can replace the magic ring with ch5, slst on the first ch to form a ring.
you may use up to 12 mm hook for looser tension, may require more ropes to crochet.
How to join cord for continuous length
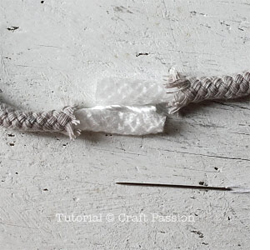
Push the braided cotton jacket backward to expose the fibre core at both ends to be joined. Overlap both ends about 2cm. Stitch and wrap the thread around, pull it tight and repeat the stitch and wrap until the joint is secured. Straighten one braided cotton jacket by pushing it forward, stitch and wrap the thread tightly to the core.
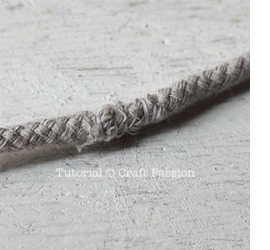
Push the remaining cotton jacket forward and repeat the same sewing. It might be difficult to push the jacket forward, but it you wrap the thread tight enough, it will make the join less bulky and thus easier for you to push the jacket over.
Crochet as usual. The joint may be harder and bulkier, so try to avoid using it on curves and loops. Once finished, flatten the rug by lightly dampening and pressing down dry towels to absorb moisture. Walk on it and press it down, leave it there until it is dry. Don’t try to soak the rug in water. Spray a coat of scotchgard after the rug is dry to protect it from dirts and stains if possible.