
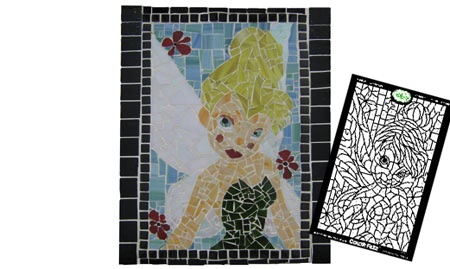
Create your own mosaic artwork
Cornelia Wiegmann - DIY Diva for Cape Town - offers Arts and Crafts classes for adults and children. In this project she shares some of her wonderful talent for a Tinkerbell mosaic.
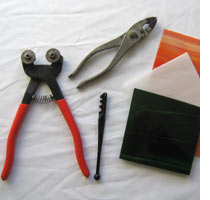
YOU WILL NEED:
Drawing or pattern
9mm SupaWood
Carbon paper
Mosaic or stained glass
Glass cutter (for stained glass)
Mosaic cutter or tile nippers
Pattex No More Nails
Grout
Sponge
Plastic paint scraper
Masking tape
Pencil and fineline black marker
Rubber gloves
HERE'S HOW:
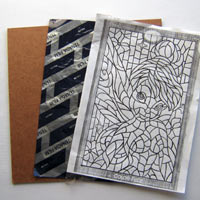
1. Use carbon paper to transfer your design or pattern onto a piece of supawood cut to the size required for your project. Tape the carbon paper to the supawood to prevent it from moving around. Tape the pattern on top of the carbon paper and draw your design. You can get wonderful mosaic patterns form the Internet and kiddies colouring books.
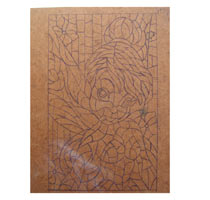
6. Use a fineline marker pen to go over the lines of the pattern. You don’t have to draw the whole pattern, only the important lines that form the main picture. Make sure that you allow for a border around the picture, or leave enough space for your finished mosaic to be framed.
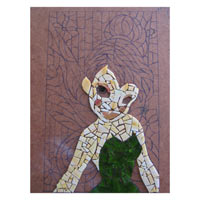
7. Start to mosaic. You don’t have to follow the pattern exactly - just to follow the main lines that form the picture. Apply a small spot of Pattex No More Nails to the back of each piece and press onto the board. Work with a selection of colours in different shades to create more detail. Leave to dry overnight.
DIY Tip:
Use the tile nippers to shape pieces that form the outline. Hold the tile firmly, with a pair of pliers if necessary, and gently grip the tile or glass to slowly break away and shape the piece.
Finishing
Mix the grout to a creamy consistency and apply to the surface with a plastic paint scraper. Make sure that you fill all the gaps with grout. Leave to dry. Clean the surface with a damp sponge to wipe off excess grout. Wipe the surface with a soft cloth to remove any remaining dust.