
More ideas for recycling in the home
I always enjoy my cup of joe in the morning, but when it comes to recycling the coffee cans, I had to figure out something new to do with them. They have such a great look and are built so well, I was determined to find them another purpose.
YOU WILL NEED:
3 large coffee cans
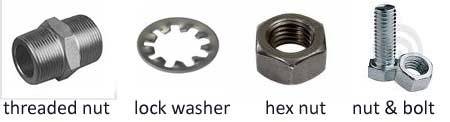
6 of 6mm x 12mm-long bolts
6 of 6mm nuts
12 washers for above
3 of 3mm x 12mm-long threaded nipples
3 light bulb sockets
3 of 3mm lock washers
3 of 3mm x 14mm hex nuts
3 silver gauge cord sets
Permanent marker - black
Ruler or tape measure
Drill/Driver plus 6mm HSS drill bit and assorted screw bits
Pliers
HERE'S HOW:
-
Turn the cans bottom side up, numbering each can with a marker and also marking the centre.
-
Huddle the cans together in a triangular configuration, keeping in the numbered sequence with the seams facing the centre. From centre to centre, make a mark on the outside edge of the cans where they touch each other.
-
Separate the cans. Using the marks on the edges, draw vertical lines down the length of each can. Drill two 6mm holes with an HSS drill bit on each line (four holes total). Make sure the holes are on the flat ribs of the can and the measurements are the same so the holes will line up.
-
With the cans bottom side up, use the 6mm HSS drill bit to drill through the centre of each can (that you marked in step 1).
-
Use six bolts, nuts, and washers to attach the cans to each other, using a drill/driver and pliers.
-
Thread the nipples into the bottom of the socket shells. Put the shell into the can, sticking the leftover nipple out of the centre hole. Use the lock washer and nut on the outside bottom of the can. Tighten all parts together.
-
Feed the silver cord set through the centre of the nipple from the outside bottom of the can to the inside. Pull plenty of wire through so you can easily knot the end of the wire and attach the socket.
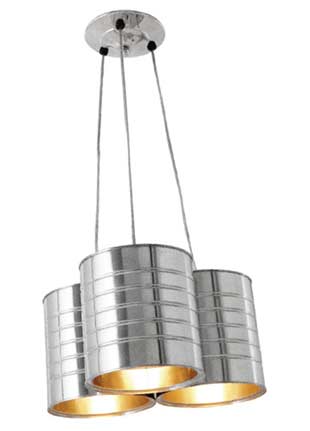
- Pull the excess wire back out and snap the socket together using the other part of the shell. With the sockets completed, test the electrical components and make sure that each lights up. There will be three separate cords, which can all be wired together or fed into a junction box if the fixture is to be installed in the ceiling.
lightsbyjames.com
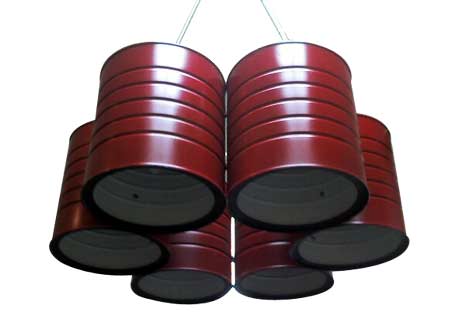
I left the cans 'natural' because I like the metal finish, but they could be painted any colour using Rust-Oleum Painters Touch to add a little excitement. If you choose to do this, I suggest marking and drilling all the holes before spraying the cans with a rust-preventing primer. Next, paint cans however you want and, when dry, assemble as instructed above.