Paper craft butterflies
I love the emergence of crafts with butterflies, particularly those that are easy to duplicate without much fuss and at little cost. Paper butterflies are so easy to make and you can print them out on your PC printer or use wrapping paper to create beautiful colours and designs.
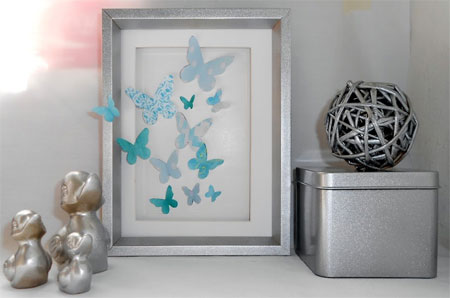
I am busy putting together a booklet of Rust-Oleum projects and my butterfly picture is one that I made and then sprayed the frame.
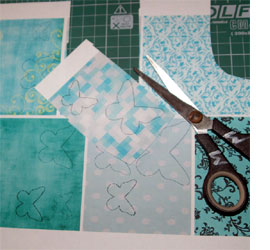
Because I wanted my butterflies in a turquoise colour, and didn't have time to shop around for wrapping papers, I searched the Internet for turquoise backgrounds and then printed these out on my printer. If you plan to do it this way, use a fairly glossy paper for best effect. I drew butterfly shapes in different sizes and cut these out with sharp scissors.
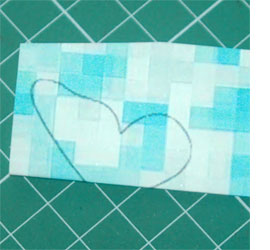
I found it much easier to fold each butterfly in half and then cut out both wings in one go. It saves time and you get perfectly shaped butterflies.
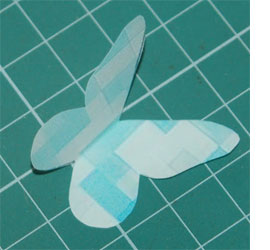
You need to cut out a lot of butterflies in different sizes for best effect. You can use a single colour or a combination of colours. If the paper you use is too thin, your butterflies won't fold up nicely and will probably lie flat when you mount them. Use a medium thickness gloss paper similar to what they use in glossy magazines. You can see below the different patterns that I used to create the butterfly art. Although each is in the same colour, all have different designs and vary in size from tiny to large.
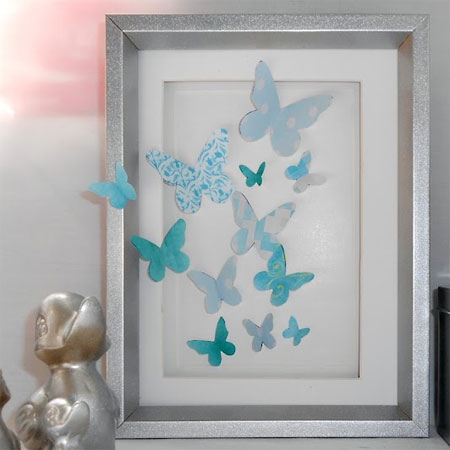
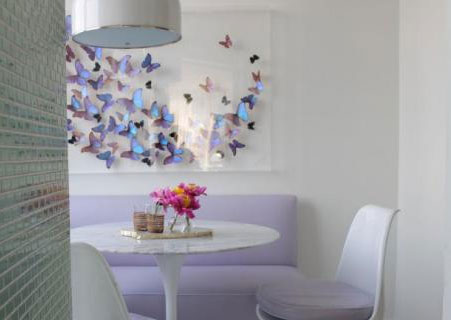
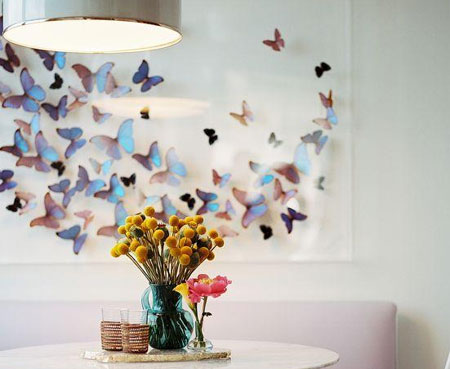
Having removed the glass from the frame, I used a small (very small) blob of superglue to attach the butterflies onto the backing, mat and frame. A toothpick comes in handy for positioning and holding until the glue dries. My next project is to make a larger butterfly artwork using a sheet of glass, as shown below. I came across this work on an interior design website and decided this was it... the butterfly art I want on my wall. I just have to think about how to get the translucent look for the butterflies.