
How Cement Can Help Spruce Up Your Home
With a little bit of elbow grease, creative flair, and a few dollops of Builders Cement, you can turn your home into a crafter’s paradise.
20/09/2022

etsy.com/ie/listing/453167726/gold-gilded-blue-concrete-hands-catchall
Spring is here, so it’s time to clear out all the winter cobwebs and update some of your home with cool crafting and renovation ideas. Making new decorations for your home can be therapeutic and fun, especially when you use cement. With a little bit of elbow grease, creative flair, and a few dollops of Builders Cement, you can turn your home into a crafter’s paradise.
Below are some fun and easy things you can make with a bit of cement and some imagination - and don't forget to put on old clothes that you don't mind getting dirty or wear an apron.
:
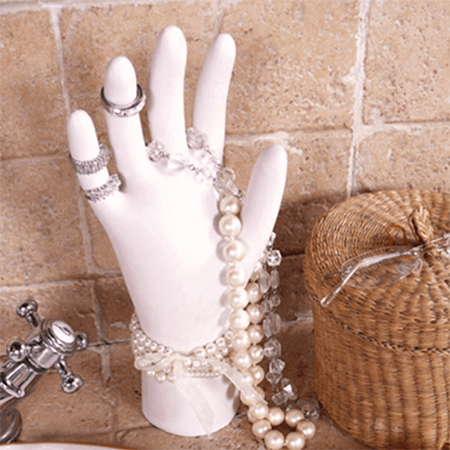
A DIY Cement Handy Jewellery Organiser
Have you ever noticed that your rings and small jewellery always seem to escape their boxes and end up in obscure parts of the house? A hand stand is a quirky and creative way to combat that. Shaped like a hand, this fantastic ornament can be used to keep all your accessories in one place.
YOU WILL NEED:
A single, durable and flexible rubber glove
Grey or white cement (available at Builders)
Container for mixing the cement
Clean water
Scissors
Paint to decorate the finished hand
Rubber gloves
Dust mask
HERES HOW:
- Hang the glove upside down by stretching the bottom of the glove over the mouth of the jar.
- Mix water and cement in a suitable container until the mixture is smooth. Once you have the desired smoothness, pour it into the glove and leave it to set for around 24 hours.
- Once it has set, use scissors to help remove the glove to reveal a solid concrete hand. Once it’s out of the glove, grab some paint and go crazy.
etsy.com/listing/636910658/white-cylinder-door-stopper-heavy
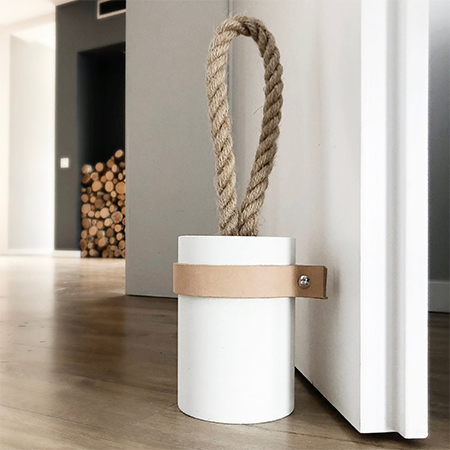
Kooky Cement Doorstops
With warm weather on the way, many more doors will be left open. If you want a funky way to keep your doors from banging, try this quick and easy project. Start by cutting a 2L bottle in half, filling it with cement and allowing it to dry. Once it has, get yourself some Fired Earth paint and decorate it to your heart’s content. For some extra inspiration courtesy of Builders, click here.
inmyownstyle.com/diy-tabletop-fire-bowl-made-in-minutes.html
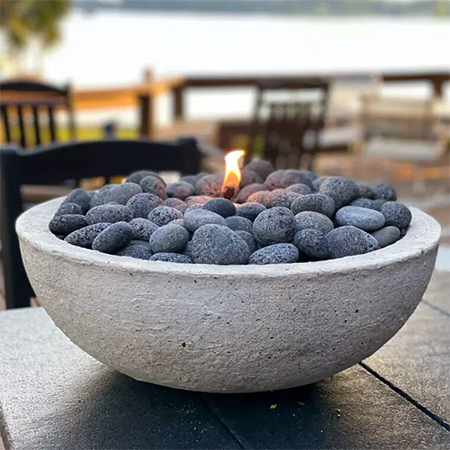
Fire In The Bowl
Summer is rolling around, meaning that fireside chats under the stars are back on the cards. To give yours a splash of DIY elegance, why not try making your concrete fire pit?
YOU WILL NEED:
2 plastic bowls for the size of your fire bowl and one slightly larger than the other. The bowls must fit into each other
Plastic bowl for mixing the cement
Non-stick cooking spray or Vaseline
Building brick or heavy weight
Sturdy knife, rasp, or sandpaper
Pebbles or other embellishment to decorate the fire bowl
Chicken wire or wire mesh
Tikki fuel
Rubber gloves and dust mask
HERE'S HOW:
- Start by coating each of the bowls with the oil or non-stick spray.
- Mix a batch of cement and clean water and then pour that into the larger bowl. Make sure that the mix is as smooth as possible.
- Next, put the small bowl into the large bowl and place your heavy item (preferably a weight) in the centre of the smaller bowl to weigh it down.
- Let it sit overnight before carefully removing the inner bowl.
- Once that is done, use a knife, rasp, or sandpaper to smooth out the edges of your new concrete bowl.
- Cut the square wire mesh and shape it to fit inside the concrete bowl. Carefully place a can of tiki fuel at the centre and cover it with the mesh wire. Cover the wire with decorative rocks, light the tiki fuel and enjoy.
cleverly.me/concrete-vases/
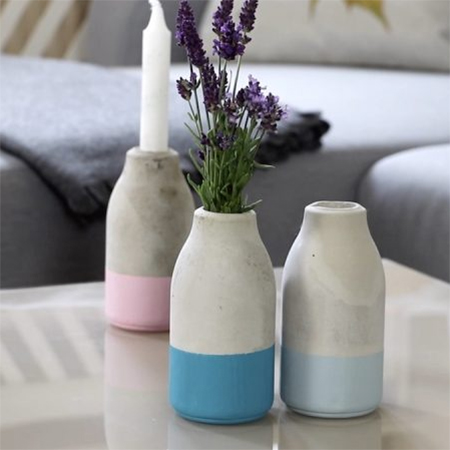
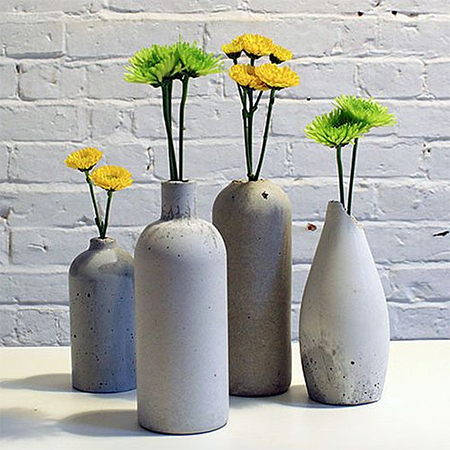
Cement and Glass Vase
Plants and flowers are an integral part of spring and creating something beautiful to put them in is a quick and exciting crafting task. If you want to make a glass and concrete vase, grab your supplies, and follow the steps below.
YOU WILL NEED:
A plastic bucket
Cardboard
Cement and clean water
Builders trowel
Assorted glass jars or recycled glass food jars
Sandpaper
Painter's or duct tape
Scissors
HERE'S HOW:
- To start, roll the cardboard into a tube and placing it inside a glass jar, using the adhesive tape to ensure it stays in place.
- Next, wrap the cardboard around the jar and use painter's tape or duct tape to hold it firmly in position. Ensure you do not cover the entire jar when you wrap it in cardboard.
- Mix the sand, cement, and water and pour that mixture into the mould. Let it dry for a day, then remove the cardboard and soften the concrete using sandpaper.
- Finally, pop some flowers into your new vase and voila, you have a vase for your coffee or dining table.
There are so many variations on all of the above projects, but they are all made with cement and a few other supplies. Use your imagination to recycle items you may already have in the home to make unique decor accessories.
decoist
For these are more crafting tips, visit builders.co.za