
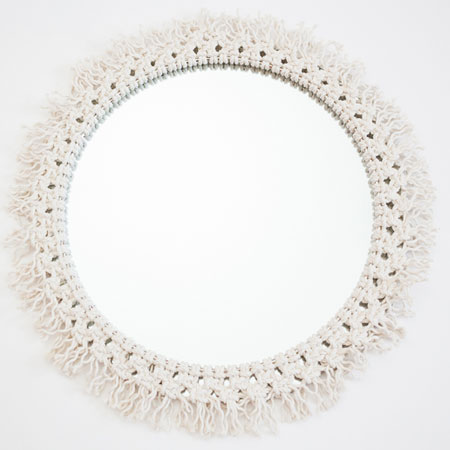
Easy Macramé Framed Mirror
Here's a gift you can make that will make a family member or friend very happy and this macramé-framed mirror shouldn't cost much and is easy to make.
26/11/2023
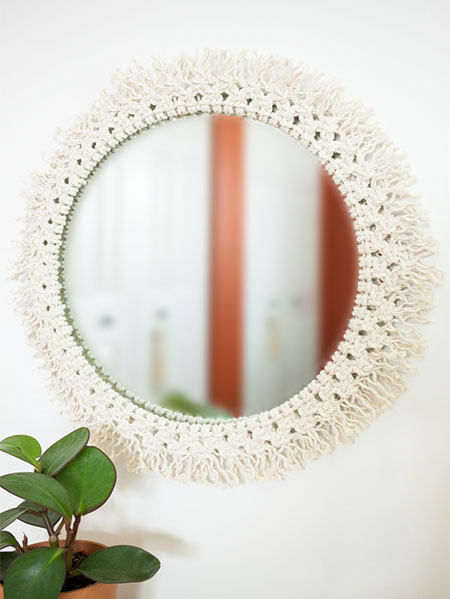
This year, instead of forking out much-needed money, look at ways to save money by making gifts for family and friends. This macramé-framed mirror won't cost you that much to make and you can purchase most of the supplies you need at any Builders store. The macramé knots used to make the mirror frame are not hard and you will very quickly get the hang of it once you get started.
The most expensive part of this project will be the hoop or ring but there are suppliers online where you can find the best possible price or you can look for an embroidery hoop. As an alternative, purchase medium-gauge wire and bend this into a circular shape to use for this project.
YOU WILL NEED:
Cord or string
Circular mirror
Metal hoop or ring or embroidery hoop
Hot glue gun
Scissors
Tape measure
HERE'S HOW:
Step 1
Cut cord strips to 400mm lengths, you will need plenty of these depending on the size of the mirror but calculate around 80 to 100 lengths. You want all the cords to be tightly wound around the ring and not leave any gaps.
Step 2
Use a Lark's Head Knot to secure all the pieces around the ring as shown below.
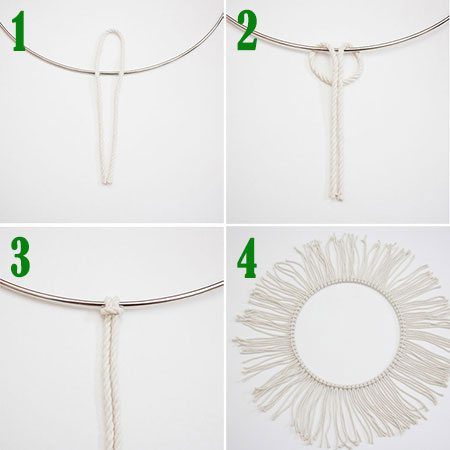
Step 3
Pull down on the cords so that the knot is as tight as possible.
Step 4
Continue adding cords in this way until the ring is completely full.
Step 5 & 6
In this step, we move onto a Square Knot for the next few rows. Take [2] outside pieces of cord from the Lark Knots and follow the images below to start the Square Knot. This is only half of the Square Knot.
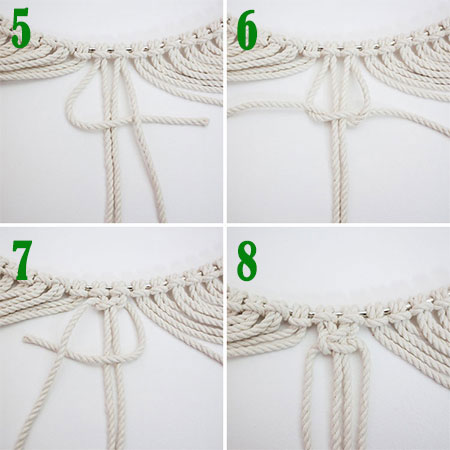
Step 7 & 8
For the other half of the Square Knot you will repeat the steps above but working in the opposite as can be seen in the images above. Pull the cords tight to secure and finish the knot. Continue with Square Knots around the entire frame.
Step 9
Below you can see the first row of completed Square Knots.
Step 10
The next row is also Square Knots and you pull [2] cords from the middle of the previous Square Knots and [2] cords from the bottom centre. The next row of Square Knots is placed between two Square Knots in the previous row.
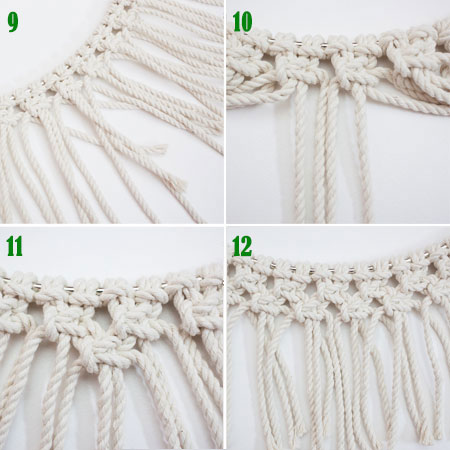
Step 11 & 12
Repeat the method for the Square Knot as done in the first row of Square Knots to complete the second row. Pull the knots as tight as possible to lock them in place before moving on to the next step.
Step 13
In this step, you will trim the ends of the cords so that they are all the same length.
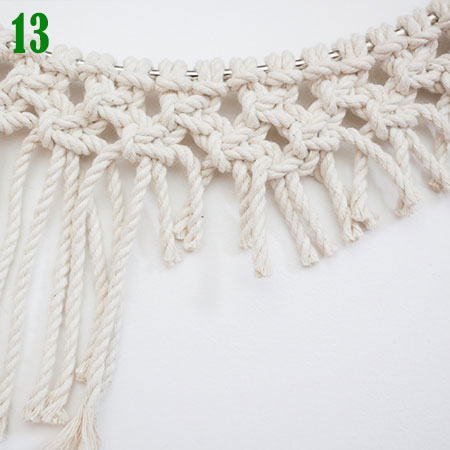
Step 14
Unravel all the trimmed cords as shown in the image below. This step is optional but does give the macramé frame a more finished look

Finishing
Attach the ring to the mirror using a hot glue gun. It works better if you attach both the ring and the first row of knots.