DIY Wood Frame Wall-Mounted Plant Hangers
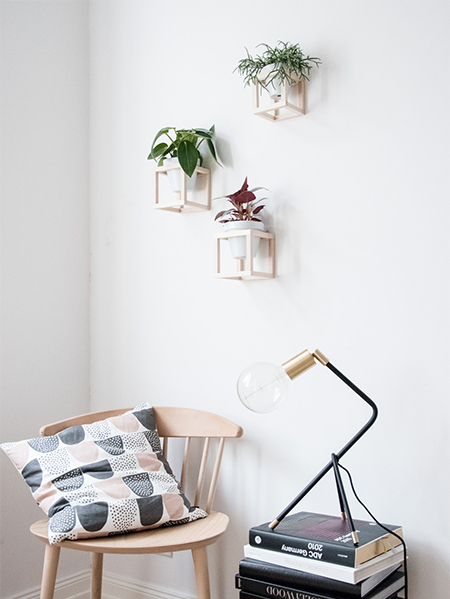
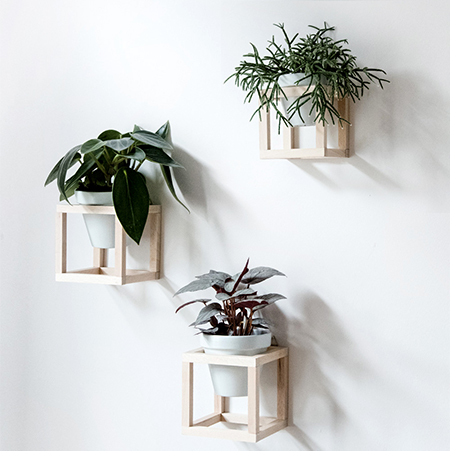
When you have a blank wall, adding a wall-mounted display brings the wall to life and these wood frame plant hangers will add interest and bring a touch of nature indoors.
16/10/2022
craftifair.de
Succulents are very trendy at the moment, and I do see them continuing with their popularity because they are so easy to care for. All these little treasures need is a sunny spot and the occasional drop of water and you can watch them flourish and reproduce even more plants that you can establish indoors or outdoors. See our article 'Tips for Growing Succulents Indoors' for more information or click here for the article 'How to Grow and Care for Succulents'.
craftifair.de
The wood frame plant hangers are mounted onto a wall to create a wonderful display and they are so easy and affordable to make. And plants deserve to be admired in a spots that sets them up as a feature and allows them to grow or hang gracefully down the wall.
craftifair.de
GOOD TO KNOW:
These wall-mounted frames are designed for hanging plants that require very little watering. If you want to hang plants that need regular watering, you will need to allow for saucers to catch any water drips from the bottom of the flower pots.
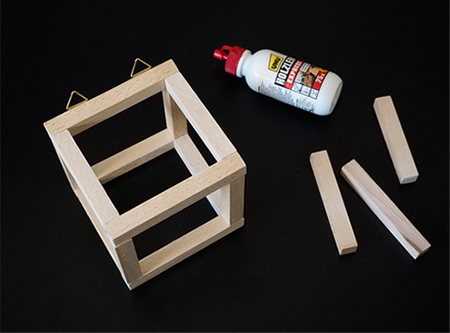
YOU WILL NEED:
22 x 22mm PAR pine
Ponal wood glue
Mitre box and backsaw or other saw
120-grit sandpaper
2 hangers per frame
Small panel pins and hammer
OPTIONAL: Drill plus 2mm drill bit
Tape measure and pencil
HERE'S HOW:
Step 1
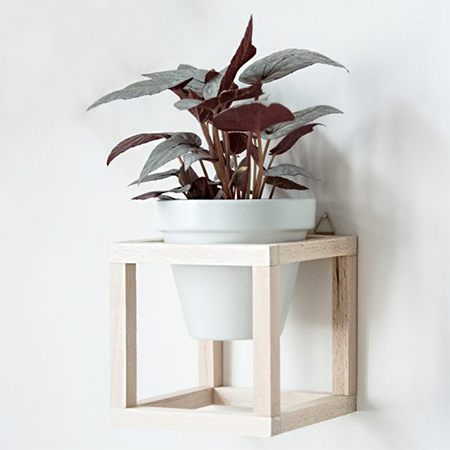
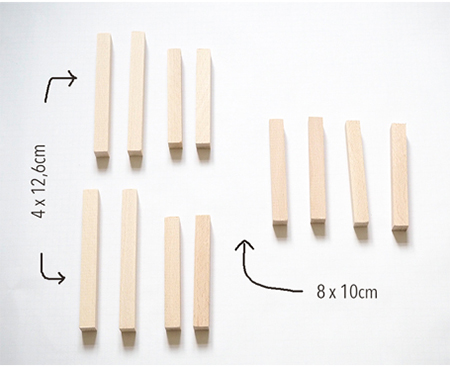
Before you buy the 22 x 22mm PAR pine, determine the size of the wooden planters based on the flower pots you have. If you don't yet have plant pots, pop into your nearest Builders store and head for the gardening section. They have a huge selection of plants pots, and you can choose coloured, black, white or terracotta in almost any size. Once you have the size of the pots, you can determine the size of the planters you need to make.
Step 2
Cut all the required pieces to length and then sand smooth with 120-grit sandpaper to remove any splinters, particularly at the cut ends.
Step 3
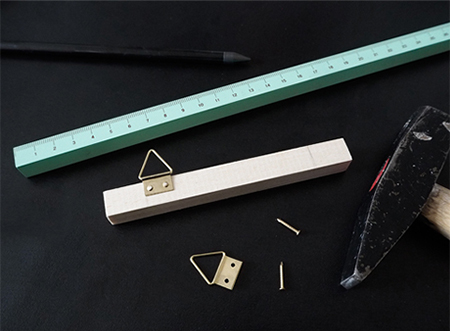
Secure the picture hangers equally spaced on the back of one of the longer sections. It is easier to do this beforehand that after the frames are assembled. If you have a drill and 2mm drill bit, you can pencil mark where the holes need to be and drill a slight hole to make it easier to drive in the panel pins.
Step 4
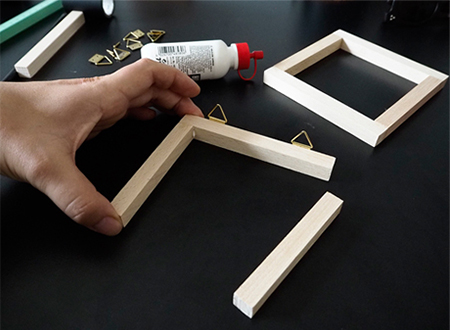
Now it is time to glue the frames together. The trick to the following steps using wood glue is to allow drying time between gluing together each section before assembling the whole. If you try to work while the wood glue is still wet, you run the risk of everything falling apart. It is also difficult to use clamps for this project due to the small size of the wood.
Step 5
Separate the gluing into sections that you can leave overnight and come back in the morning to finish the assembly.
Step 6
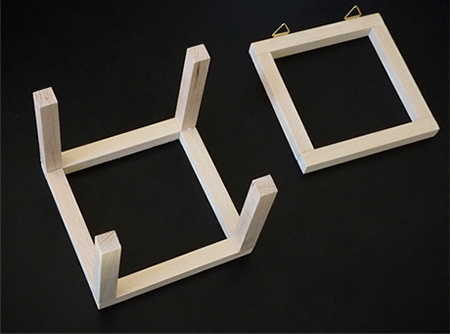
Look at the images above to see how these frames were assembled and how best to proceed. First, the bottom frames were glued together and the top glued separately before joining these two sections together. The remaining pieces are positioned so that the rim of the plant pot will sit on top, and the frames will hold the container firmly in place.