Make a wire cupcake stand
A couple of years back I bought a wire cupcake stand as a gift for a friend. It cost around R200 but appears to be no longer available locally. Wanting a cupcake stand for my own use, I decided to try my hand at making one. So here's how to make your own wire cupcake stand... cheap!
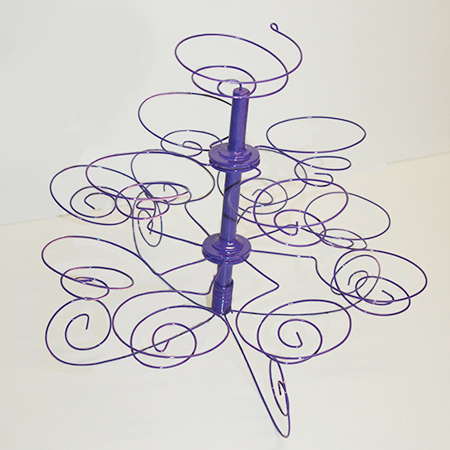
Making the wire cupcake holder was actually easier than I thought. After the first couple of failed attempts to twist the wire shapes, it was a breeze to get them all the same shape and size.
You can make your own wire cupcake stand at a cost of around R100 and buy everything you need for this project at your local Builders Warehouse.
YOU WILL NEED:
Galvanised fence wire, 1 roll
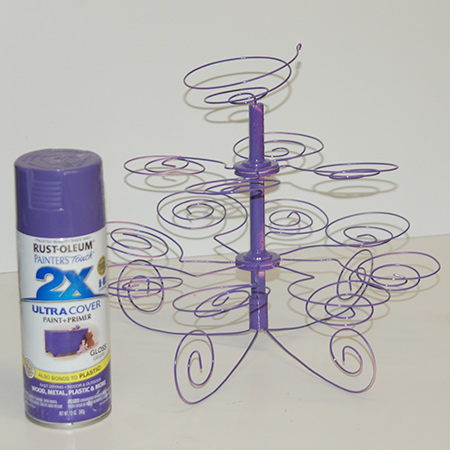
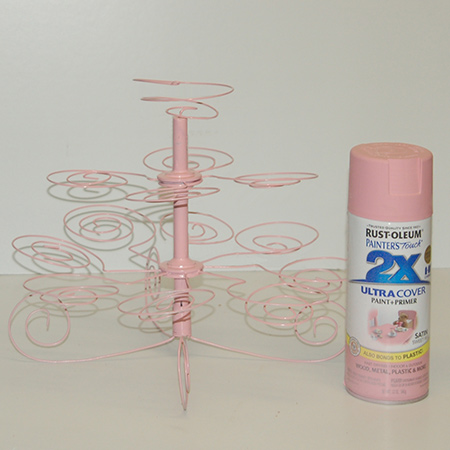
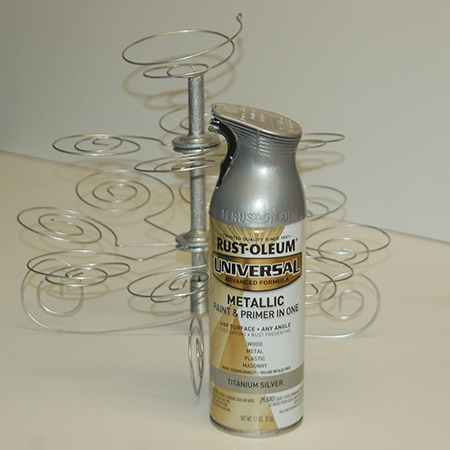
Rust-Oleum 2X or Universal Metallic spray paint in your choice of colour
Pine dowel, 12mm diameter
Long-nose pliers and/or cutting pliers
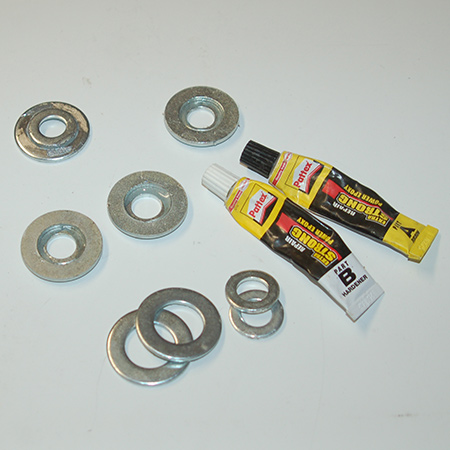
Epoxy glue
Pack of large washers
Pack of 12mm washers
Masking tape
TOOLS:
Drill / Driver plus 2mm HSS bit
Dremel MultiTool and Cutting Disk
HERE'S HOW:
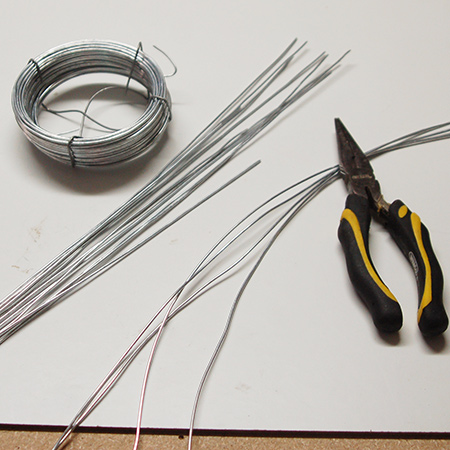
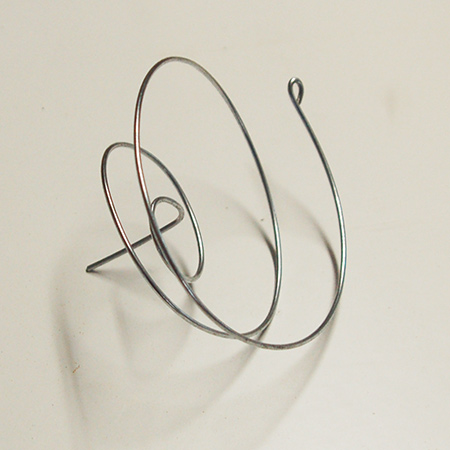
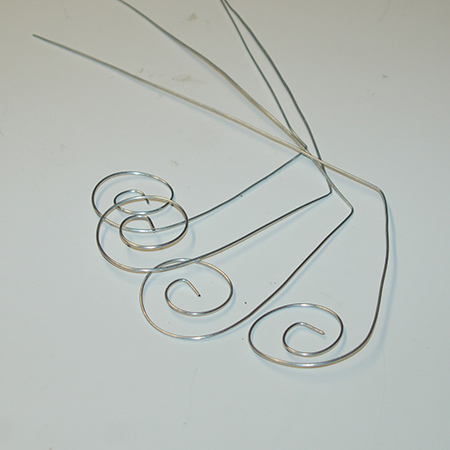
1. My wire cupcake stand has 13 holders, so you need to cut 13 lengths of wire 500mm long. Once cut, straighten each piece of wire as much as possible.
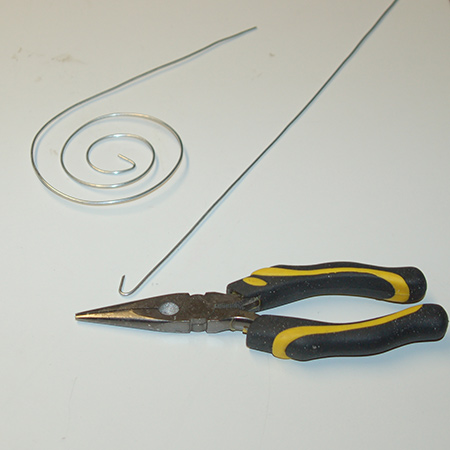
2. Fold over the ends of the wire. You will hold this end in the pliers to allow you to twist the wire and use your other hand to gently bend the wire as you twist. Sounds difficult, but after a couple of practice runs you should easily get the hang of it.
GOOD TO KNOW: As you twist to form the curled shapes, keep the wire at even height and make one perfect piece that you can use as a template for the remainder.
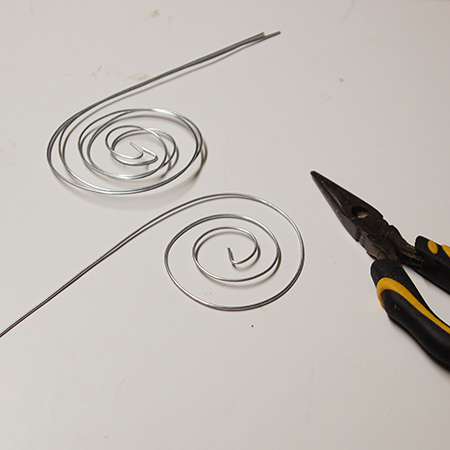
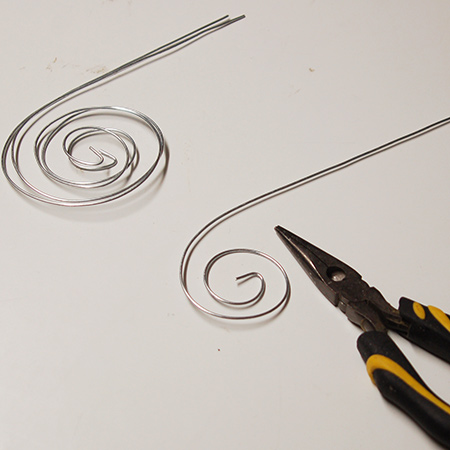
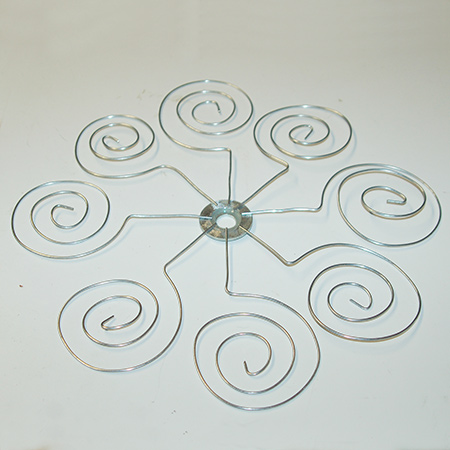
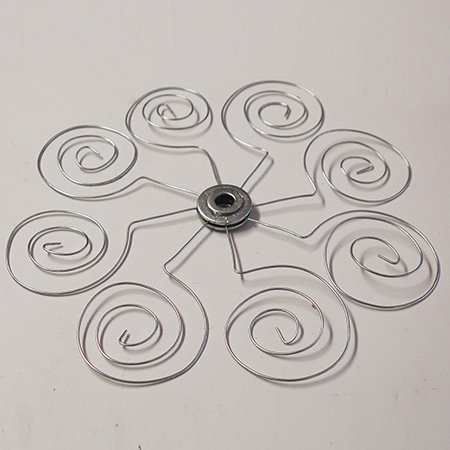
3. You need 4 short lengths for the upper tier (finished length 100mm) and 8 long lengths for the bottom tier (finished length 140mm), plus an extra piece for the top. Trim all pieces so that they are all exactly the same length.
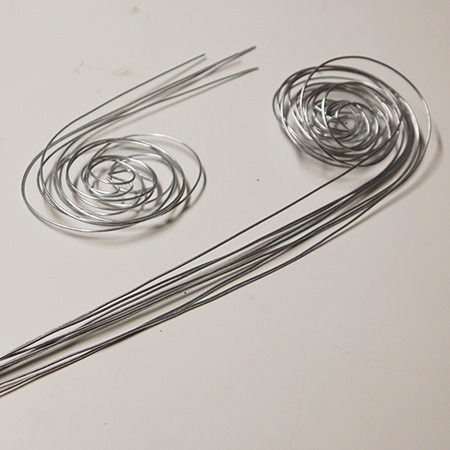
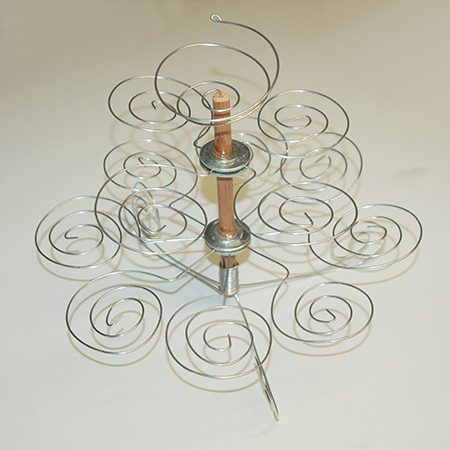
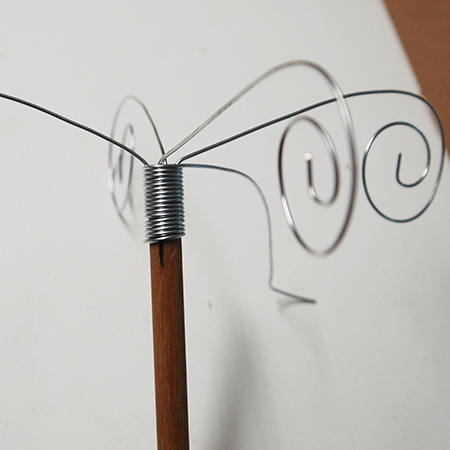
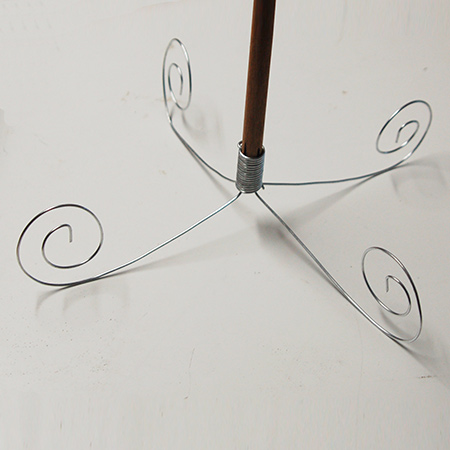
4. You also need to cut 4 lengths of wire for the feet (finished length about 140mm).
5. For mounting the feet supports cut slots in one end of the dowel. The easiest and quickest way to do this is with a Dremel MultiTool and cutting disk. If you don't own a Dremel, you can always secure the wire for the feet on the outside of the dowel.

6. Where the slots for the wire end drill a 2mm hole. This allows you to insert the end of a piece of wire (about 800mm long) to wrap around and over where the wire will be placed for the feet.
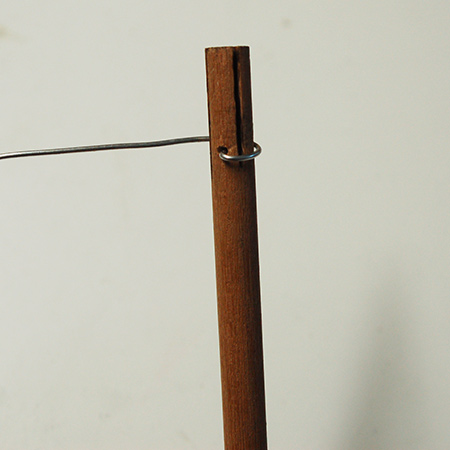
7. Place the wire for the feet in the cut slots and wrap the length of wire around to secure everything tightly in place. Cut the wire off at the end.
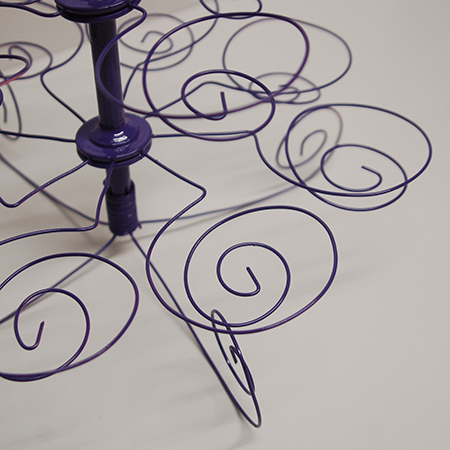
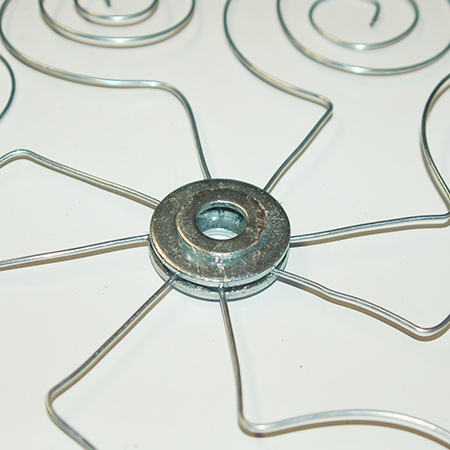
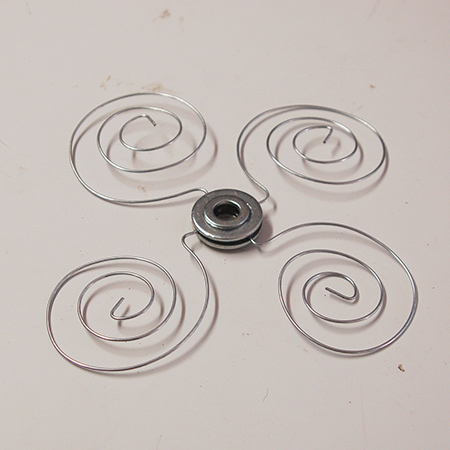
8. I looked at different options for mounting the tiers onto the dowel, but the best by far was to use steel washers (small and large) and epoxy glue. Place the larger washers on top of the 12mm steel washers and glue together.
9. Once the epoxy glue has cured, arrange the sections for the bottom tier. Check that each section is evenly spaced before using epoxy glue to secure to the washer. Note: Attach the wire to the back side of the larger washer.
10 Before the glue starts to harden, place another already glued double-washer on top of this. I then placed a brick over this - or anything heavy - to hold everything firmly together until the epoxy hardened.
11. Repeat this process for the upper tier with its 4 sections.
12. To secure the tiers onto the dowel rod, wrap a thick layer of masking tape around the dowel to mark the height of each tier. Check that the washers sit level and use epoxy glue to secure in place. Apply around the top, let this harden before removing the masking tape to turn the stand upside down and apply epoxy glue underneath.
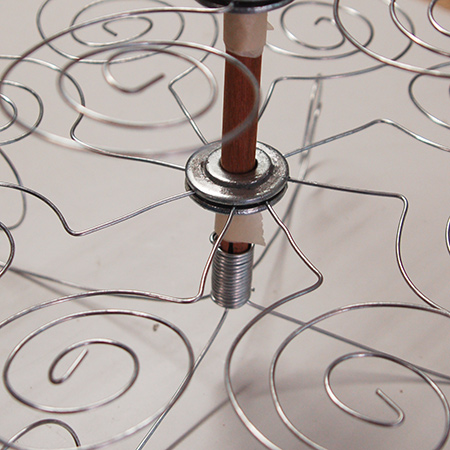
13. Finish off the assembly of your wire cupcake stand by adding the top swirl. Drill a hole in the top, place the swirl inside and secure with a little epoxy glue.