How to re-upholster old furniture
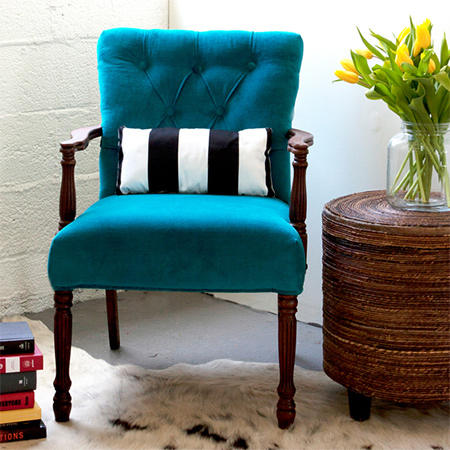
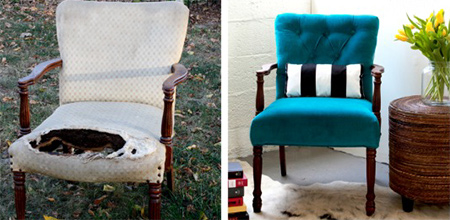
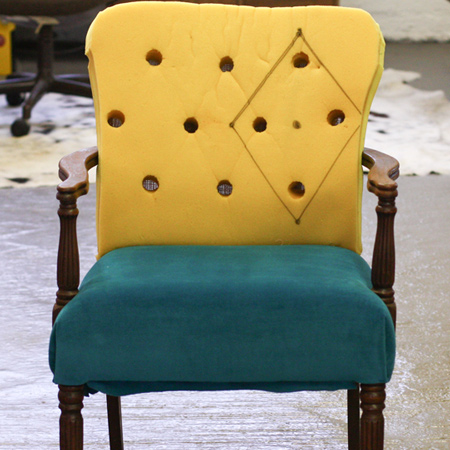
This old chair might not look like much before, but after some re-upholstery and TLC it becomes a stunning piece. You can pick up a similar chair for around R50 and spend about R100 on materials and supplies, for a beautiful chair that only costs R150 in total.
modhomeec.com
This is a great project for those starting out with upholstery projects and it will give you the confidence necessary to consider taking on larger projects.
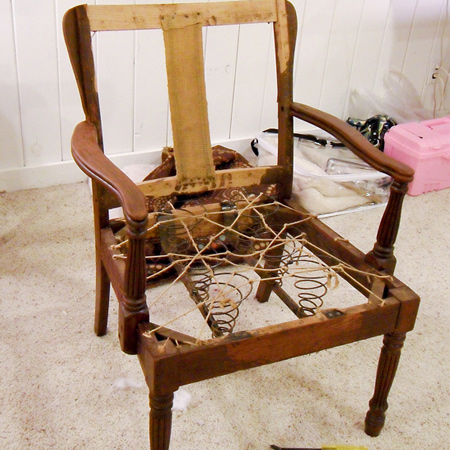
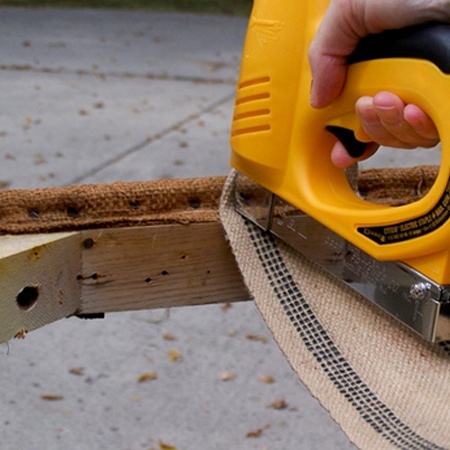
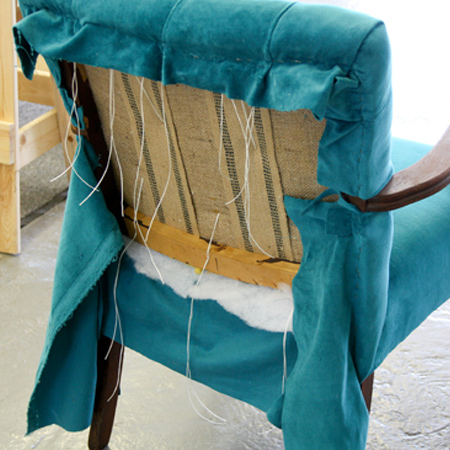
1. Strip the chair back to the basic framework by removing all the layers of fabric, foam or straw, and all old hessian. Now is best time to sand and do any repairs to the chair - before you start to re-upholster.
GOOD TO KNOW:
While the chair is bare you can
make a template of the shape of the seat and
back. Brown paper is best for this and it's
easier to do this before fitting anything to the
chair frame.
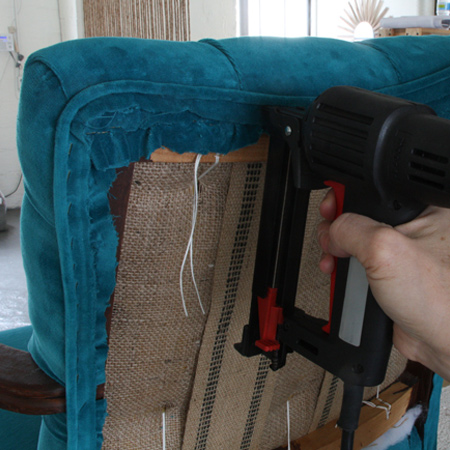
2. Now you can start adding the foundation for the new upholstery, starting with wrapping seat frame edges with hessian and adding upholstery webbing strips to the seat using a heavy-duty staple gun. You can buy webbing strips at most larger fabric stores.
GOOD TO KNOW:
If you are in the market for a
staple gun I can't recommend the
Bosch Tacker enough. I use it for all my
upholstery projects. The Tacker retails at just
under R600, which is only slightly more
expensive than a manual staple gun.
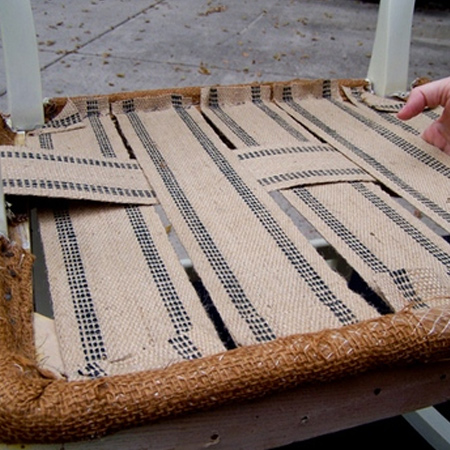
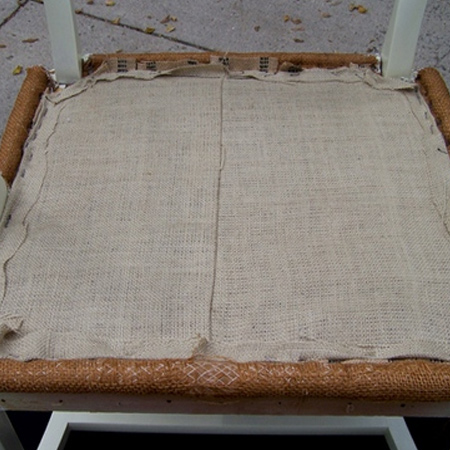
3. Lay a row of strips in one direction and then weave another row through these to create a firm seat. Cover up the webbing with a layer of hessian stapled around the inside of the seat frame. Make sure the piece of hessian is slightly larger than the opening to allow for folding over and stapling in place. Repeat this process for the back of the chair.
GOOD TO KNOW:
The webbing must be pulled as
tight as possible before stapling in place. If
the webbing is not tight the seat will sag.
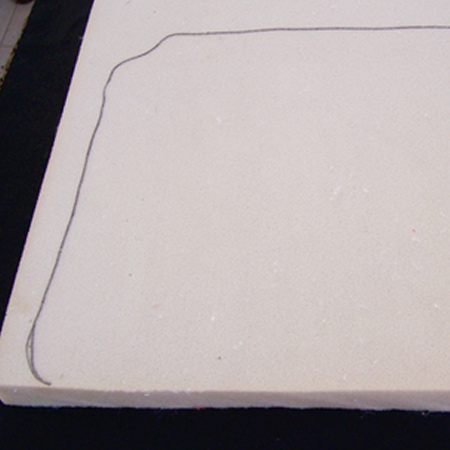
4. Use the template to cut a piece of medium-density foam to fit the seat. If your local upholstery store doesn't stock foam you can try www.foamfactory.co.za.
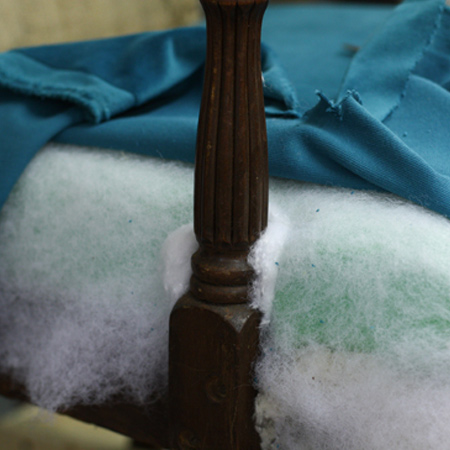
5. Cover the wrapped frame and webbed seat with a layer of thin batting. Over this you will place the cut piece of foam and another layer of thin batting.
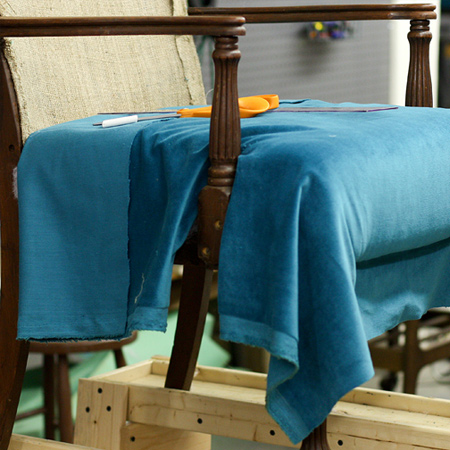
6. Cut a piece of upholstery fabric that is large enough to either be fastened to the side of the chair frame, or be stapled underneath the chair seat, depending on the style of chair that you are re-upholstering.
GOOD TO KNOW:
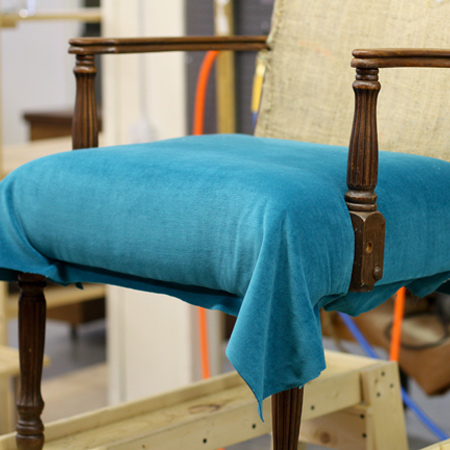
You will need to cut to allow
for fitting around arms. Don't make the cut too
long as the fabric will be tucked down tightly
behind the arm. Make the cut and pull the fabric
taut to see if it fits up against the arm. If it
bunches up, snip it just a little bit more until
it fits down by the base and smoothly around the
arm.
7. Use staples to anchor the fabric underneath the chair seat and once the fabric fits snugly you can remove these in order to fold over and secure the fabric properly to the underside of the frame.
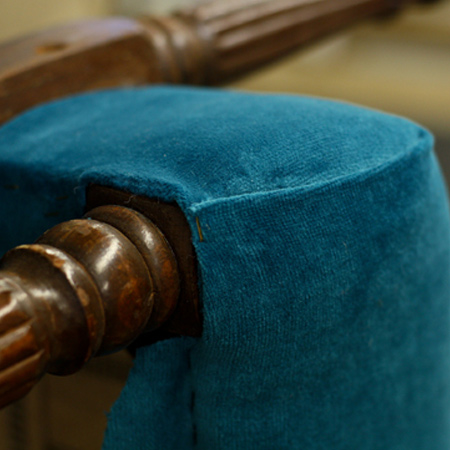
7. For the corners the fabric will need to be trimmed to remove excess that will cause the corners to be bulky. Fold the side section over and staple before carefully folding and stapling the front panel in place. Lastly, staple underneath to the frame. When the chair seat is finished the fabric covered welt cord will be glued around the bottom and around the front corner to cover any visible staples.
8. Once again, use the template to cut out a piece of foam for the back of the chair. The foam should be slightly larger than the inside back of the chair. Leave enough foam at the bottom to tuck through to the back. Try to keep the cut line as straight as you can.
GOOD TO KNOW:
If you plan on tufting the
chair you need to cut holes in the foam to
create a beautiful diamond-tufted pattern.
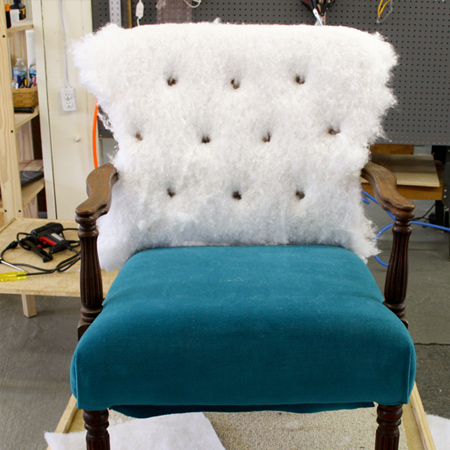
9. Place a large piece of medium batting over the top of the foam and poke through the holes.
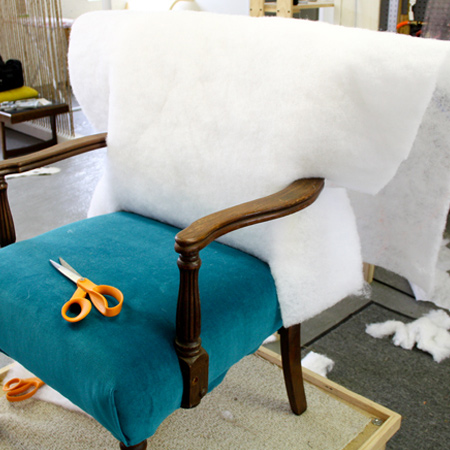
10. Wrap the back with a layer of thin batting - this time without any holes poked through.
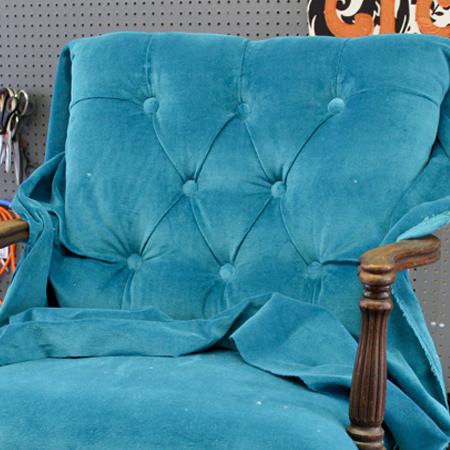
11. Cut a piece of fabric for the back of the chair that is at least 50cm wide all around. This will allow the fabric to bunch nicely when adding the diamond pattern. Start at the centre and work out - threading an upholstery needle through the back - into an upholstered button - and back through the fabric. Pull as tight as possible before tying off at the back. Move out from the centre to continue the pattern through all the holes.
12. Once you have completed all the holes it is time to move to the sides and top. The bottom piece of fabric is pushed through the base. With stapler in hand, neatly pleat the fabric from the diamond pattern and staple to the back of the seat - working from the centre of the frame out to the sides. Leave the corners until last so that you can trim, tuck and fold neatly before stapling down.
13. If you are attaching any welting around the edge - do so now. Use a stapler to secure the welting around the edge.

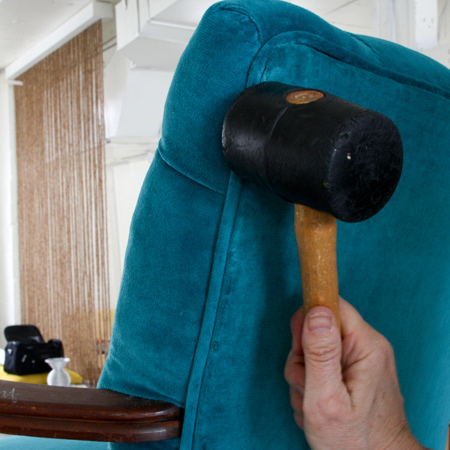
14. Use upholstery strips to attach the fabric at the back of the seat. If you struggle to find upholstery strips at your local fabric store you will find details here for upholstery tools and materials. Make sure to fold over and pull to fabric taut over the upholstery strips before tapping down with a rubber mallet.