Stencil a Fireplace Surround
Why replace dated tiles around a fireplace when you can use stencils and paint for a brand new look.
13/10/2019
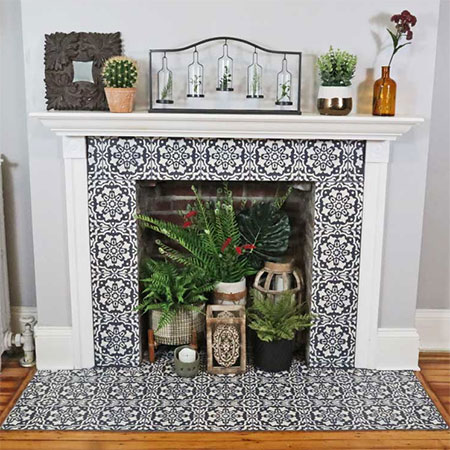
Stencils continue to be a very popular way of transforming so many features and pieces in a home. And you can use stencils as an alternative to expensive wallpaper. In this feature we show how you can transform tiles around a fireplace rather than replacing them.
There are plenty of ways that you can use stencils as part of a DIY home improvement, and you can use stencils on almost any surface if you use the right paint. In this stunning DIY makeover you will see how easy it is to transform old tiles to create a stunning feature fireplace.
Preparation
1. Scrub the tile surround with Sugar Soap or similar abrasive cleaner. You don't want any soot or grime to spoil the finish. Rinse with clean water and dry with a rag. Use 120-grit sandpaper to rub down over all the tiles. The sanding is an important step as it ensure a good surface for the paint. Use a damp rag to wipe away all traces of dust.
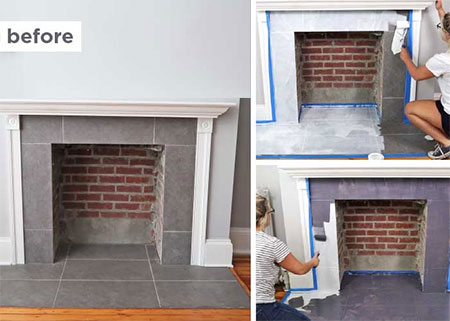
2. Use painter's tape to mask off the surrounding areas that are not going to be painted.
3. Paint the tired area with a universal or tile primer. Apply the primer with a foam roller and apply a total of 3 to 4 coats, allowing plenty of drying time between each coat, as per the recommended guidelines.
4. Allow the primer to dry overnight before applying your choice of base colour. Again, apply this with a foam roller. The best paint for the base coat is a matt or flat finish. Note: 2 to 3 coats are recommended for the base coat.
5. Apply Bostik or Alcolin Spray Adhesive to the back of the stencil to reduce the risk of paint bleeding underneath the stencil. Place the stencil in the centre of the header at the top of the tile surround. Stick down on the sides with painter's tape.
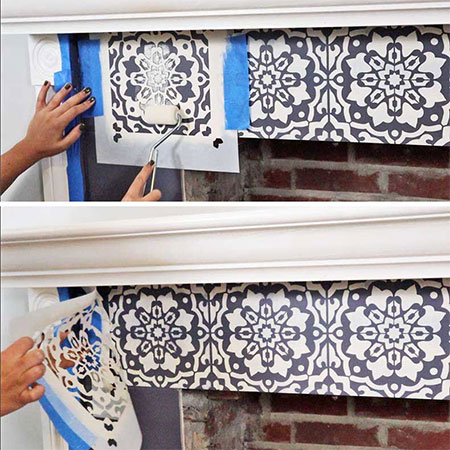
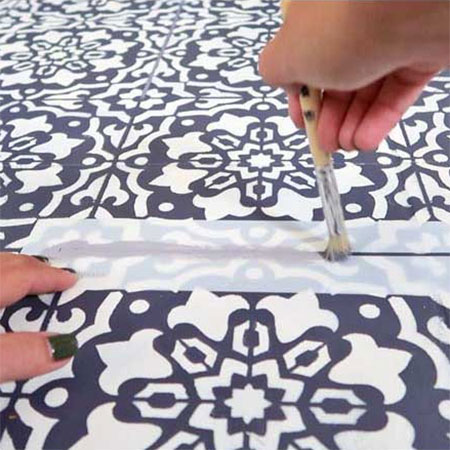
6. Load a foam roller with your top coat paint colour. Have a roll of paper towel on hand that you can use to roll away any excess paint before gently rolling paint over the stencil and onto the tile. If there are any areas that you cannot get to with the foam roller, use a stencil brush to paint these areas.
7. For the next tile, align the registration marks on the stencil and repeat the process until the top row is complete.
GOOD TO KNOW: If there are areas that are not a full tile size, align the stencil with the inside edge and continue as before. Watch the video below for tips on stencilling areas that are not full tile size.
8, Finish off with the grout line stencil that is supplied. See the video below for more information on this step.