
Easter Lace Eggs - with Ostrich Eggs!
Lace eggs are wonderful to craft if you own a Dremel Rotary MultiTool. I was given some Ostrich eggs and decided to use these to make a larger version of my lace eggs.
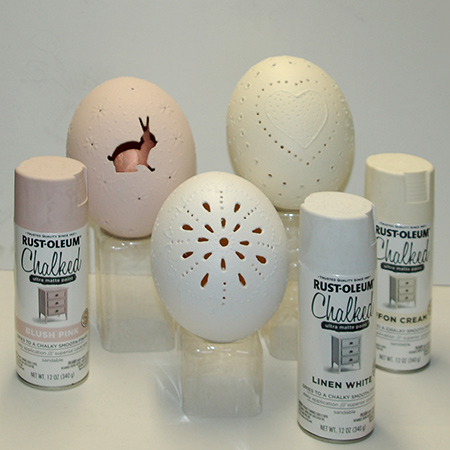
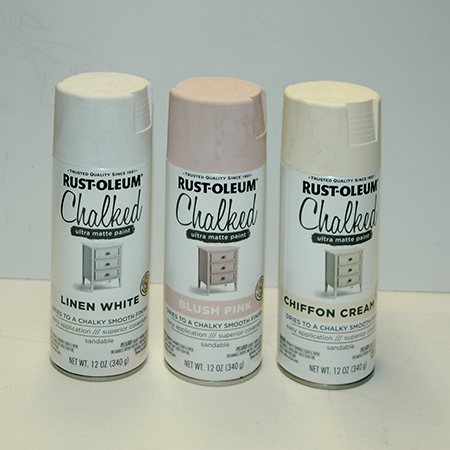
I had three Ostrich eggs to work with, and each was finished with a different Rust-Oleum Chalked spray paint: Blush Pink, Linen White and Chiffon Cream. You will find the full range of Rust-Oleum products at Builders, or contact spraymate.co.za to find your nearest retail outlet.
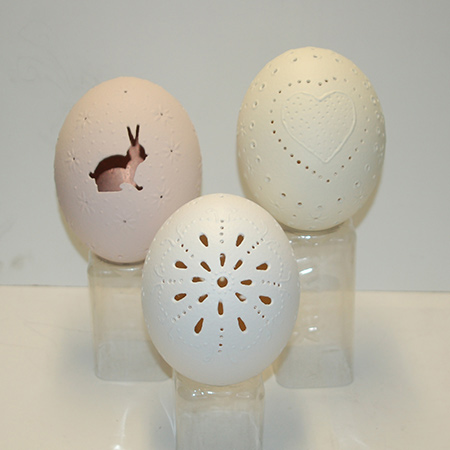
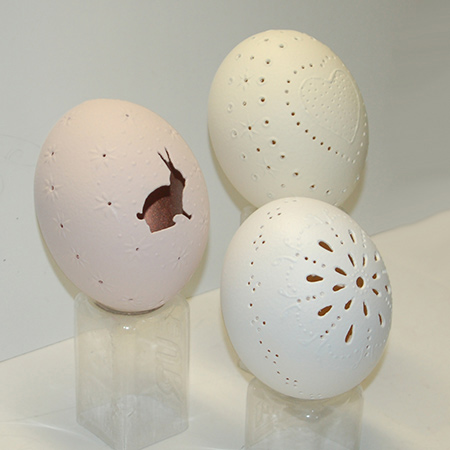
I also applied a different design to each egg: One is carved with a bunny (just for Easter), another has a detailed flower-style design, and the last was the easiest one, where I modified a glass & tile bit to cut the holes - see details for this below.
Working with Ostrich eggs is not as tricky as working with chicken eggs, but it is harder to cut out details in the shell. I wouldn't say that this project is a practice run for making lace eggs with chicken eggs, but it was a whole lot of fun!

Rust-Oleum Chalked is an ultra-matte spray paint that provides a chalk paint finish to a wide variety of surfaces. It's very easy to apply and there is also a Matte Sealer Coat that can be applied over the painted finish for protection.
YOU WILL NEED:
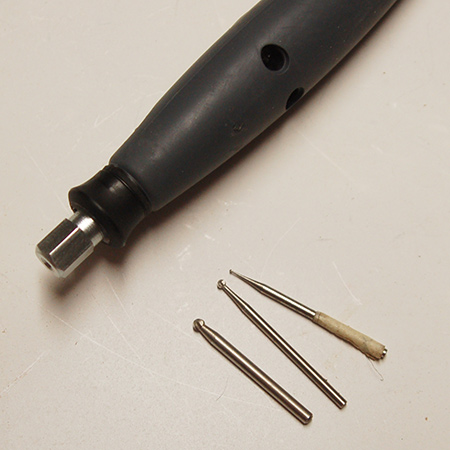
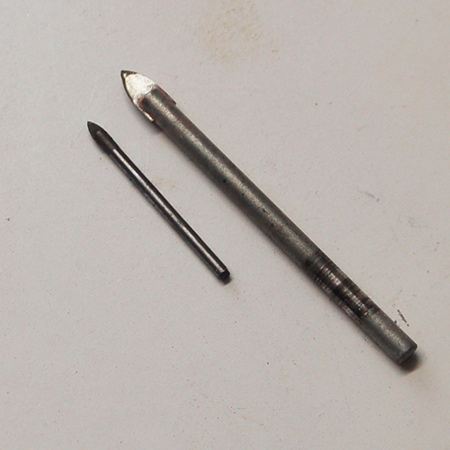
Dremel Rotary MultiTool*
Assorted bits (#192 cutter - #114 cutter - #194 cutter)
OPTIONAL: HSS bit, 3mm
OPTIONAL: Glass & tile bit
Ostrich eggs
Pencil
Optional: Glass Decor or Puffy paint
Rust-Oleum Chalked Ultra Matte spray paint
*The high the cutting speed the easier this project will be.
Find all the tools and supplies for this project, excluding the Ostrich eggs, at Builders Warehouse.
HERE'S HOW:
EASTER BUNNY LACE EGG
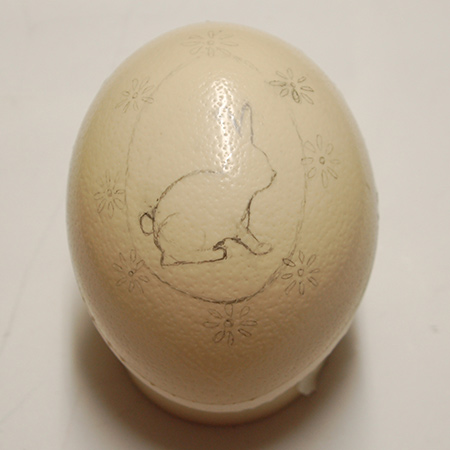
1. Start by transferring your design onto the Ostrich egg. The Internet offers thousands of images that you an print out and use to make our own lace Easter eggs.
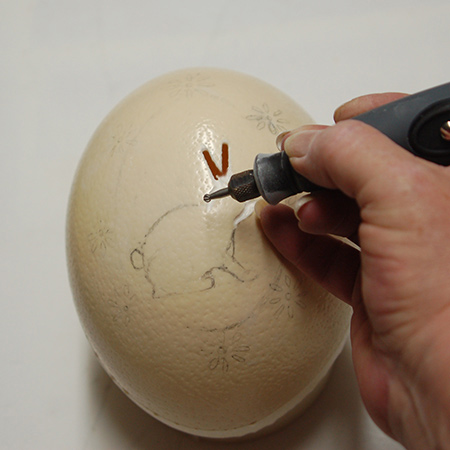
2. To engrave on the eggs you will need #192 cutter - #114 cutter - #194 cutter. Use the larger #114 cutter to outline the shape of the bunny.
GOOD TO KNOW
Run your Dremel MultiTool on high speed for quick engraving and cutting.
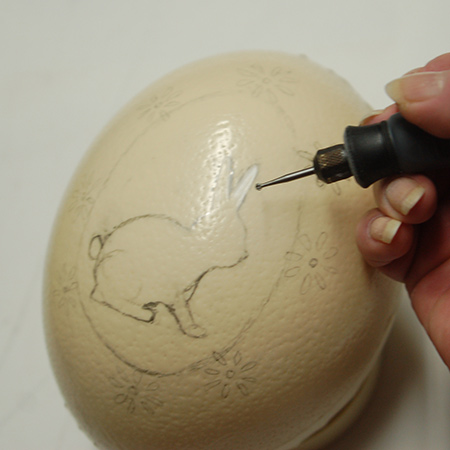
3. Once you have the outline you can start to press harder to remove the inner section.
BELOW: Bunny shape carved out.
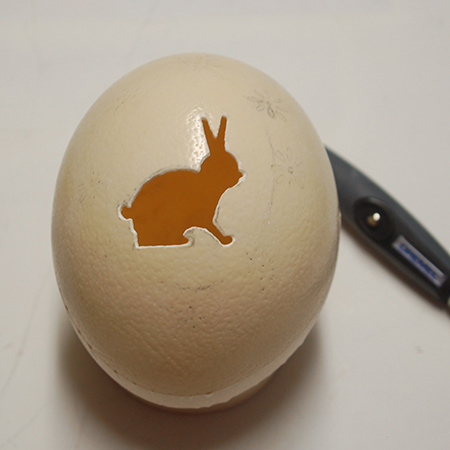
4. Continue using the #114 and smaller #192 cutter to add details.
GOOD TO KNOW
I mention at the start of this article that I modified a glass & tile bit to cut holes. I must be honest, this R30 bit worked incredibly well. As I was working I discovered that the Dremel bits were taking a long time to cut through the thick shell - the glass & tile bit made this much easier. See details below.
5. After adding all the detail with your Dremel MultiTool, continue to add more detail with glass deco or puffy paint.
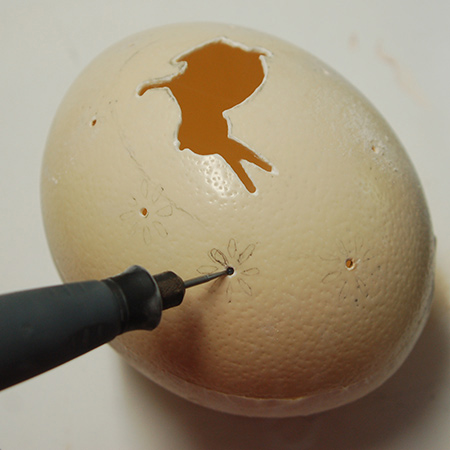
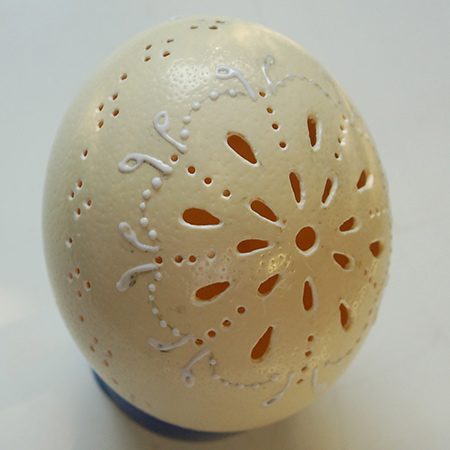
FLOWER STYLE LACE EGG

1. Use the same method as for the first egg to transfer your design.
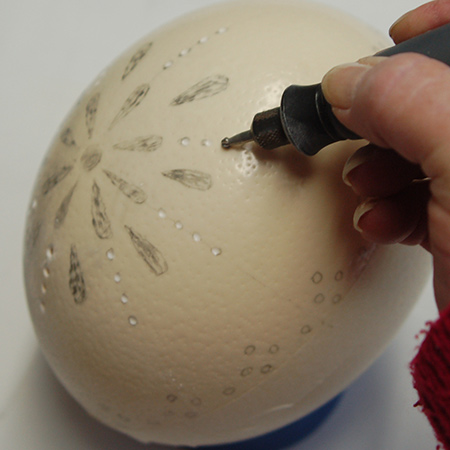
2. Use the #114 cutter to mark where to drill holes.
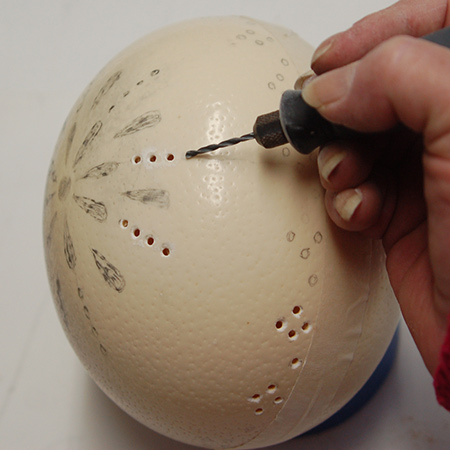
3. For this egg, rather than use the Dremel cutters, I used a 3mm HSS bit. The areas marked with the cutter make it easier to drill holes without the bit sliding around.
GOOD TO KNOW
Run your Dremel MultiTool on high speed for quick engraving and cutting.
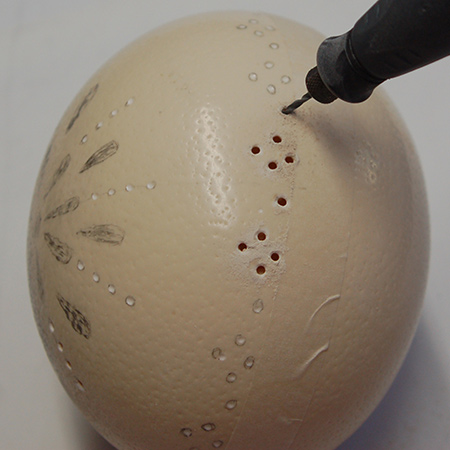
4. The large and medium round cutters only do so much and you will need to use a #194 cutter to continue cutting the holes in a flower petal shape.
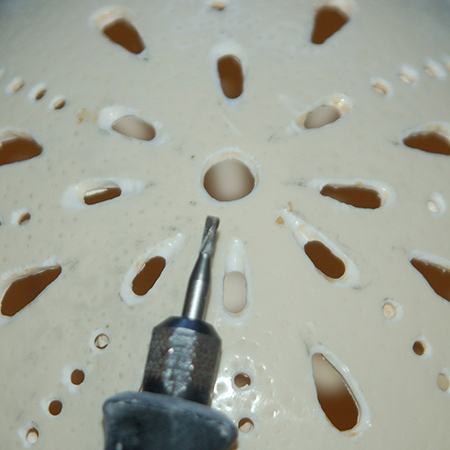
BELOW: Flower shape carved out.
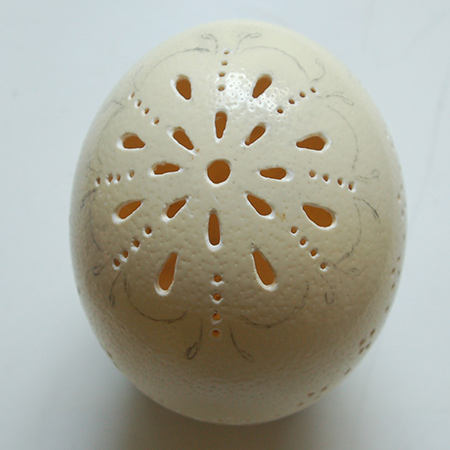
5. After adding all the detail with your Dremel MultiTool, continue to add more detail with glass deco or puffy paint.
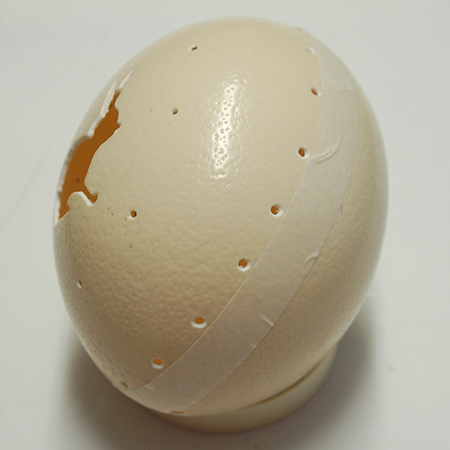
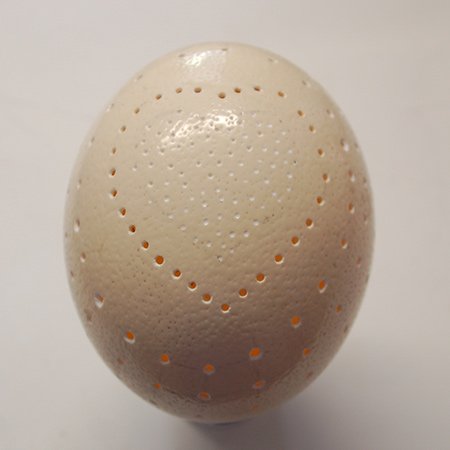
HEART LACE EGG
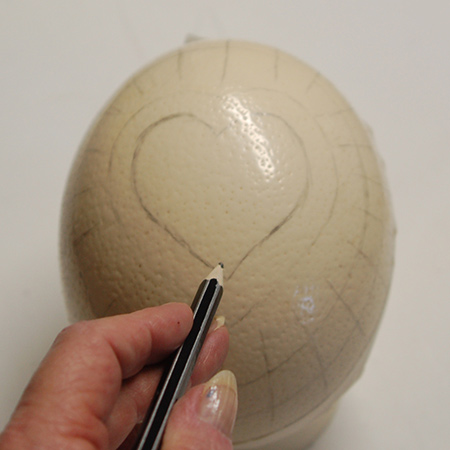
1. Use the same method as for the first egg to transfer your design.
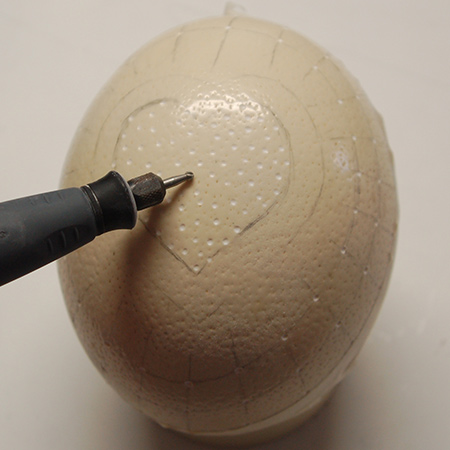
2. Use the #114 cutter to mark where to drill holes and apply the indented pattern for the heart shape in the centre.
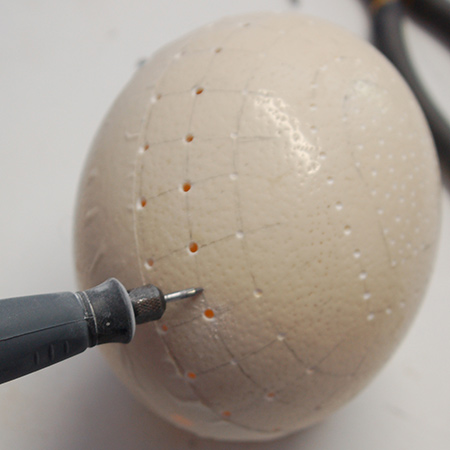
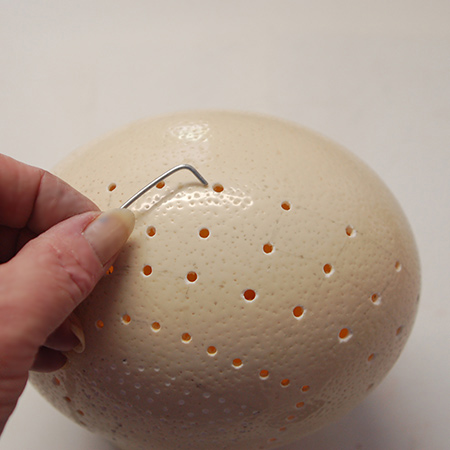
3. For the final egg I used a modified glass & tile bit to make the holes. It was the easiest method, but you need the smallest glass & tile bit you can find and you need to work carefully. Work on high speed but only apply light pressure so that you can control how deep the bit goes.
4. Use a bent paperclip of piece of wire to remove any membrane that remains on the inside of the holes.
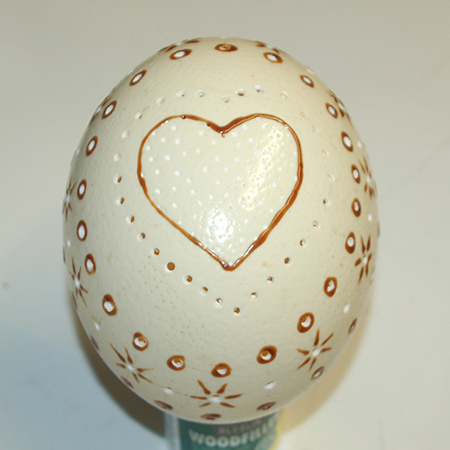
5. After adding all the detail with your Dremel MultiTool, continue to add more detail with glass deco or puffy paint.
Finishing
My lace Ostrich eggs were painted with Rust-Oleum Chalked ultra matte paint in blush pink, linen white and chiffon cream. You can paint them with any Rust-Oleum spray paint.