
Galvanised pipe lighting
You can make this industrial style lighting for a home with galvanised pipe that you can buy from steel merchants or local suppliers, and using copper pipe and low voltage lighting from your local Builders or lighting supplier.
instructables.com
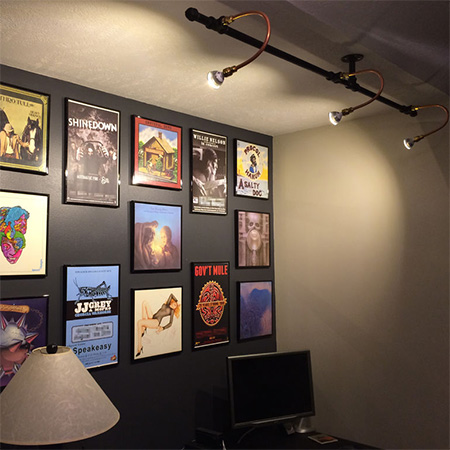
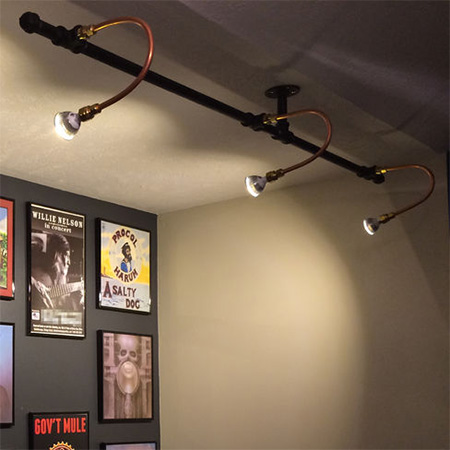
Using galvanised pipe to make your own industrial lighting is an inexpensive way to create a unique lighting arrangement that you can customise for any area in a home. This galvanised pipe light arrangement is perfect for highlighting a gallery wall.
The combination of galvanised and copper pipe work well together to create an industrial style lighting arrangement with a contemporary edge.
YOU WILL NEED:
Galvanised pipe and fittings as shown below
Copper pipe (at Builders or search local) - soft pipe 10 to 12mm diameter with compression fittings for the pipe diameter used
Halogen sockets for globes
Suitable low-voltage transformer and wiring (discuss your requirements with the sales staff)
Rust-Oleum 2X satin canyon black
Electrical tape
TOOLS:
Wrenches
Tube cutter or hacksaw to cut the copper tube
Drill / Driver and assorted bits
wire strippers
*Draw up your arrangement to know what lengths, pipes and fittings are needed. When buying fittings for the copper pipe, print out this page and take it along to the supplier with your light fittings, so that the correct fittings can be purchased.
HERE'S HOW:

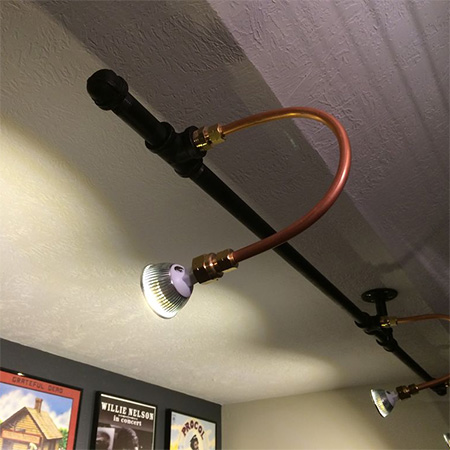
The copper arms not only allow for flexibility by being able to bend the pipe, it also adds a soft touch to the otherwise industrial design. If you are not able to obtain copper pipe you will need to bend the pipe around a solid form to curve to shape.
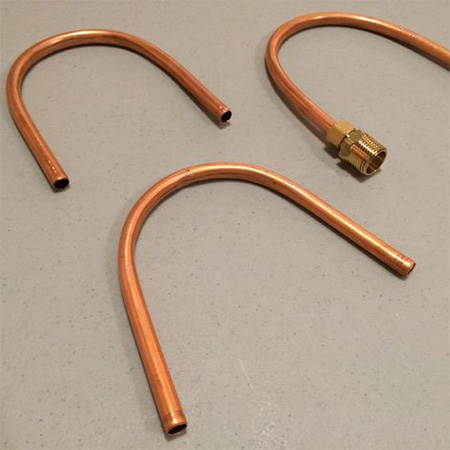
Use a strong form for beding the copper tube. The shape used to bend the pipes for this project was 10 centimetres in diameter. You will also need to fill the pipe with something that will prevent it from crimping or flattening as you bend it. There are many ways to do this such as inserting a stiff silicone tube to filling the pipe with sand. However, if you take it slow you should be able to bend the pipe without any flattening.
If necessary you can use pliers or wire crimpers to adjust the end of the pipe to fit the connectors, opening or closing the diameter as needed.
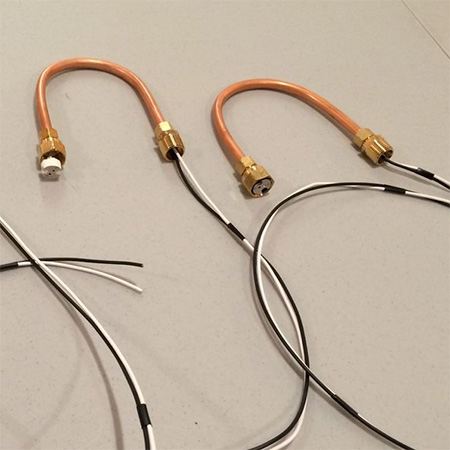
The light arrangement uses a 12V power supply with separate wires running from from each bulb back to a transformer. This setup allows for two wires in each pipe that are easily spliced to a connector that fits snugly inside the copper tubing.
If possible, buy wiring in two colours (black and white shown here) or make sure that you can easily identify the two wires in order to differentiate when threading these through the pipes.
It is recommended that you discuss the wiring with the supplier, so that they can recommend the correct gauge or Ampage wire you will need and provide a suitable transformer.
Cut two pieces of primary wire for each individual fitting - and of each colour - that are long enough to reach from the fitting, through the pipe, and into the ceiling, with extra length that allows you room to work with in the ceiling.
GOOD TO KNOW
To keep track of wire pairs tape them together with electrical tape.
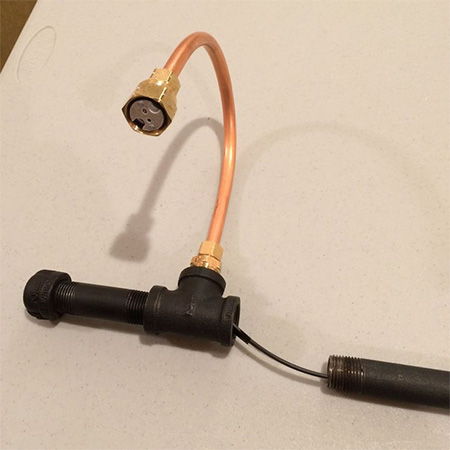
Strip off all the wire ends and push one socket leg and black wire into opposite ends of a connector. Squeeze at each end with your pliers to make a crimp that holds the wires firmly. Repeat for the other leg with a wire in a different colour or marked. Thread the wire pair into the pipe, pull it through until the socket fits into the female threaded fitting. Make sure the lamp base fits snug. You can wrap with electrical tape if required.
NOTE:
All connections in a low voltage lighting system must be very tight and secure. If not, the wires may arc creating a great deal of heat and causing the entire lighting system to fail or become a fire hazard.
If in any doubt, ask an electrician to wire up the light fitting for you. It should only take about an hour and is well worth the cost!