
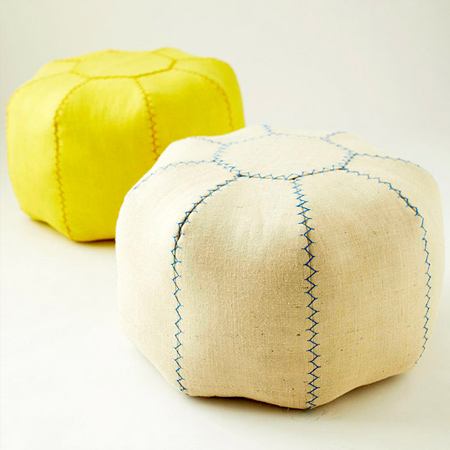
Sew up a comfortable pouf for your home
Super easy to make, once you have made one of these fabric poufs you will want to make more.

bhg.com
YOU WILL NEED:
2 metres of linen, min 140cm wide
1 old sheet, or 3 metres muslin, min 114cm wide
Sellotape
Sewing machine and sewing accessories
Filling (old clothing, worn towels, fabric scraps, etc.)
Additional batting or cushion filler
1 metre iron-on webbing or decoupage paper
Large upholstery needle
4 skeins embroidery thread (to match or contrast fabric)
Scissors
HERE'S HOW:
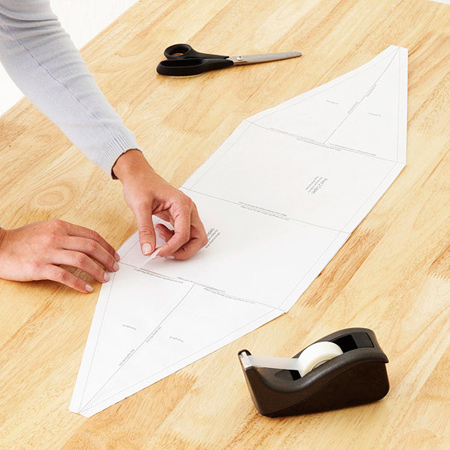
1. Print out the patterns. The required copies for each shape is indicated on the patterns. Cut out the individual shapes and then use tape to piece together the larger pattern. The pattern will resemble a rectangle with a triangle on each end. Also piece and tape together the end cap pattern.
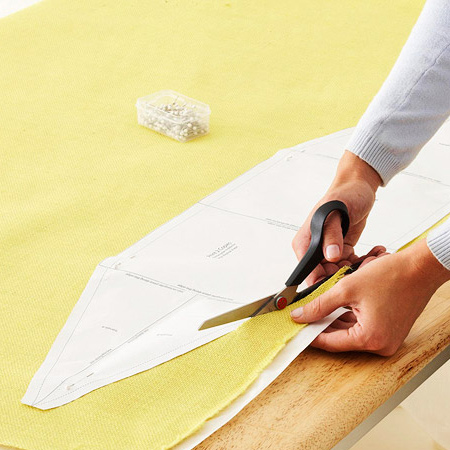
2. Place the linen over the sheet / muslin and pin the pattern into place to cut out. Cut out all eight sets for a total of eight pieces of linen and eight pieces of sheet.
3. Using the end cap pattern, cut the octagonal pieces for the top and bottom of the pouf. For each piece, fold a piece of linen in half, pin the long edge of the end cap pattern along the fold and cut out. Repeat to make the second octagonal piece.
4. Sew the pieces together starting with the long shapes. Layer one sheet piece on the bottom, two pieces of linen in the middle, and one piece of sheet on top. Pin the layers together along one side. Repeat to create three more layered sets.
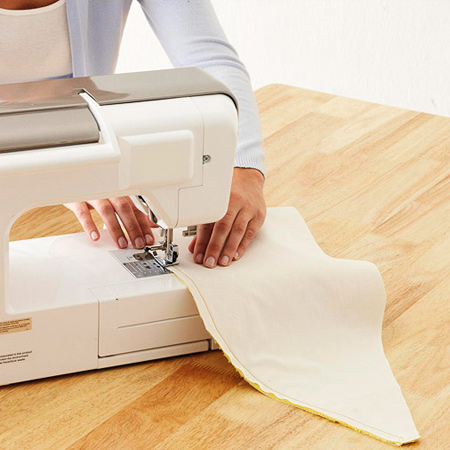
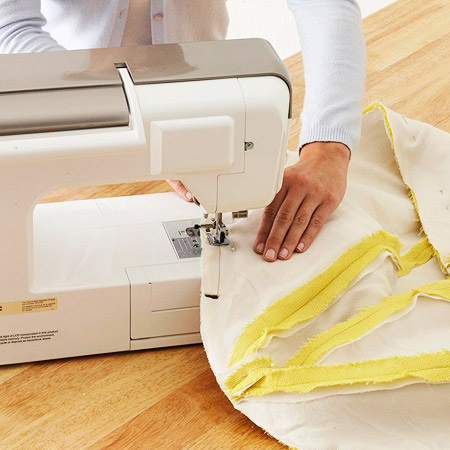
5. Use a running stitch and a 12mm seam allowance to sew along the pinned side of each layered set to create pairs of panels.
6. Open up and press the seam allowance of each pair so a strip of linen lies flat on either side.
7. Lay one joined pair on top of another - right sides together linen to linen - and pin. Sew along the pinned edge, remove pins, and press open. Repeat with the other two layered sets. At this point, you will have two halves. Turn one half right side out and the other half inside out.
8. Nest one half inside the other with right sides together, and pin around the outside edges. Make a mark 10cm on each side of the centre point where all the seams meet on one end of the pouf.
9. From one 10cm mark, stitch around the outside edge of the pouf, stopping at the 10cm mark on the other side, leaving a 20cm opening. Reinforce the opening by sewing across the seam allowance at a right angle to the seam at the 10cm marks.
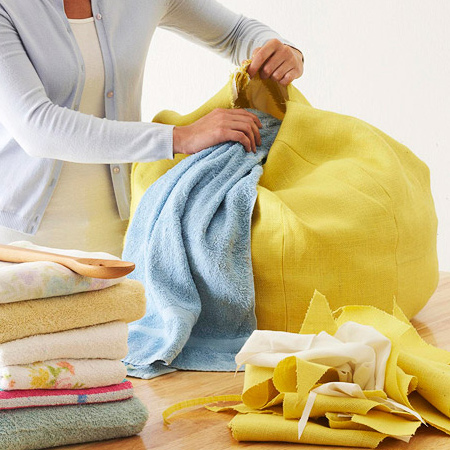
10. Turn the pouf right side out with the opening at the top. Sort fabric scraps into small piles and start stuffing with the largest pieces at the bottom centre to provide support. Place heavier fabrics as neatly as possible to avoid creating large gaps in the stuffing. When filled about halfway, use softer / smaller pieces to fill around the sides.

11. Fill with scraps to about two-thirds stuffed and then use batting or filling along the sides to smooth the shape. The top of the pouf should have a good layer of filling for a comfortable seat.
GOOD TO KNOW:
The tighter the fabrics
and batting are packed, the better it will hold its shape.

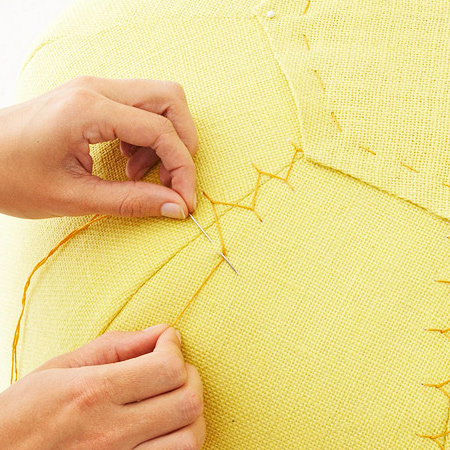
12. Once filled, hand-sew the seam together. The octagonal section will cover this part of the seam, so don’t worry about neatness.
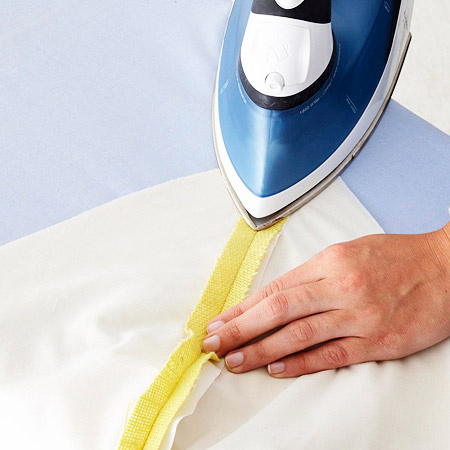
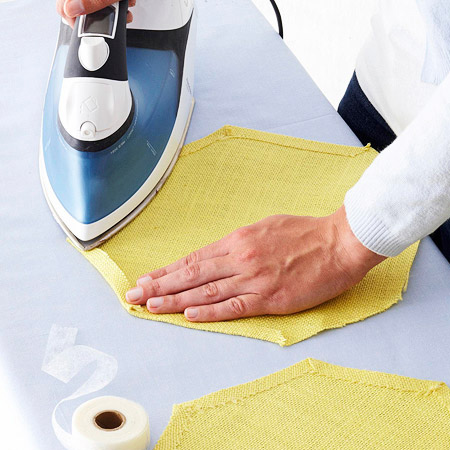
13. Apply iron-on webbing around the edges of the two octagonal pieces for the top and bottom.
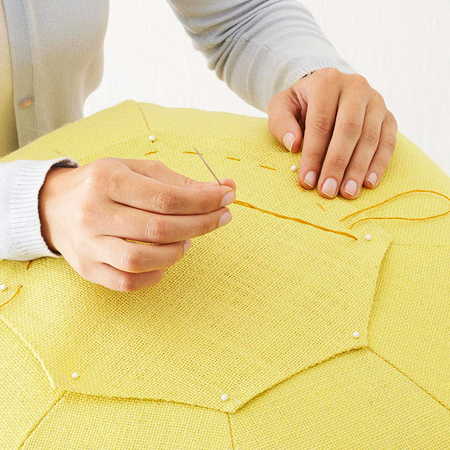
14. Line up the corners of the octagonals with the seams on the top as closely as possible. You can insert pins straight down on the seams to make adjusting the alignment easier. Using a basting stitch 2cm inside the edges of the octagon to baste one piece to the top of the pouf and the other to the base. Fuse the edges of the to the top and bottom with an iron. When all sides of each octagon are complete, remove the basting stitches from top and bottom pieces to finish.
GOOD TO KNOW:
Separate six-ply embroidery thread into two-ply
pieces and work with 30cm lengths
at one time.