Faux pewter wall art
This Saturday we did a faux pewter workshop on request. Quite a few DIY Divas have commented on my faux pewter wall art and wanted to know how to make their own.
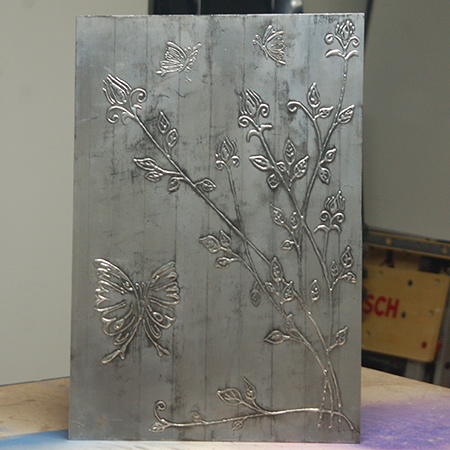
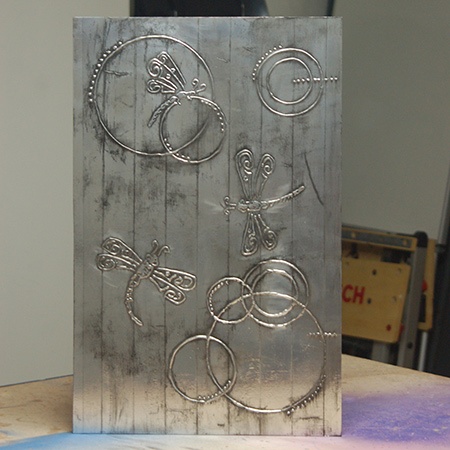
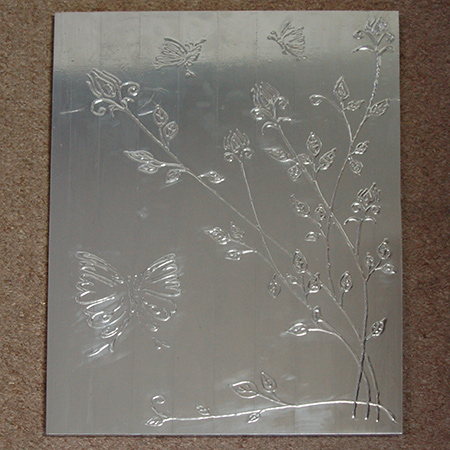
It's easy and affordable to make your own faux pewter wall art, and at this Saturday's DIY Divas workshop the ladies made their own faux pewter wall art. The ladies got to choose between butterfly, dragonfly or jellyfish designs. Shown here are the butterfly and dragonfly designs.
YOU WILL NEED:
Artwork for your design
SupaWood [MDF] or masonite board cut to size
Aluminium roofing tape (self-adhesive)
Eraser and ear buds (Dove or Johnson's)
Bostik Deco Glass or Puffy paint pens
Black acrylic craft paint
Stiff sponges
Ruler
Craft knife
HERE'S HOW:
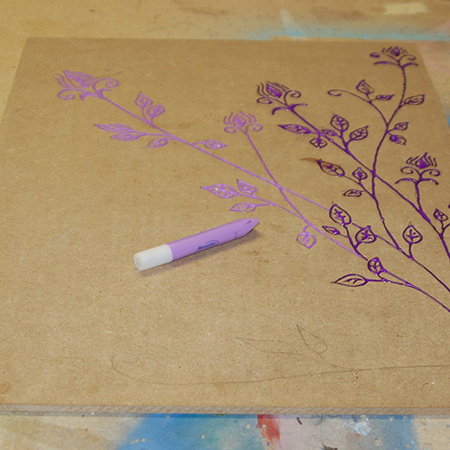
Once you have transferred your design onto the board, use the deco glass or puffy paint pen to outline. Start at the top of the board to prevent smudging as you work.
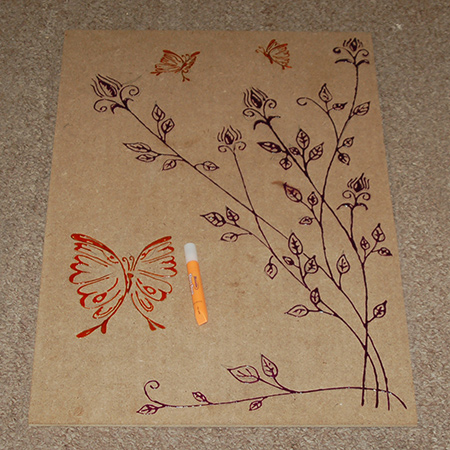
Add as much detail as possible - the more detail the, better the finished effect. Allow the paint to dry hard.

For the first row draw a straight line that you can follow for sticking down the tape. This needs to overlap the edge and be folded over the side and stuck down at the back.
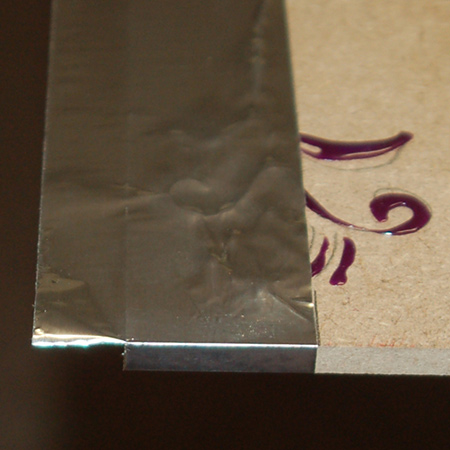
Trim the corners with a sharp craft knife. Tuck under the top and then fold the edge over the side and onto the back of the board.

GOOD TO KNOW
Use an eraser to rub over the edge before folding over. This gives a nice sharp edge and also makes it easier to fold over.
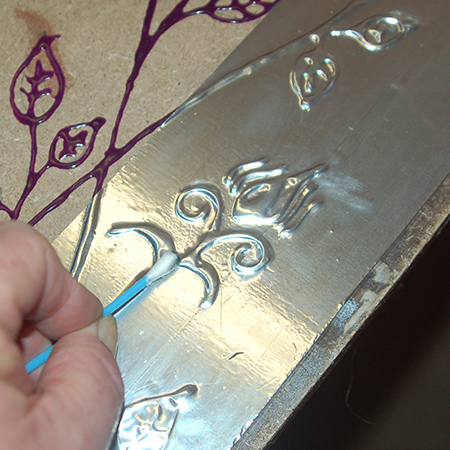
Use the cotton bud to outline the raised detail. You want the detail to be as sharp as possible. If the bud starts to scratch the surface, use a new one. You only need to apply gentle pressure with the tip of the bud to press down the tape.
Use the eraser and cotton bud on each strip of tape before applying the next row. Make sure that each row of tape is perfectly aligned with the edge of the previous layer.
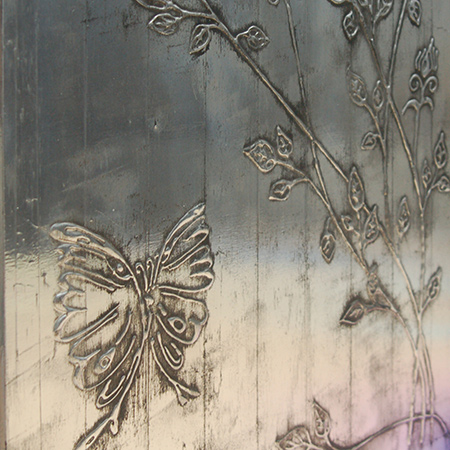
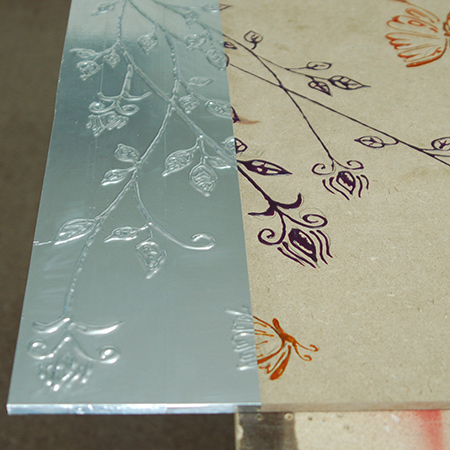
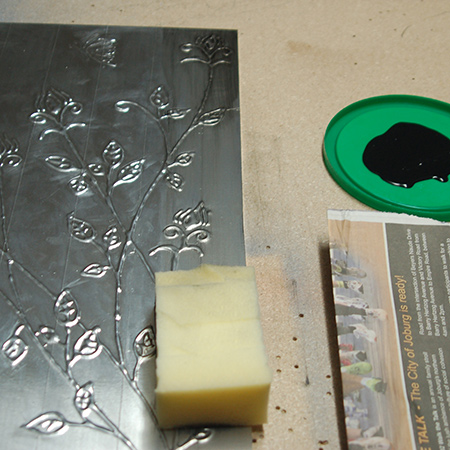
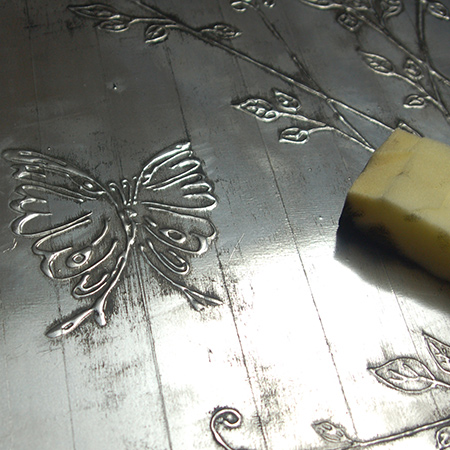
To add the antique effect you need acrylic craft paint and a sponge.

Dip the tip of the sponge lightly into the paint and then run from top to bottom on the surface of one row. Before the paint dries continue to rub with the sponge. You will see that as you rub the paint will remain in and around the detail and can be rubbed off the open areas.
Repeat this row by row until you are finished. You can repeat the process for a darker antique effect.
The finished antique effect.