
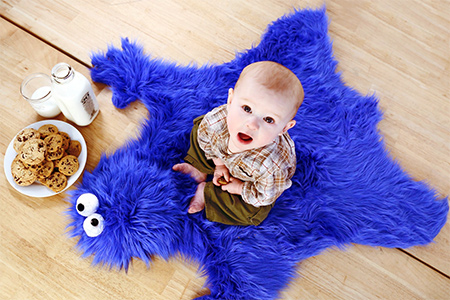
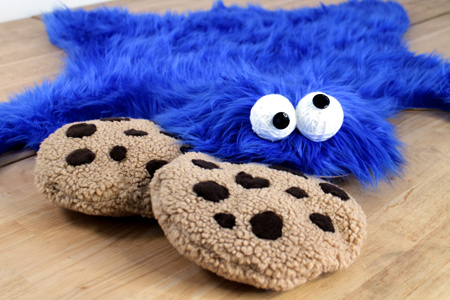
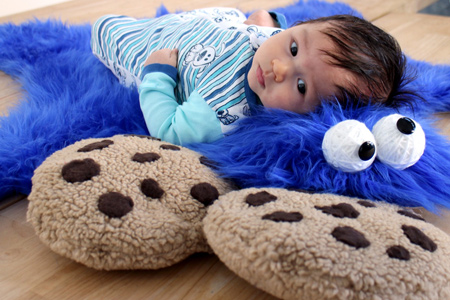
How to make a cookie monster play mat or rug
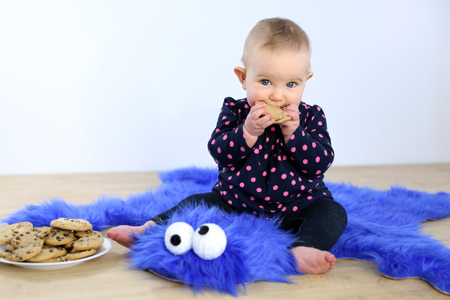
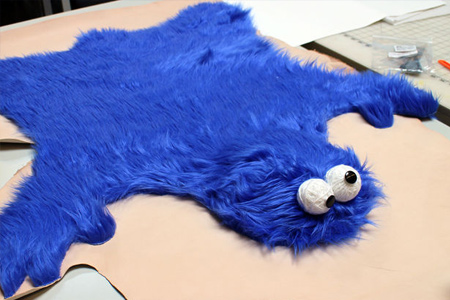
Use super-soft plush fabric to make everyone's favourite cookie eating monster. Using plush faux-fur fabric and some other supplies, I was able to make this rug in under an hour. This soft rug is great for kids, and the cookie pillows really make it complete.
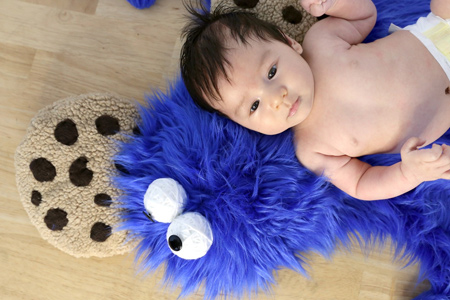
The head of the cookie monster is padded with a double layer of thin foam for extra comfort. You could also add a thin layer of batting or foam to the cookie monster body if you want an even softer rug.
On the back of the cookie monster attach a non-slip backing to prevent the rug or play mat from sliding around.
YOU WILL NEED:
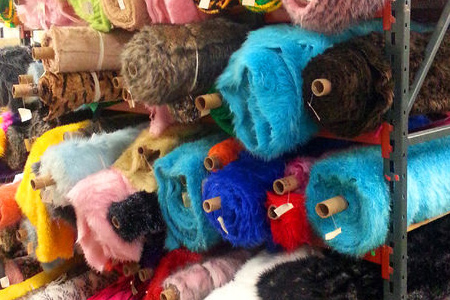
Faux fur, blue or your choice of colour, about 1.5 metres
Fabric for cookies
Thin foam for padding head
Batting for cookies
Soft and cuddly white wool
Black buttons for eyes (2)
Chalk for outlining
Rug backing or rubber mat for optional backing
Sewing machine and accessories
White embroidery thread and needle
Scissors
Cutting knife and seal-healing mat
HERE'S HOW:
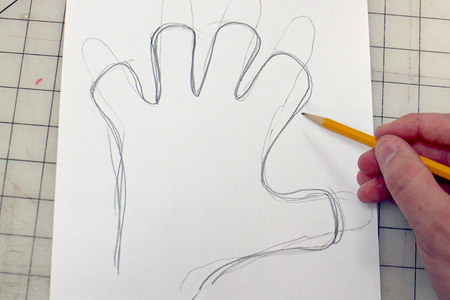
1. Trace the outline of your hand onto a piece of blank paper and then sketch a basic shape around this. Make the fingers wider and shorter. Cut out the shape to use as a pattern.
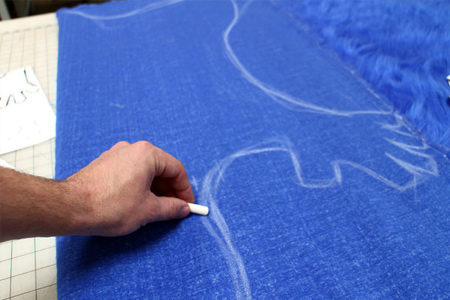
2. Fold the faux fur in half and transfer the design onto the fabric with chalk. You only need to draw half the shape and can use the hand pattern.
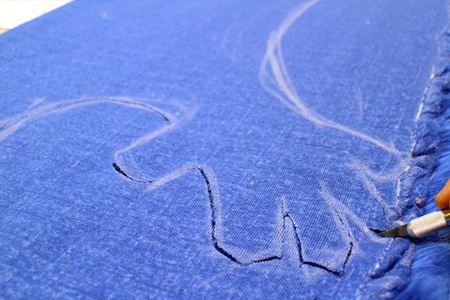
3. Use a sharp craft knife (or scissors) to cut out the shape. If you find it difficult to cut out a double layer of fabric - cut half and them fold this over the other half to draw and then cut out.
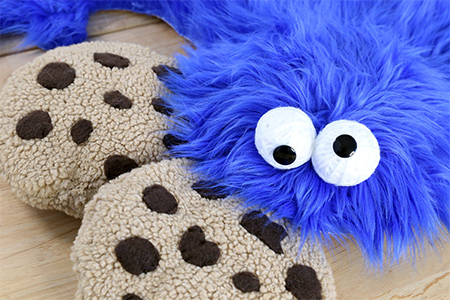
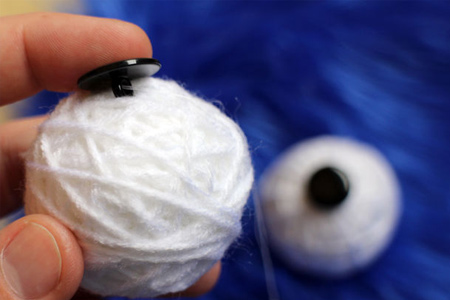
4. Part of the cookie monster's charm is his goofy eyes. To make the eyes start by bunching up one end of the wool and then wrapping around to make a more rounded shape. To prevent the yarn from unravelling at the end, sew this down when adding the button eyes.
5. Use a few stitches through the button eyes and around the tucked end of the yarn to ensure everything is well secured and will not unravel later on.
GOOD TO KNOW:
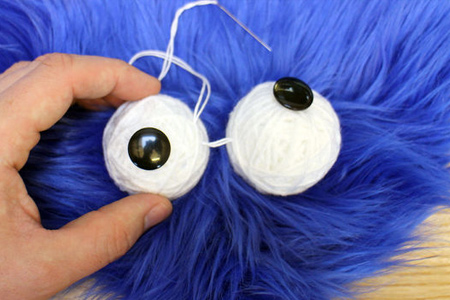
The eyes are held in place with
thick, white embroidery thread. After each eye
was attached to the head of the rug, the eyes
were then stitched together to provide stability.
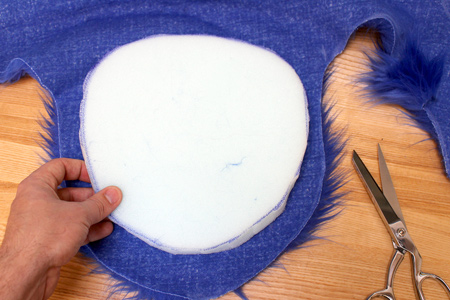
6. Add comfort with a double layer of foam underneath the head section. Secure this with a few stitches through the foam and into the fabric. There are two foam discs, one slightly smaller than the other.
7. If you want a more finished look you can add a layer to the underside of the rug using rug backing, soft rubber or even faux leather. To do this, lay your monster rug on top of the backing fabric and cut out with a craft knife or scissors. Use spray adhesive to join the two sections together.
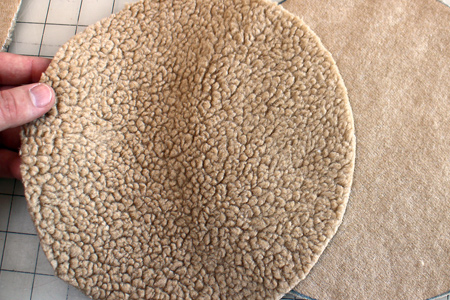
8. To make the chocolate chip cookies use a large plate to trace the outline on the underside of the fabric. Cut out two identical circles and, with right sides together, sew together along the edge. Make sure to stop sewing when you're almost all the way around, so you can turn inside out and stuff with batting.
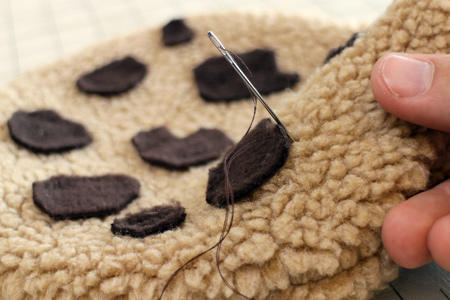
9. Use a darker fabric for the chocolate chips and sew these onto the fabric.
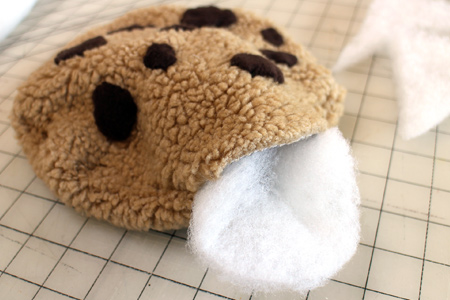
10. Fill each cookie with batting and hand sew the opening closed.
Your cookie monster rug or play mat and cookie pillows are now done! Time to place that rug and have fun.
instructables.com