Great Idea for Decorating a Shared Bedroom
If you are searching for ideas on decorating a shared bedroom, take a look at this project that transformed a plain shared bedroom into a modern, affordable and most definitely DIYable space.
11/10/2021
Decorating a shared bedroom already requires some careful thought and preparation to try and squeeze two beds into the room - and still leave enough space to move around. Decorating in such a way to create a pleasing arrangement and aesthetic design can be even more tricky. First, you need to find the right place for the beds and then you need to work on ideas to make the room inviting and fun for kids.
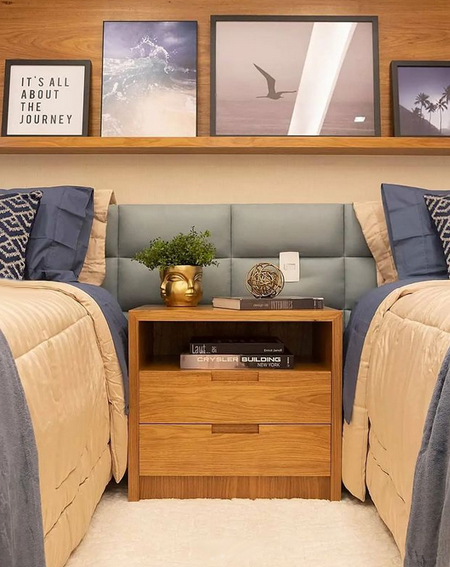
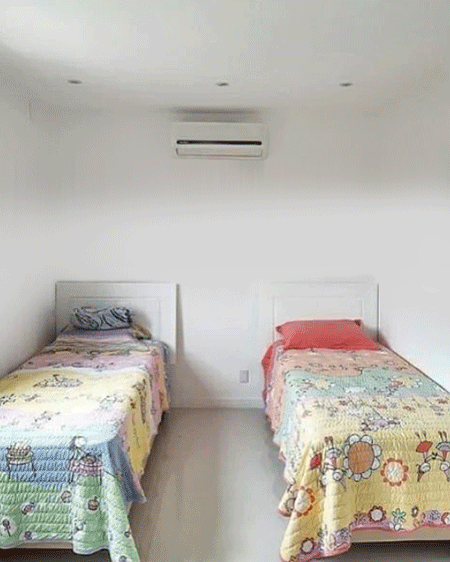
In this project, a bedroom shared for two teen boys growing out of their childhood fantasies, desperately needed an update and more organisation. Having only just moved into the house, the bedroom wasn't large by any standard and could only just accommodate the two beds.
After moving the furniture around to determine the best position for the beds, it was finally decided that against the one wall would be the best option and still leave space for a study desk close to the single window in the room.
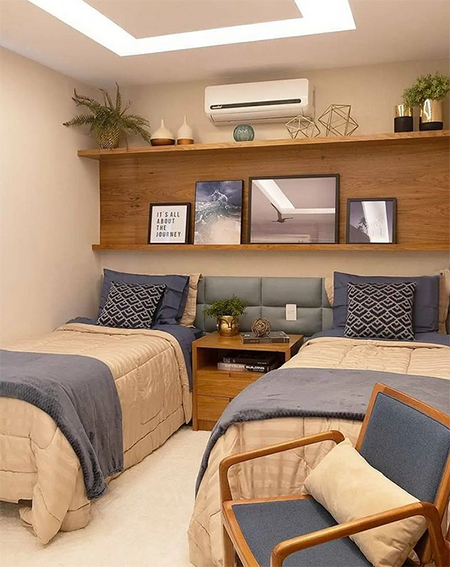
Get The Look
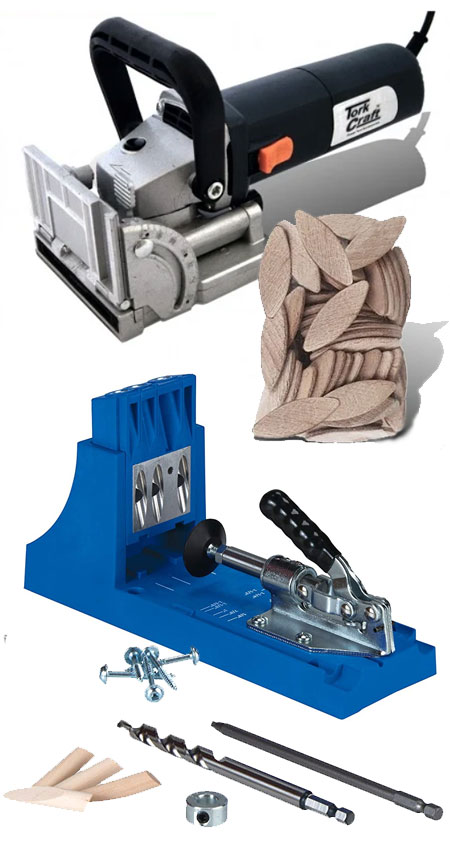
Even if you only have basic DIY or woodworking skills, making the shelf unit for the bedroom wall is an easy project. All you really need is some laminated pine shelving that you can purchase at any Builders store, a combi drill (one that also drills into brick and masonry), and tinted varnish or wood stain
YOU WILL NEED:
Combi drill (or drill that can also be used to drill into brick/masonry)
1 of Laminated pine shelving - long enough to fit across the wall
2 of Laminated pine shelving - long enough to fit across the wall and wide enough for a shelf
32mm pocket-hole screws
Kreg Pocket-hole jig OR biscuit joiner OR use butt joints
Choice of finishing (wood stain and clear varnish or tinted varnish)
HERE'S HOW:
Step 1
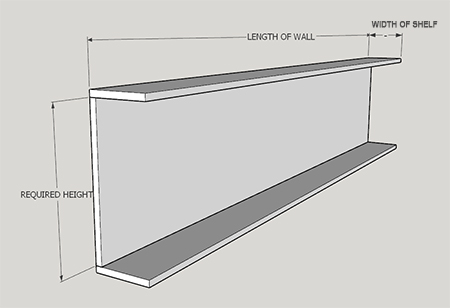
Determine the length of laminated pine shelving you need to fit from wall-to-wall. Don't just measure once, measure where the top of the board will sit and where the bottom of the board will sit. This way, if the wall is uneven, you can allow for this when cutting the back board to fit onto the wall.
Step 2
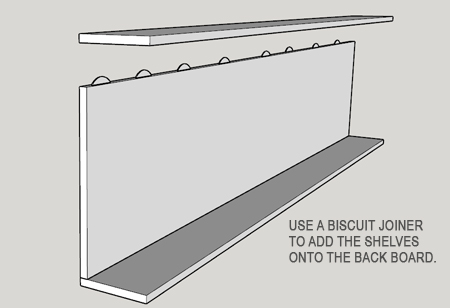
If you are using a Biscuit Joiner to attach the top and bottom shelves onto the back board, make slots all along the top and bottom edges of the back board and one side of the top and bottom shelves - making sure that the locations for the slots will be perfectly aligned once fitted together. Apply a bead of wood glue into the slots, insert the biscuits and then clamp or tape overnight. Do wipe away any excess glue that oozes out with a slightly damp cloth, as this can affect the stained finish.
Step 3
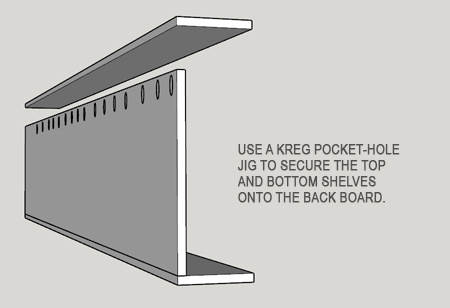
If you are using a Kreg Pocket-Hole jig to secure the top and bottom shelves onto the back board, drill pocket-holes on one side at the top and bottom, as shown below. Use wood glue and pocket-hole screws to assemble.
Step 4
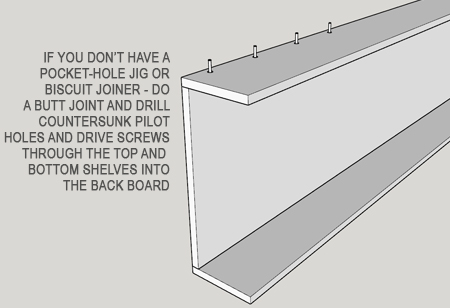
If you don't have a biscuit joiner or pocket-hole jig, simply make butt joints where the shelves fit onto the back board. Drill countersunk pilot holes through the top or bottom shelf into the back board and secure with 35mm wood screws.
If you want the exact same headboard as below - one that goes from one side of the room to the other, there are plenty of suppliers out there where you can have the headboard custom made in your choice of fabric, pattern and size.