
Easy painted panel headboard
Turn SupaWood panels into a colourful headboard with paint and add as many 300mm-wide panels as you need to create a headboard for any size bed.

To choose the paint colours for your painted headboard, select existing colours from bedding, curtains, wall art, furniture or floor coverings. The main colour in this project was pulled from the botanical-print pillowcases and bed sheets.
YOU WILL NEED:
12mm supawood panels cut to size
Matt acrylic - white plus 2 colours
Foam paint roller and tray
Soft scrubbing brush
Drop cloth or newspaper
Keyhole hangers
SX5 x 25 nylon wall plugs and screws
Impact Drill + 5mm masonry bit
HERE'S HOW:
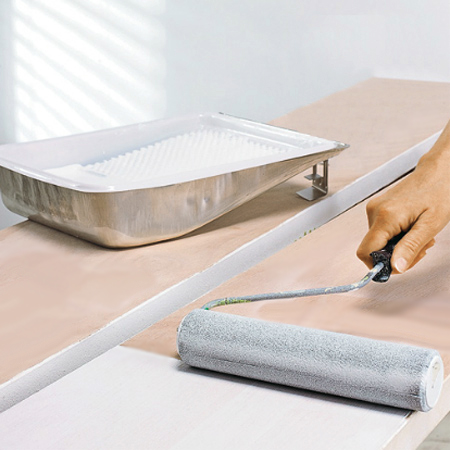
1. If the edges of the boards are rough, sand with 240-grit sandpaper before painting. Apply 2 to 3 coats of Plascon Sure Coat white acrylic over the boards using a foam paint roller. Let each coat dry before applying the next coat. Clean the paint tray ready for the next step.
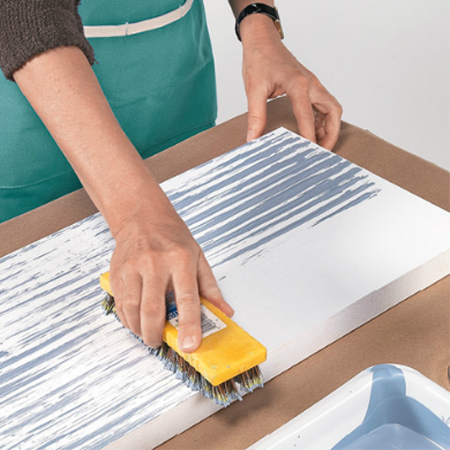
2. Use your first colour and, starting at one end of the board, dip the brush into the paint and drag lengthwise along the surface. Don't stop until the scrubbing brush runs out of paint. Dip again and start where you left off. Repeat until the board is covered with loose lines. Leave this to dry and clean the paint tray and scrubbing brush ready for the next step.
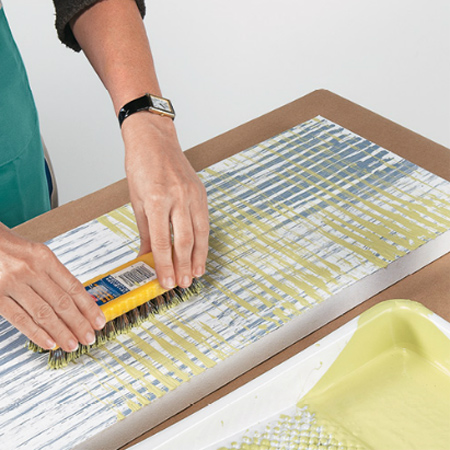
3. Repeat the brushing technique with your second colour, dragging the brush to create perpendicular lines from side to side. Leave this to dry.
4. While waiting for paint to dry, use a tape measure and pencil to mark the location for the boards on the wall behind the bed. You want to mount the boards so that they are slightly below the level of the mattress. Divide the width by the number of boards you are handing, allowing for a 3cm gap between each board, and mark on the wall.
5. At the centre of your mark for each board and 5cm down drill a hole for 5 x Fischer SX wall plugs. The depth of the hole should be 10mm longer than the length of the wall plug. Push in the plug and drive in a 4 x 40mm screw, so that the head of the screw protrudes enough for mounting the boards.
6. On the back of each board, mark the centre and measure down 5cm to fit a screw hole hanger to the back. Now mount your boards onto the wall with peace of mind.