Trendy painted headboard
For this DIY headboard, SupaWood panels are cut to size, painted in your choice of colour and then mounted on a batten for securing onto the wall. The result... a trendy headboard that can be finished to match the existing colours in a bedroom.
What's nice about this trendy painted headboard is that it is quick and easy to make and you can mount behind the bed in 30-minutes, excluding paint drying time.
YOU WILL NEED:
16mm SupaWood panels 250mm wide x 1200mm high*
10 x 44mm strip of PAR pine cut slightly shorter than the width of the headboard
16mm screws
4 keyhole brackets
120-grit sandpaper
Plascon Polvin - see colours below
Plascon Scumble Glaze or Prominent clear acrylic sealer
Paintbrush
TOOLS:
Drill / Driver plus assorted bits
*Measure the width of the bed to determine how many panels you will need in total
Have all the panels and the battens cut to size at your local Builders Warehouse to make it even easier.
HERE'S HOW:
GOOD TO KNOW: If you prefer to use laminated pine for this project, it will need to be given a coat of Wood Primer before painting.
1. Skip this step by having a half sheet or sheet of SupaWood cut to size.
2. Sand all the cut edges with 180-grit sandpaper and wipe clean.
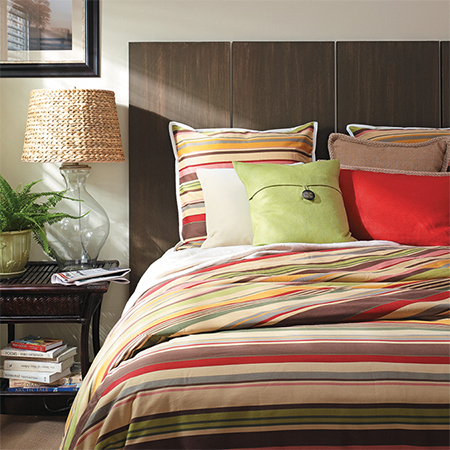
3. Apply a base coat of Plascon Polvin sugar dust [R4-E2-3] and let this dry before dry brushing on Plascon Polvin maple tree [O6-E1-3]. This gives the panels a matt finish, but you can apply Plascon glazecoat gloss if you prefer a shiny finish that is washable.
YOU WILL NEED:
16mm SupaWood panels 250mm wide x 1200mm high*
10 x 44mm strip of PAR pine cut slightly shorter than the width of the headboard
16mm screws
4 keyhole brackets
120-grit sandpaper
Plascon Polvin - see colours below
Plascon Scumble Glaze or Prominent clear acrylic sealer
Paintbrush
Nylon bath scrub
TOOLS:
Drill / Driver plus assorted bits
*Measure the width of the bed to determine how many panels you will need in total
HERE'S HOW:
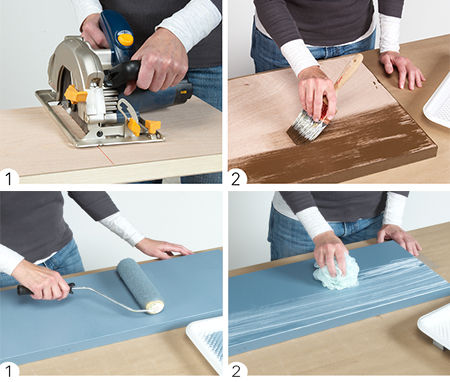
1. Sand the edges with 180-grit sandpaper before painting on a base coat of Plascon Polvin white. Let this dry.
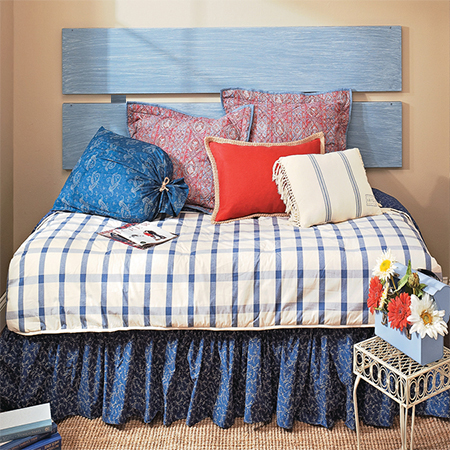
2. Combine 1 part Plascon Polvin blue for you [B3-A1-3] with 3 parts Plascon Scumble Glaze.
3. Dip the bath scrub in the paint and dab onto a piece of newspaper to remove excess paint. Drag along the painted finish from one end to the other until covered and then leave to dry.
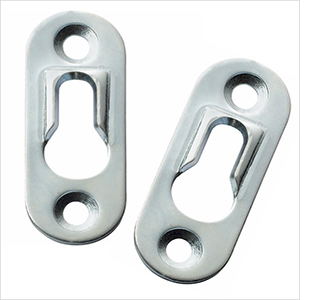
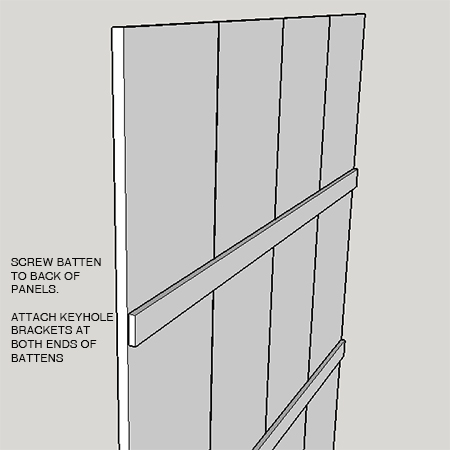
Screw the batten/s to the back of the panels, leaving a 10mm gap for vertical design and 50mm for horizontal.
Measure in 50mm from each end of the batten and attach keyhole brackets. Transfer the placing of the keyhole brackets onto the wall and drill for wall plugs and screws, leaving just enough screw head to pop into the keyhole brackets to mount the headboard.