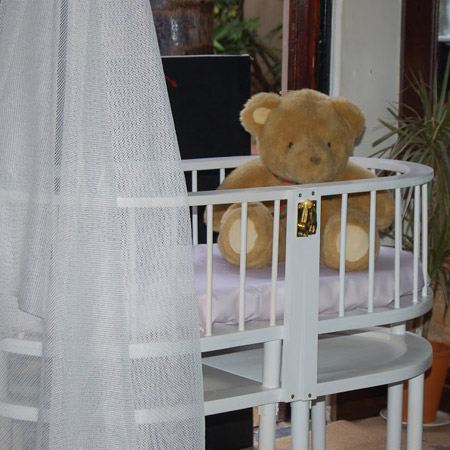
Nursery crib that becomes two chairs
In this project we make a crib that transforms into two attractive chairs.
We are always on the lookout for furniture that serves a dual purpose, not only from a price point of view, but also from a practical approach. Furniture that is dual-purpose endures longer if it can be used in another way at a later date. In this project we make a crib that transforms into two attractive chairs.
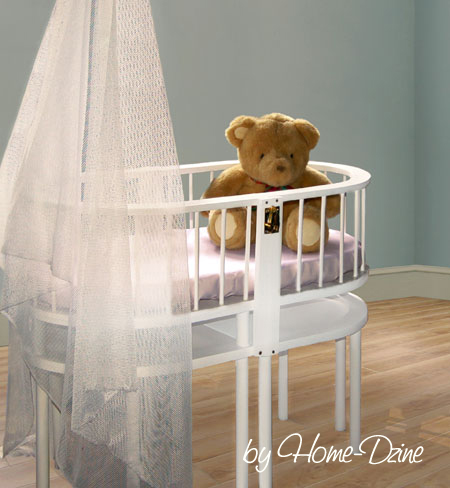
The crib easily transforms into two chairs and also features a storage shelf. You can add a canopy over the top simply by hanging from the ceiling.
YOU WILL NEED:
8 of 500 x 500mm 16mmSupaWood
2 of pine curtain rods 2.5 metres length x 34mm diameter
9 of dowels 1 metre x 10mm diameter
20 of L-brackets
16mm wood screws
Wood filler
Wood glue
220-grit sandpaper
Acrylic PVA for basecoat
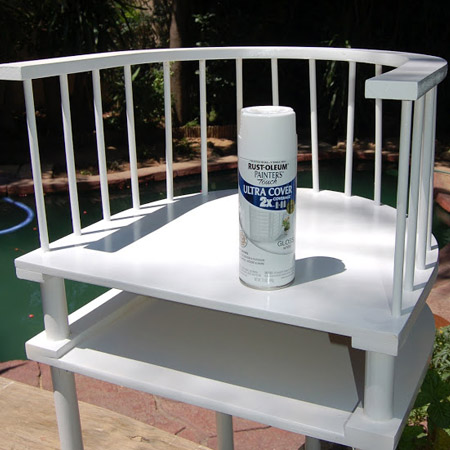
Rust-Oleum 2X Painters Touch, white
TOOLS
Drill/Driver plus drill and screw bits
Jigsaw and clean-cut blade
Rubber mallet
Drop cloth
TIME: 4 days allowing for drying times
COST: R950
HERE'S HOW:
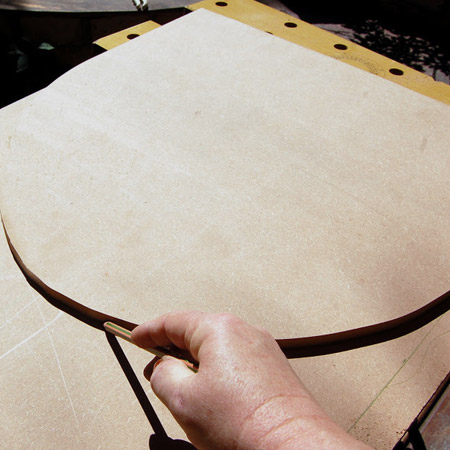
1. Cut 8 of 500 x 500mm boards into a curved shape. Two will be for the bases and six will be for frames. You can use a suitable-sized template to create the shape. I used the lid of my braai as a template.
GOOD TO KNOW
To fit all the required pieces from one sheet of 16mm SupaWood, cut the seat and shelf frames in halves.
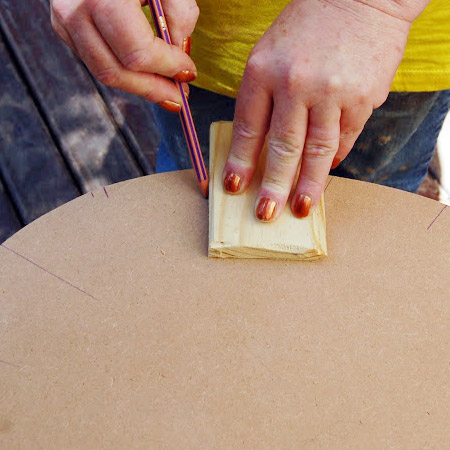
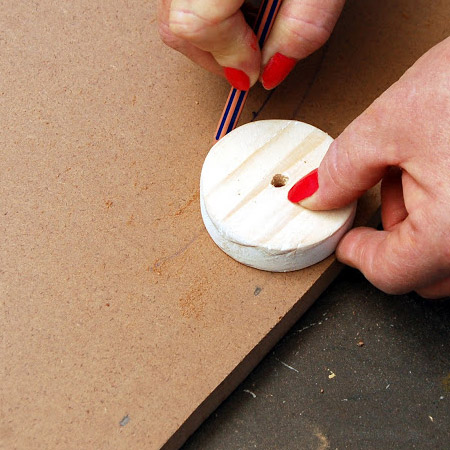
2. Use a tape measure and pencil to mark the boards at 10mm in from the edge and at every 60mm. These marks are for the legs and dowels. Use a leg as a template to draw the shape onto the boards. See diagram below.

3. For the frames you need to cut these to a width of 50mm. To make this task easier, I used a 50mm wide off-cut, placed my pencil on the inside edge and then moved around the cut edge to mark the inside shape. Use wood glue to attach the seat frame bottom and shelf frame top and leave to dry.
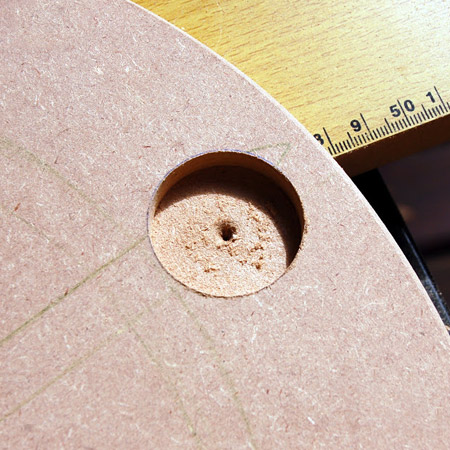
4. Use a MAD or Forstner bit to drill out holes to a depth of 5mm for the legs and base supports. See diagram above.
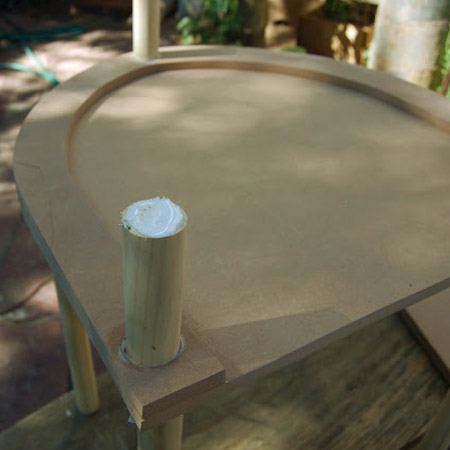
5. Use wood glue to affix both the base supports and legs. Let the wood glue dry overnight.
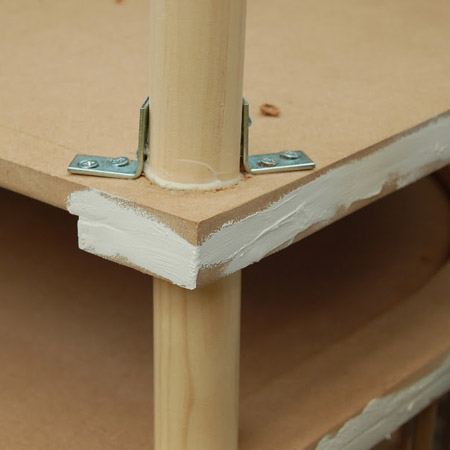
I also attached L-braces to the legs to provide additional support.
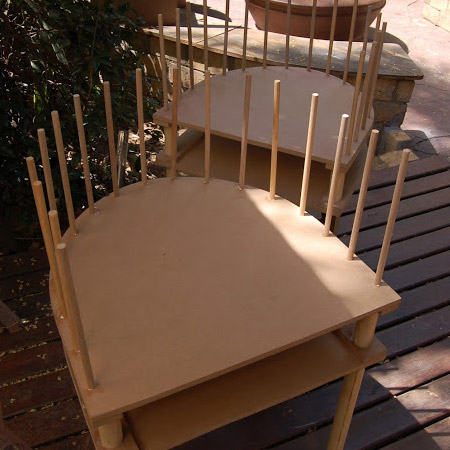
6. In the top of each base and the underside of the top frames, use a wood bit to drill 10mm holes to a depth of 5mm. These holes are for the dowels. Dry fit to ensure that the dowels align nicely.
7. Apply a bead of wood glue to the 10mm holes in the top of the bases and underside of the top frame. Insert the dowels into the base first and then pop on the top frame. Use a rubber mallet to light tap into place.
8. Use wood filler to cover up joins and gaps and let this dry before sanding smooth with 220-grit sandpaper.
9. Wipe clean before applying a base coat of acrylic PVA to the entire assembly. Once dry, sand with 220-grit sandpaper and wipe clean.
10. Put down newspaper or a drop cloth before spraying the two sections with Rust-Oleum 2X Painters Touch. You will only need to apply two light coats.
My thanks to Ashley Stemmett, who came up with the original idea for this crib.