
Build a built-in cupboard, closet or wardrobe with timber and dry wall
Building your own built-in cupboard, closet or wardrobe is an inexpensive DIY project that provides you with lots of additional storage space. As a DIY project, most built-in cupboards are fairly simple to build, even for a beginner DIYer.
In this particular project you will also get experience in how to frame a wall, how to put up drywall, how to plaster, and how to install a set of sliding doors. The whole project costs about R800, assuming you already have the tools required and, if not, what better excuse to start building up your own collection of power tools !
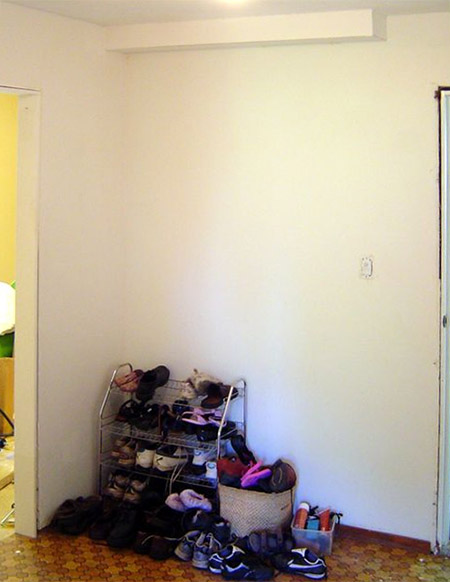
What's nice about this particular design is that you can build it almost anywhere that has a bit of space. You can use it as a pantry, as a linen cupboard, or just for extra storage space. The built-in cupboard shown here is designed for shoes, so it's a bit shallower than the average cupboard and it's filled with shelves rather than a clothes rail.
However, the method of construction is pretty much the same as other built-in cupboards and it's just a matter of widening the sides for additional depth. The entire project took an afternoon to build, then plastering and painting took a week.
YOU WILL NEED:
PAR pine lengths cut to size as required
One set of sliding doors (or bifold, if you prefer)
1 or 2 full sheets of gypsum board
Drywall screws
Nylon wall plugs
3,5 x 50mm half-shank screws (depending on thickness of PAR pine used)
Rawlbolts or expanding anchor bolts 50mm long
Aluminium corner beading
3 lengths of aluminium profile
Drywall tape for plastering
Paint
Rhinolite plaster
TOOLS:
Jigsaw, Circular Saw or Dremel Saw Max
Drill/Driver plus assorted bits
Drill with hammer function
Hammer
Spirit level
Tape measure and pencil
Carpenter's square
Craft or utility knife
Straightedge or steel rule
Plastering tools
HERE'S HOW:
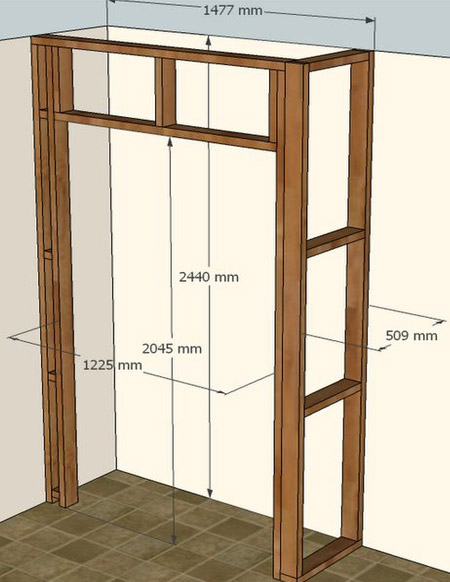
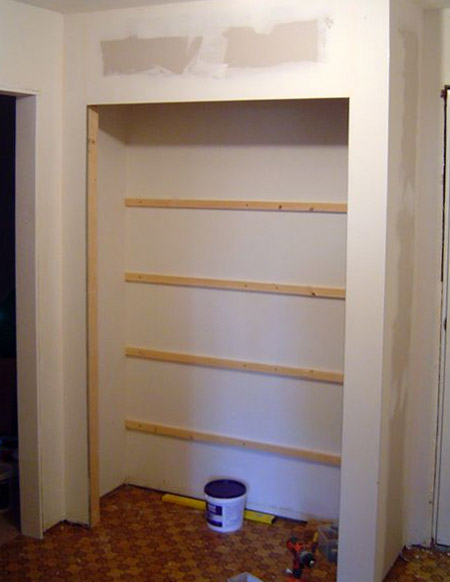
This is design is meant for a corner cupboard of full height, and wide enough to fit the sliding doors. All that was needed was two simple frames, which could be screwed to the walls, floor, ceiling and each other. You will find all the framing timber required for this project at your local Builders Warehouse and it's just a matter of measuring up and cutting everything to length.
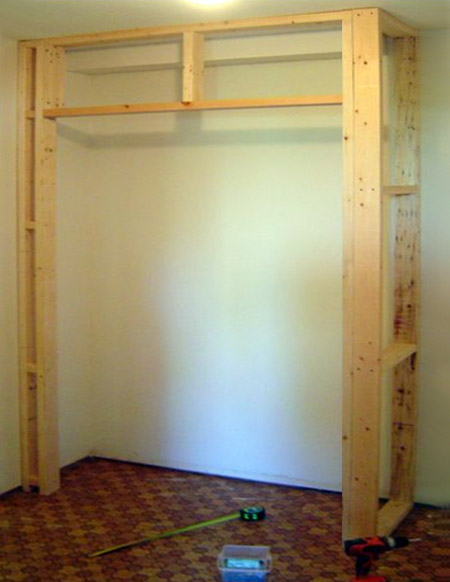
1. Screw the uprights to the walls using wall plugs and screws and then insert the cross beams. The top beams are screwed to ceiling battens, so make sure to plan for this in your design. Make sure the outside frames are vertical by using the spirit level to check. You may have to use wedges or shims next to the wall if it isn't vertical
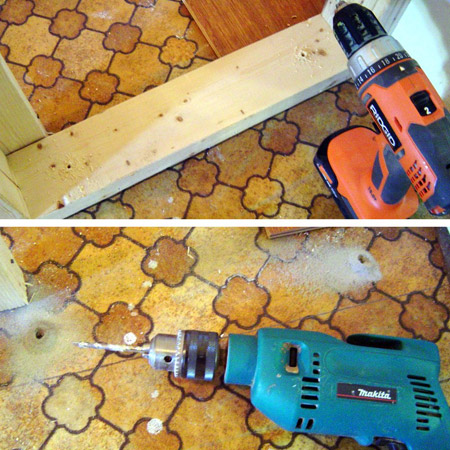
2. So that the open side frames are secure, insert a bottom board. This board is screwed to the floor using expanding anchor bolts or rawlbolts, so you will need a 500W drill with hammer function for this part of the job. Secure the open side frames through the outside into the bottom board.
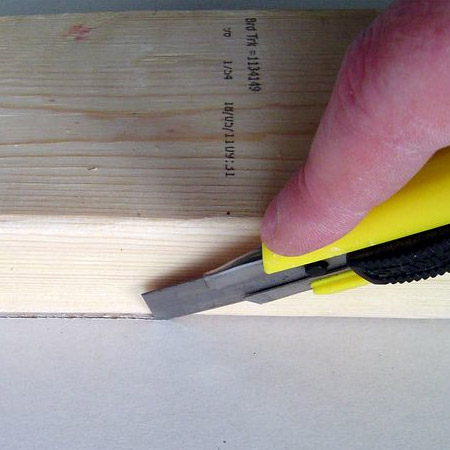
3. Measure up the frame and transfer the measurements onto the drywall. Measure carefully, and cut the drywall using an craft or utility knife. Score on one side along a straightedge, flip the sheet and it will snap along the line when you gently strike the other side. Slice through the remaining paper.
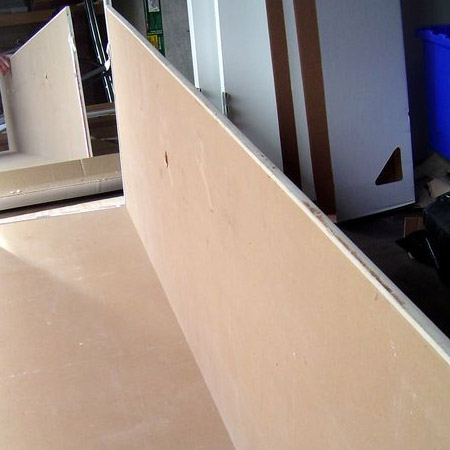
4. Secure the cut pieces of drywall to the frame using drywall screws. Don't do the edges near the external bead or near the door opening, as these will be covered by aluminium profiles.
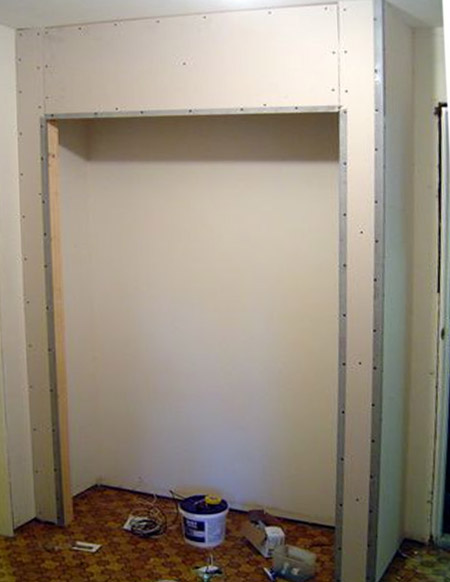
5. Secure the aluminium profiles around the edges and on the corner. The profiles will secure the drywall along those edges.
Mix the rhinolite according to the instructions. It's important to get the consistency right, as too sloppy or too dry and the stuff will crack.
DIY TIP: If you are worried about plastering the built in frame, call in a handyman or someone with experience on applying dry wall or rhinolite plaster.
6. Use dry wall tape on all the joins and corners. To do this, start by cutting your tape to length for each corner and join, then wet the tape, squeezing off any excess so that it's damp rather than dripping - hang the tape somewhere close by. Start at a corner and smear plaster on both sides - at least 5cm wide - from top to bottom. Grab the wet tape and embed in the plaster, trying to keep it relatively tight (but don't tear it!). Get your trowel, and scrape the tape in, starting at the top, going 10 to 12cm down on one side before switching to the other side.
The plaster behind the tape will ooze out, that's good. Go all the way to the bottom. You may have to account for some slight stretching of the tape, that's fine, just pull it tight and keep going, you can cut off excess at the bottom later. Now plaster over the tape, scraping it down well. Repeat for all your other joins. Scrape off your trowel, have a beer and come back tomorrow !
Before you add the second coat, scrape off any ridges or lumps in the plaster with your trowel. Don't sand, unless you don't mind making a lot of dust. When you plaster, do one side of the internal corners only. Pros always do both, because they're awesome. You're not. This way you won't screw up the side you just plastered when you do the second one. Scrape off your trowel, come back tomorrow.
7. Since you only did half a coat last time, go back and do step 6 again for the other side of each internal corner. You may have to keep going, each time feathering the plaster out wider (a wider trowel helps a lot here). Once you think it is as good as you can get it with a trowel you can start sanding7.
8. Before you add any trim, apply a plaster primer and then apply two coats of topcoat. To hang the doors, just follow the instructions - all mounting directions and hardware are included. Basically, you attach the top and bottom tracks with screws, then clip the doors into the tracks.
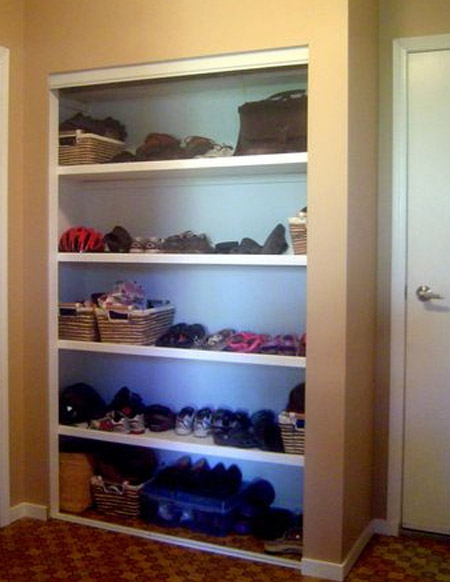
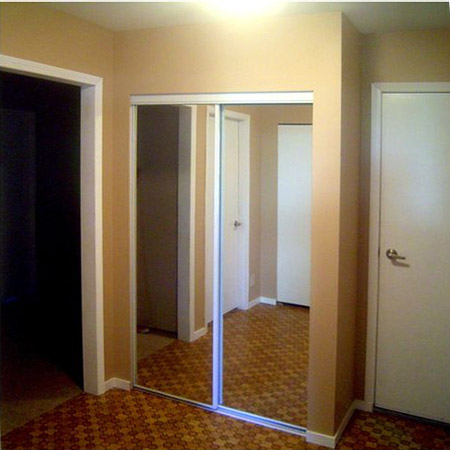
I use PAR pine for building utility furniture, so I made the shelf supports by cutting two pieces of laminated pine shelving into pieces to fit inside the built in. And finally, the last step is to hang the doors. Mirror doors are a tad pricey but they do look really nice, especially if you have a small bedroom.