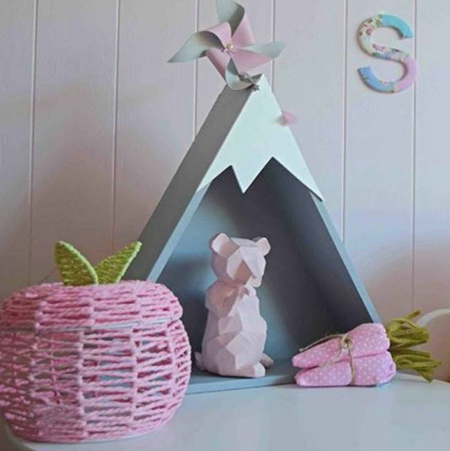
Trendy kiddies shelf
The idea for this triangular shelf is from Kmart (Australia) and a company that sells the add-on pieces to turn the shelf into a designer piece. We show you how to make the shelf - and finish it off.
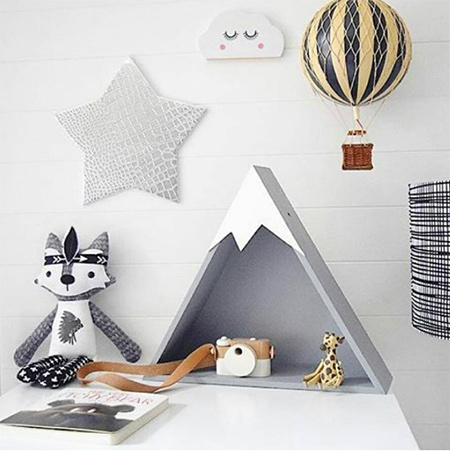
You will find these shelves on Bear and Sparrow in Australia, but it's not something you will be able to source locally. So, we took a closer look at how to make our own triangle shelf.
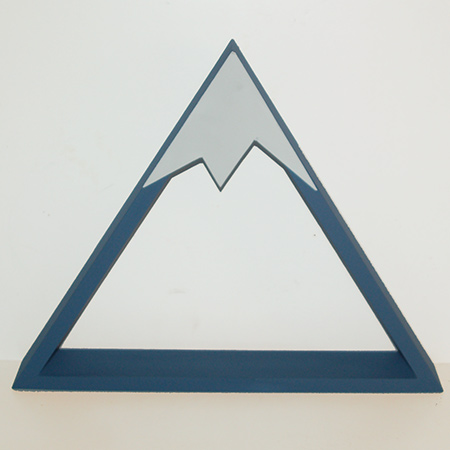
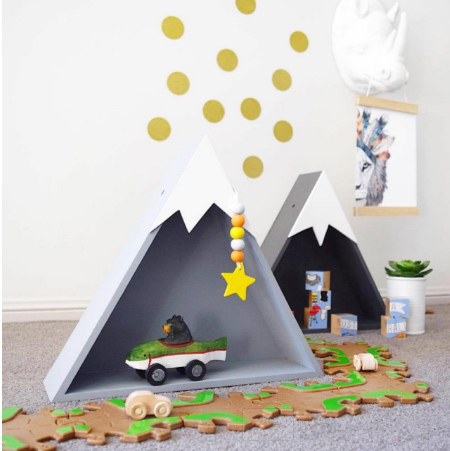
See our detailed step-by-step instructions for this project below. Make up a few triangular shelves to create a fun and colourful storage arrangement.
GOOD TO KNOW: Have now discovered an easier way to make this shelf.
For our project we used 16mm SupaWood offcuts, a scrap piece of Masonite, and Rust-Oleum Chalked ultra matte spray paint. All of these items can be found at your local Builders Warehouse.
YOU WILL NEED:
2 of 70 x 425mm - sides
1 of 70 x 417mm - bottom
Wood glue
Wood filler
Rust-Oleum Chalked ultra matte spray paint in your choice of colours
Picture hanger and 16mm screw
V-pins and hammer
TOOLS:
Mitre saw
Drill / Driver plus assorted bits
Orbital Sander plus 120-grit sanding pads
Tape measure and pencil
.
HERE'S HOW:
GOOD TO KNOW: Have now discovered an easier way to make this shelf.
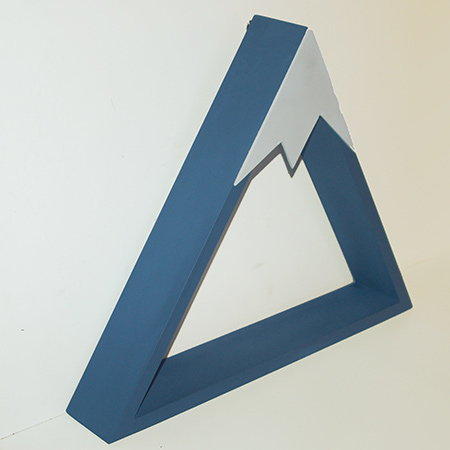
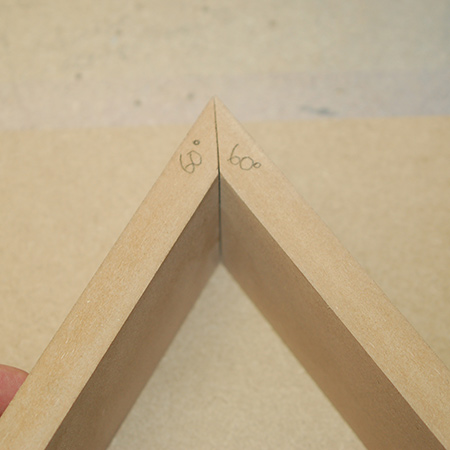
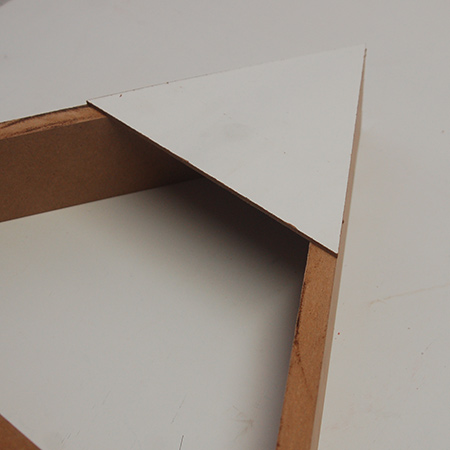
1. The triangular shelf has two angles: a 60-degree angle at the top of both sides, and a 31-degree angle on both ends of the bottom piece.
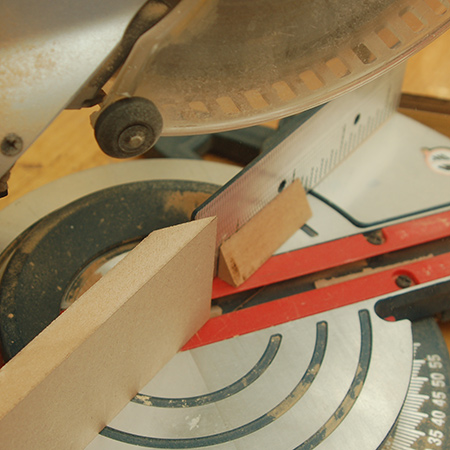
I'm not a mathematician and would never claim to be one, so finding the correct angles was pretty much trial and error until I got it right. It was also a puzzle to work out how to cut a 60-degree bevel angle on a mitre saw that only adjusts to 45-degree. As you can see above, I ended up placing the side sections on one side and setting the table to 60-degrees to cut this angle.
Do this with caution and only if you have experience with using a mitre saw!

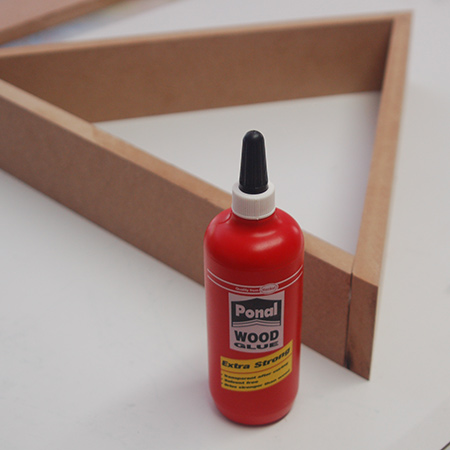
2. Use wood glue to join the sections together. I tried various clamping methods but none worked at these extreme angles, so I just made sure that the joints were firmly pressed together.
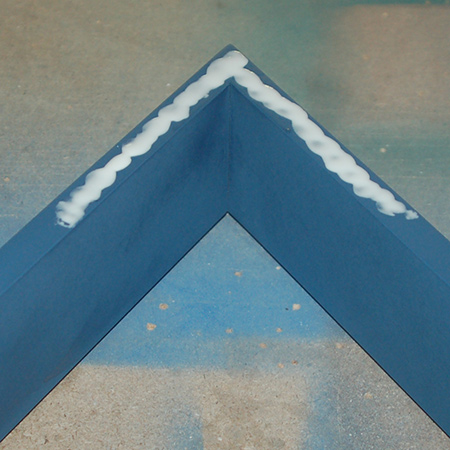
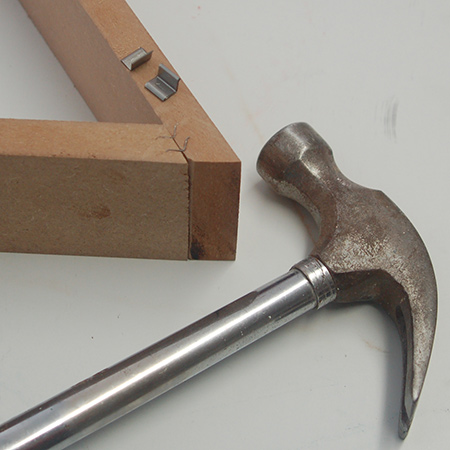
3. To provide extra stability, I added a couple of v-pins (or v-nails) to each join.
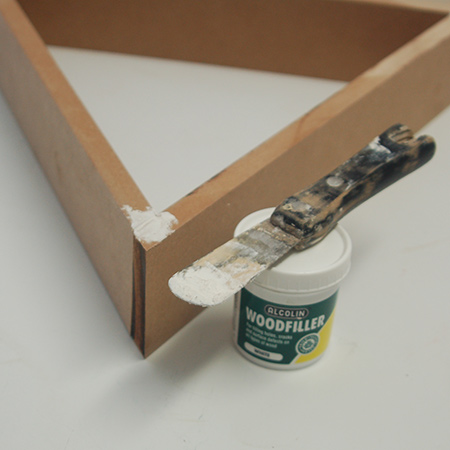
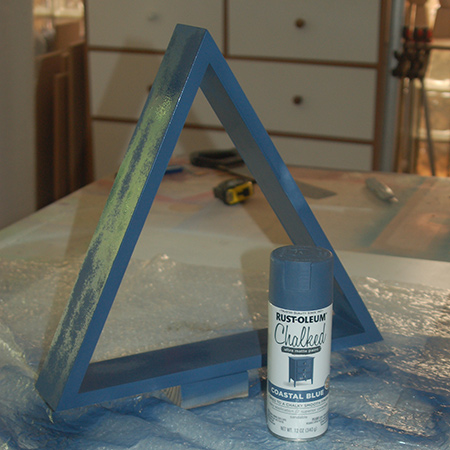
4. While there weren't any large gaps, I did add wood filler over the joins for a nice smooth finish.
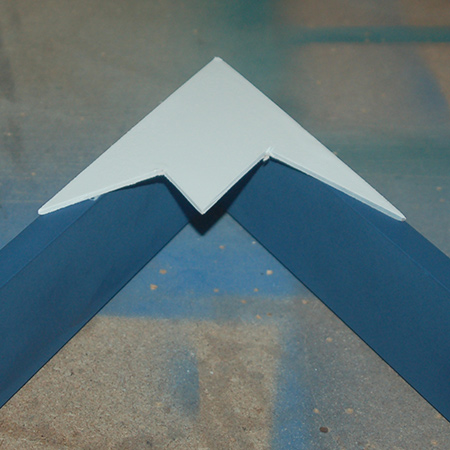
5. Using the frame itself as a template, using a jigsaw I cut a piece of 3mm white masonite for the decorative front piece. In the finished pic you will see that I also cut out shapes to make a rough zig-zag pattern.
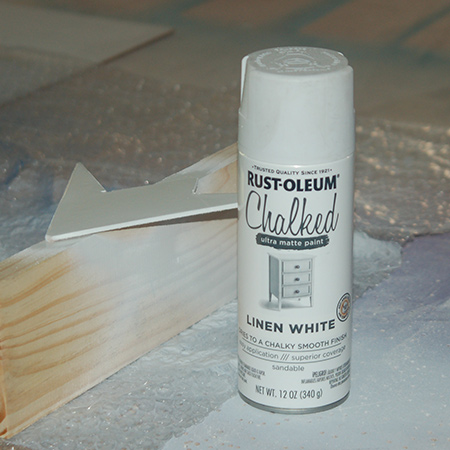
6. If you plan on spray painting the shelf, which I did, rub wood filler over the cut edges to reduce absorption. If you don't do this you use a lot more spray paint. Rub your finger over the filler until it is super smooth and blocks the surface of the supawood.

7. Now you're ready to paint. For this project I used Rust-Oleum Chalked ultra matte spray paint in Coastal Blue. I was given some samples to try out and love the Chalked finish it gives. Plus it dries very quickly to an ultra matt finish.
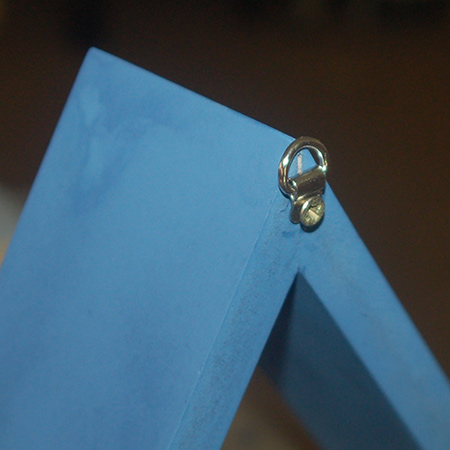
8. In order to hang the shelf on a wall you need a picture hanger - mounted at the back with a 16mm screw. This shelf is not designed for heavy items, but more as a decorative feature, so the hanger is fine.
9. Use wood glue to mount the decorative feature on the front of the frame.