How to... Built-In Closets or Wardrobes
The idea for this project is to show how easy - and affordable - it is to build your own built-in cupboards or wardrobes.
16/10/2018
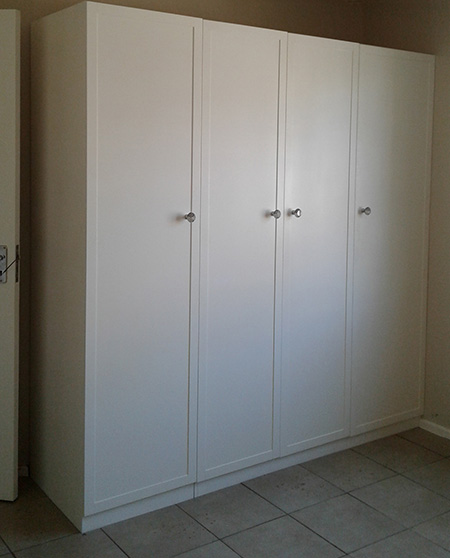
I have a guest bedroom in my home that is busy getting a revamp. One of the major changes in this room is to rip out the builders-grade built-in cupboards and design and build a custom built-in cupboard. Once you see how easy it is, and how the cost to build your own can be cheaper than ready-made built-ins, you may want to consider this project for all your bedrooms.
The cost to build the cupboards (excluding accessories) should be around R2000.00 which, when compared to the price of a (smaller) ready-made built-in design, works out much cheaper, plus you can build your own design to fit.
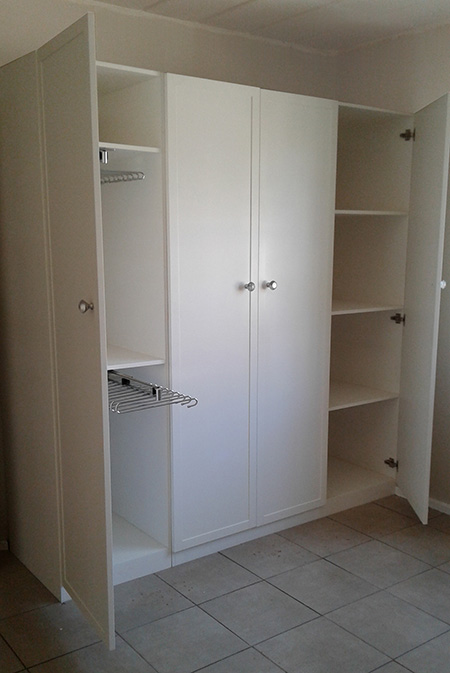
Having seen all the accessories for my built-in cupboards at my local Gelmar, I opted to take the easy option of buying and installing pull-out trouser racks and a pull-down clothes hanger rail. You will find instructions below for fitting these, as well as a pull-out belt or tie rack. Adding these to built-in cupboards not only makes the assembly easier, it also provides the built-in cupboards with all the latest space-saving features.
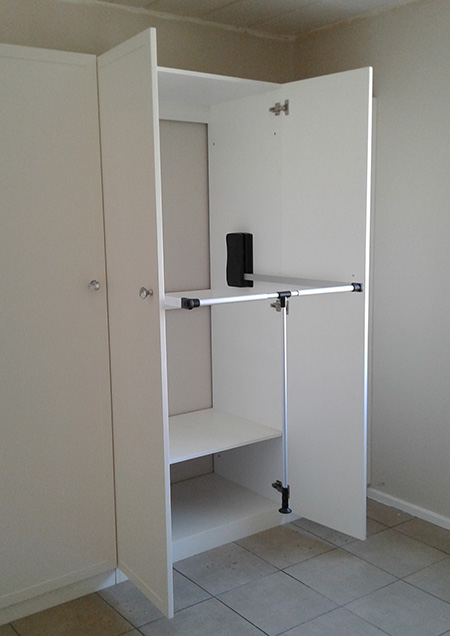
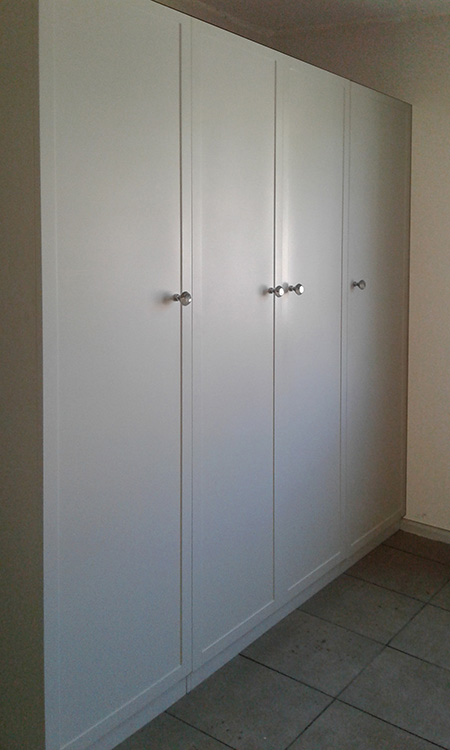
My favourite accessory to the custom built-in cupboards is the pull-down clothes rail. Although I have only fitted one rail in the built-in closet (shown above), it is possible to install a double hanger system with a pull-out clothes rail at the top of a cupboard and a fitted clothes rail lower down. The pull-out clothes hanger allows you to fit more clothes into a single cupboard and still have easy access to your clothes.
The built-in cupboards are assembled using 16mm SupaWood for the frames and 12mm SupaWood for shelves. I used 12mm for the shelves to cut down on the total weight, since SupaWood is a dense and heavy board product. The doors have a 3mm SupaWood frame to add a touch of Shaker style to the finished cupboards.
YOU WILL NEED:
16mm SupaWood - frame - we used 2 sheets for this project
12mm SupaWood - shelves - we used 1 sheet for this project
3mm SupaWood - detailing - we used 1/2 sheet for this project
4 x 4.5mm screws
5 x 30mm screws
16mm screws
Wood glue
Wood filler
Plascon Polvin, in your choice of colour
Prominent Paints Woodpro clear acrylic sealer
Gelmar Trouser Rack
Gelmar Clothes Lift
Gelmar Pull-out Tie / Belt Holder
Gelmar Crystal Cone Knobs
Gelmar Soft Close Concealed Hinges
TOOLS:
Drill / Driver plus assorted bits
Countersink bit
Orbital and Random Orbit Sander plus 120- and 240-grit sanding pads
Bosch PFS spray system
Tape measure and pencil
HERE'S HOW:
Assemble the Cupboards
1. The first step in installing the built-in cupboards was to remove the old builders-grade cupboards. These were cheap melamine cupboards that were falling apart, with chipped edges around the doors and frames. That's my main beef with ready-made melamine or laminated cupboards - they easily chip.
2. The next step was to measure up the space for fitting the new built-in cupboards. Using a spirit level, I was lucky enough to discover that the walls and floor were straight, but if you find that your walls aren't straight you will need to fit a filler panel down one side that can be cut to allow for an angle, since you can't install skew cupboards!
GOOD TO KNOW: The built-in cupboards I installed are not floor-to-ceiling, but I intend on installing cupboards above the built-in closets once the cupboards are installed.
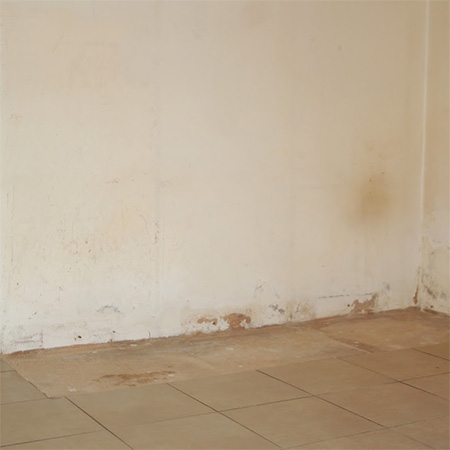
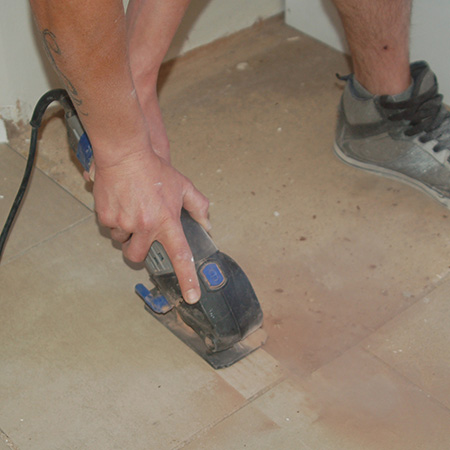
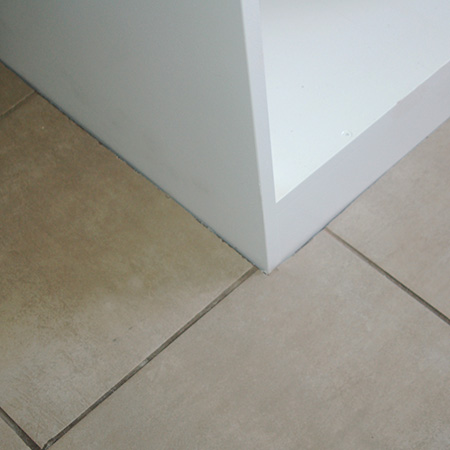
3. After removing the old cupboards, I discovered that the tiles were installed around the cupboards (typical) and there was nothing on the floor underneath. To rectify this without too much expense and inconvenience, the floor tiles were trimmed to allow for fitting the new cupboards. Cutting was easily done with a Dremel DSM20 and cutting disk.
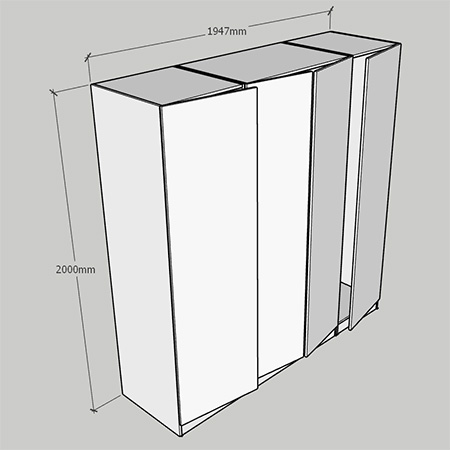
4. The entire installation consisted of 3 cupboards, each of a particular size depending on what I wanted to fit inside the cupboard. The total length fitted perfectly into the allowed space, and I left plenty of space at the top for adding cupboards later on.
GOOD TO KNOW: If you plan of building built-in cupboards or cabinets I highly recommend downloading SketchUp Make. This drawing program is absolutely free and allows you to draw up accurate plans.
5. Since all the individual cupboards are made in exactly the same way, I will be showing how I assembled the cupboard that has pull-out trouser racks fitted.
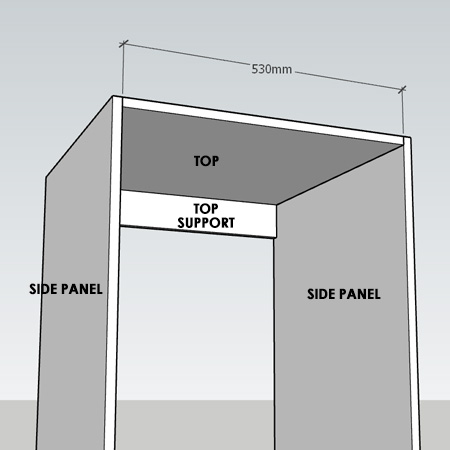
GOOD TO KNOW: The top and bottom supports are important when building built-in cupboards, as these give stability to the cupboards and prevent bowing.
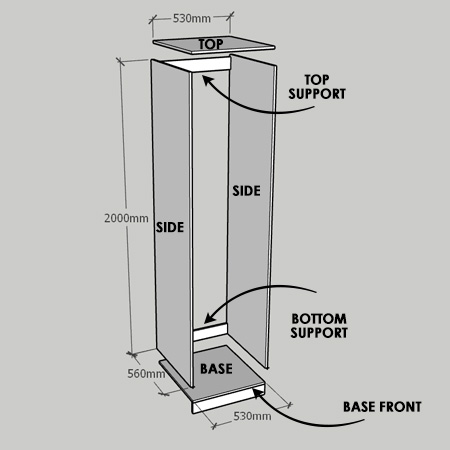
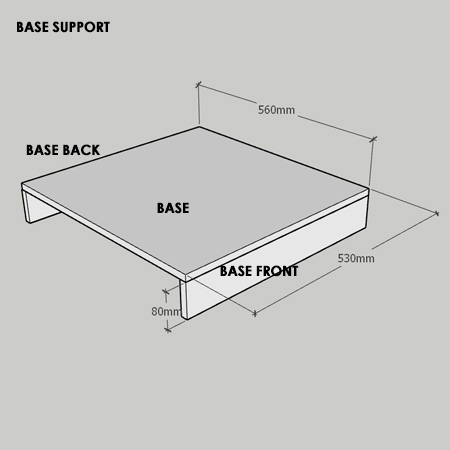
6. Assemble the base by securing the base front and base back underneath the base. Drill 3mm pilot holes through the front and back edge of the base, countersink and use [3] 4 x 45mm screws to join.
7. The base assembly is then secured to one of the side pieces. Drill pilot holes through the side panel into the edges of the front and base inserts and secure with [2] 4 x 45mm screws.
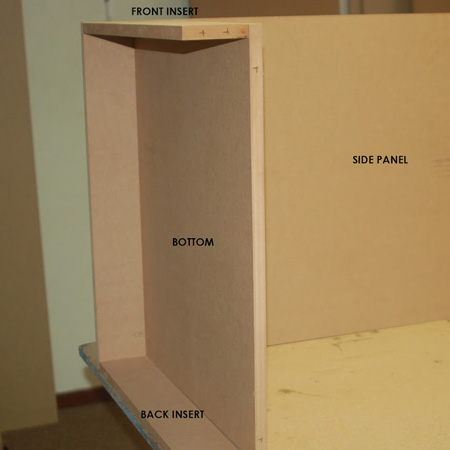
8. With the base resting on its back, attach the remaining side panel in the same way.
9. To complete the built-in cupboard add the top and top support. Drill through the top of both side panels to secure both in place with 4x 45mm screws.
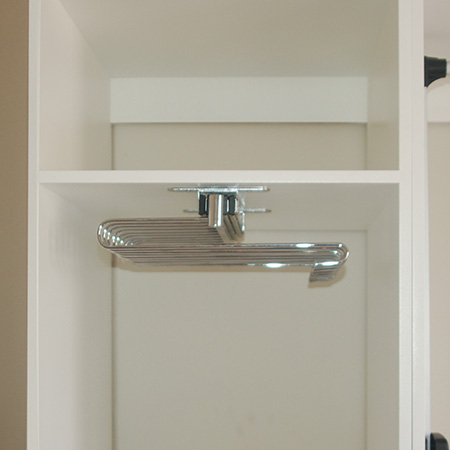
BELOW: Assembled cupboard with Gelmar trouser racks installed (see below for instructions).

Install Gelmar Trouser Racks
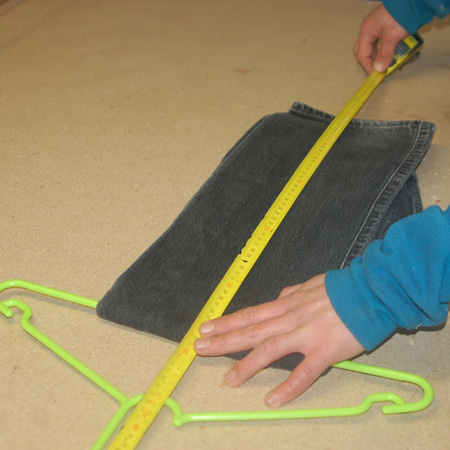
The Gelmar chrome-plated pull-out trouser racks are easy to install. For the correct mounting height, measure the total length from top of hanger to bottom of a pair of trousers. The length of the trousers will determine where the shelves will be mounted that hold the trouser racks. In this particular instance, we mounted two trouser racks (see above), with a shelf at the top for additional storage.
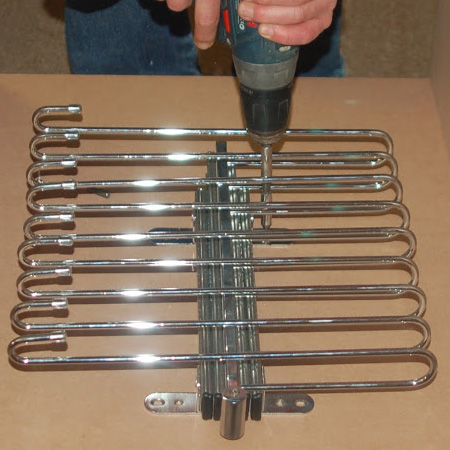
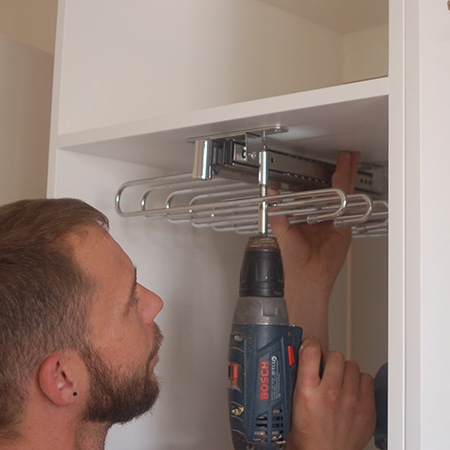
To install the pull-out trouser rack it's easier to work with the cupboard upside down. The trouser rack is secured to the underside of a shelf, with allowance at the front edge, using [8] 16mm screws. Simply place the rack where it is to be installed, drill shallow pilot holes with a 2mm drill bit and drive in the screws.
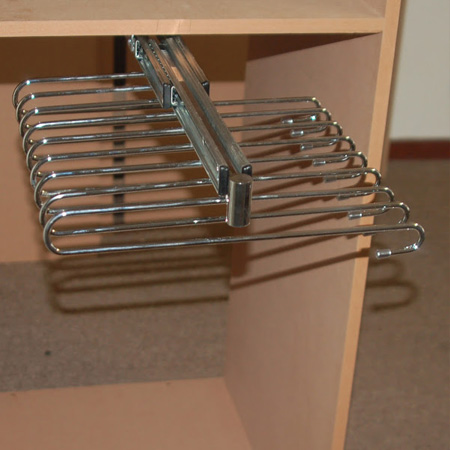
BELOW: The Gelmar pull-out trouser rack fitted underneath a shelf.
GOOD TO KNOW: The trouser racks were installed for the purpose of this feature, but were then removed for painting the cupboards and re-installed after painting.
Painting the Cupboards
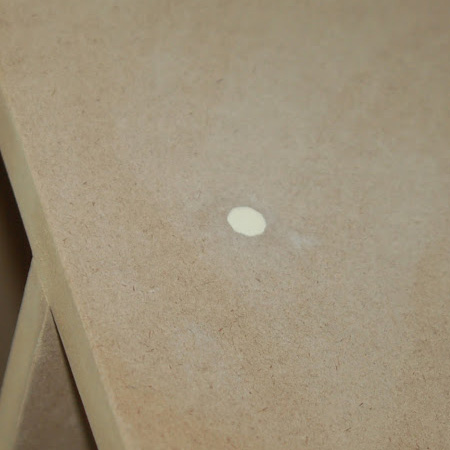
1. All the screw holes were filled with wood filler and sanded smooth once dry.
GOOD TO KNOW: When covering screw holes, apply a little Pattex No More Nails over screw heads before filling with wood filler. This helps reduce shrinkage of the wood filler, and possible cracking.
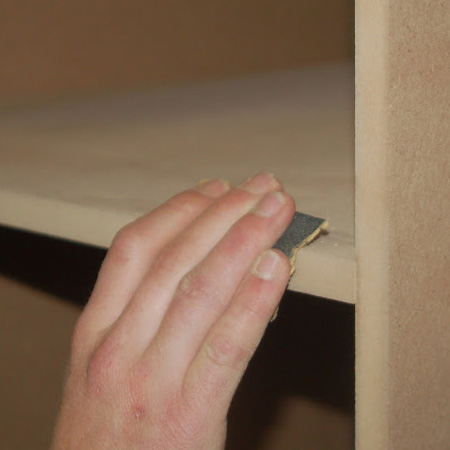
2. Before painting the cupboards, all the sharp edges were sanded and the raw edges sanded until smooth. It is important to sand the edges properly, as this prevents the edges for absorbing paint too quickly. Sanding blocks the pores of the SupaWood.
3. All the cabinets were painted with Plascon Polvin, white. I prefer to use a matt paint, as this can be sanded smooth between coats and then finished off with a clear sealer. If you use a sheen, satin or gloss paint it's not as easy to sand and can peel off while you are sanding, so bear this is mind.
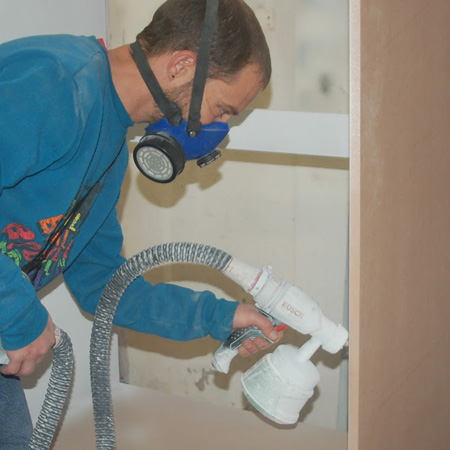
4. Two coats of paint were applied as a primer base and then everything was sanded smooth using a random orbit sander and 240-grit sanding pads. Two more coats were applied and then sanded with 600-grit sandpaper until smooth. Finally, two coats of clear acrylic sealer were applied. The sealer coats protects the painted finish and allows for easy cleaning of the cupboards. For the sealer coat we always use Prominent Paints Woodpro water-based sealer.
Installing the Cupboards
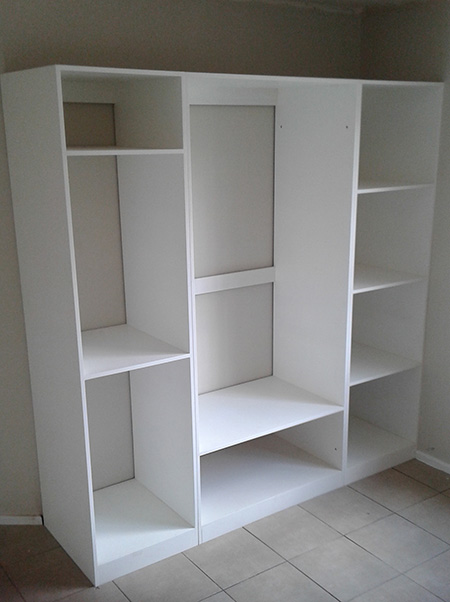
ABOVE - BELOW: The built-in cupboards are slotted in place inside the cut tile area.
1. The installed cupboards were joined together using [2] 5 x 30mm screws at the top and bottom.
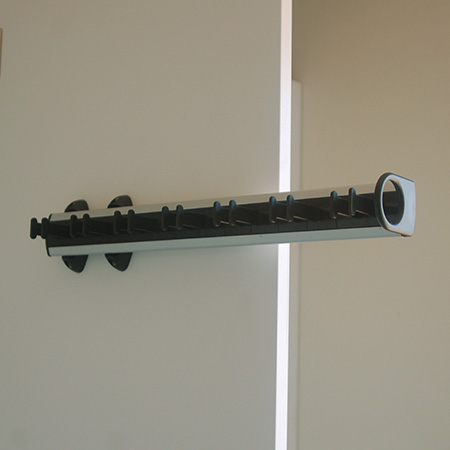
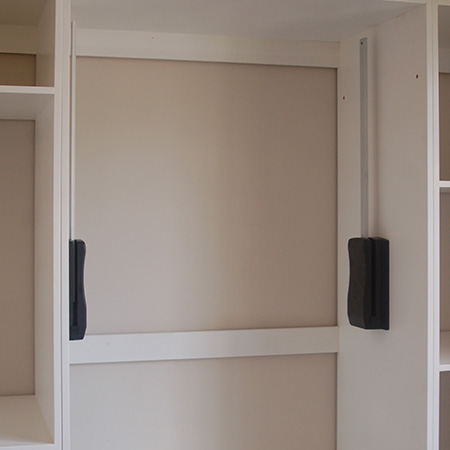
Install Gelmar Clothes Lift
The Gelmar Clothes Lift is a brilliant way to add extra hanging space to a wardrobe, whether a new installation or a revamp of your existing built-in cupboards. It's easy to install and the installation will only take about 20-minutes to complete.
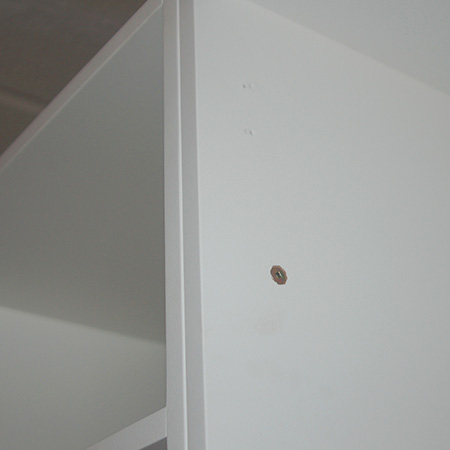
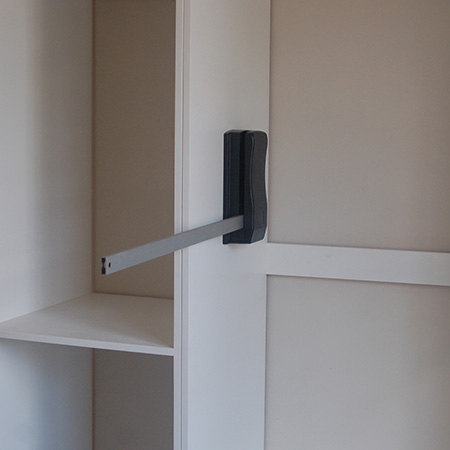
The lift [2] mechanisms are mounted onto the sides of your cupboard using the supplied screws. You do need to use all the supplied screws, as the lift mechanism is what controls the lift movement and needs to be securely attached to the frame. When mounting the lift mechanisms measure the available space to ensure these are mounted at the correct height.
GOOD TO KNOW: If you are replacing a single clothes rail with a Gelmar Clothes Lift and clothes rail, you can buy all the components for the clothes rail at Gelmar.
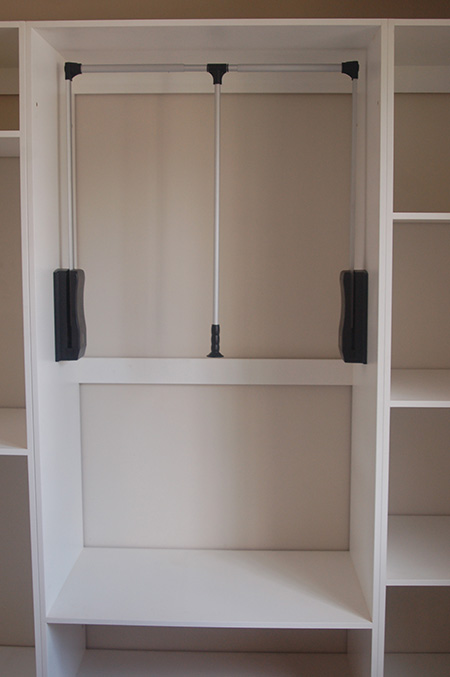
Clothes lift mechanism mounted onto the cupboard side panels.
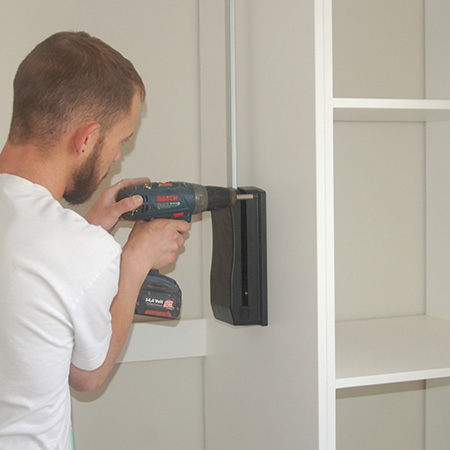
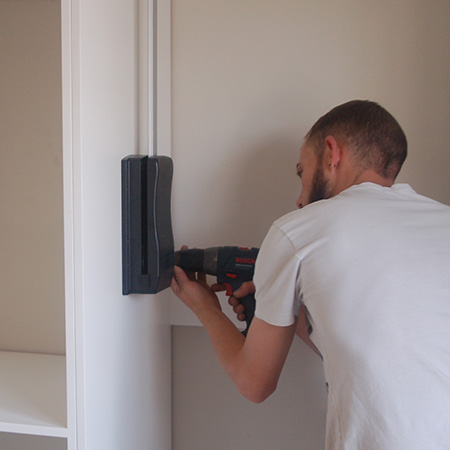
Pull the lift mechanism into the 'down' position for attaching the top rail - see below.
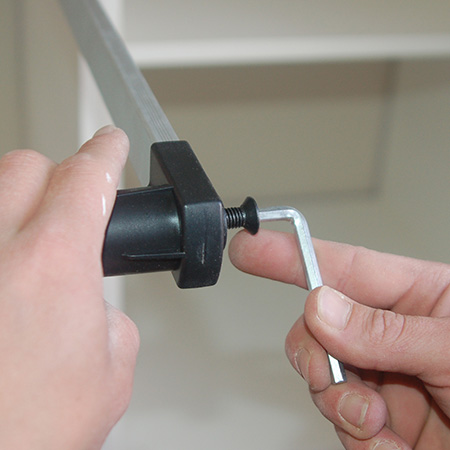
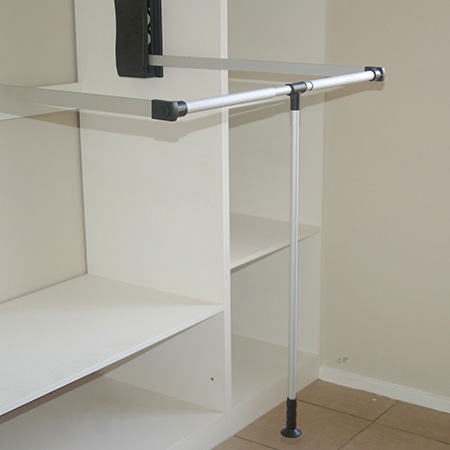
Attach the telescopic rod, adjusting the width accordingly for your size of cupboard - see below.
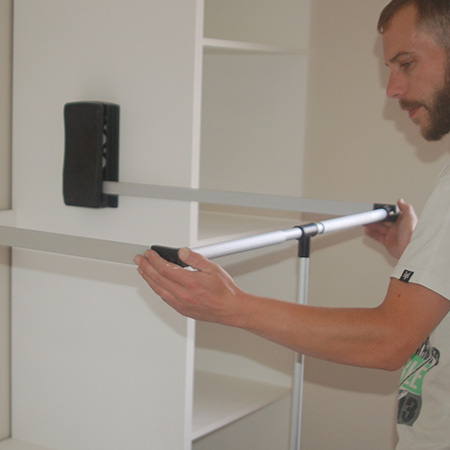
The telescoping rod is secure onto the lift mechanism arms.
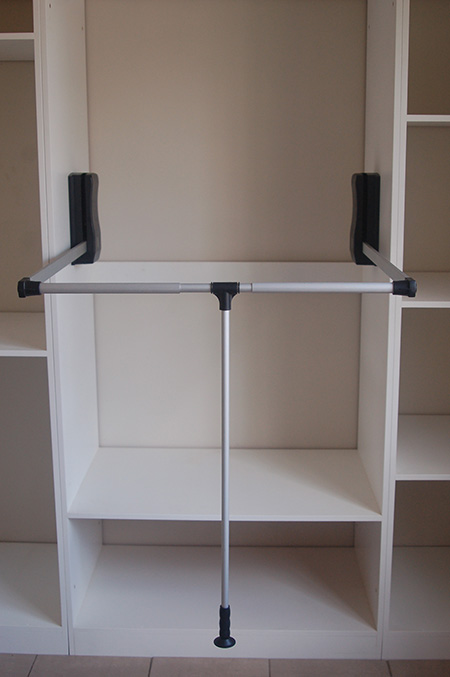
Assembled Clothes Lift in 'down' position.
Gelmar Clothes Lift fitted to built-in cupboard.
The Gelmar Clothes Lift is easy to use - simply pull down the centre rod.
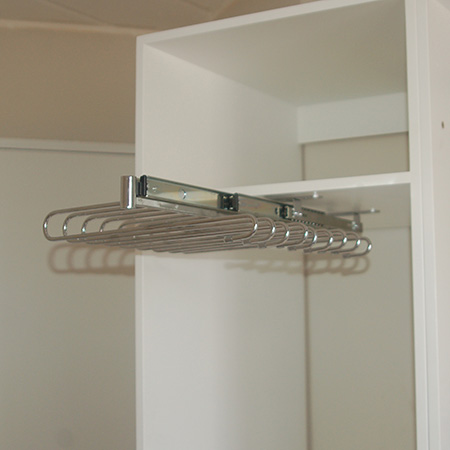
The Gelmar pull-out Trouser Racks are re-installed using the previously drilled holes.
Gelmar pull-out trouser racks allow for easy access for up to 9 jeans, slacks or trousers.
Fitting the Euro / Concealed Hinges
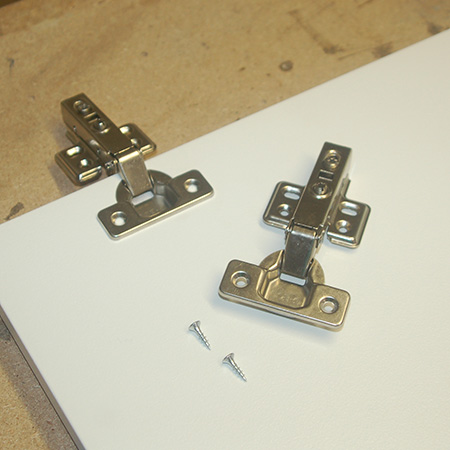
1. The cupboard doors were fitted with Gelmar Soft Close Hinges. To attach these hinges you need to drill circular holes with a 35mm Forstner bit. See below for instructions for mounting Euro or concealed hinges. To make installation easier you can invest in a Kreg Concealed Hinge Jig, especially if you plan on fitting lots of doors.

2. After fitting the cup part of the concealed hinge to the door, have someone on hand to hold the door in place while you secure the door onto the frame. Make sure the top and the door is aligned flush with the frame.
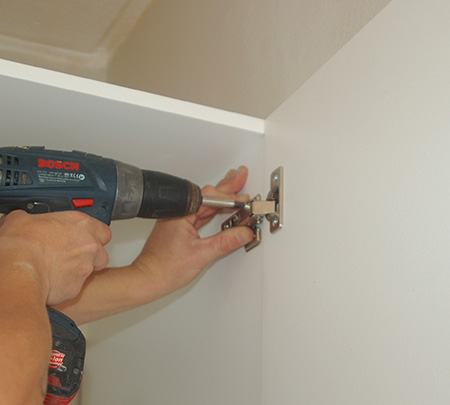
3. Once installed you are able to adjust the hinges to ensure the doors hang nicely.
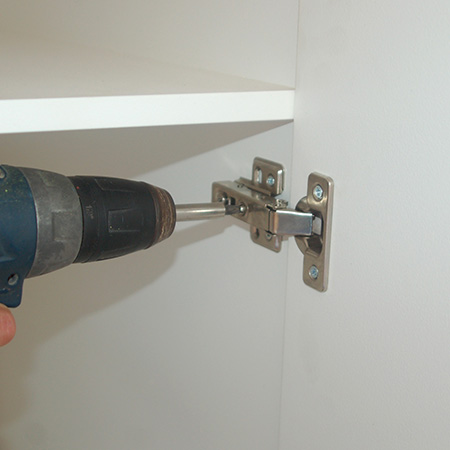
Gelmar soft-close hinges mounted on built-in cupboard doors.


Finishing Off
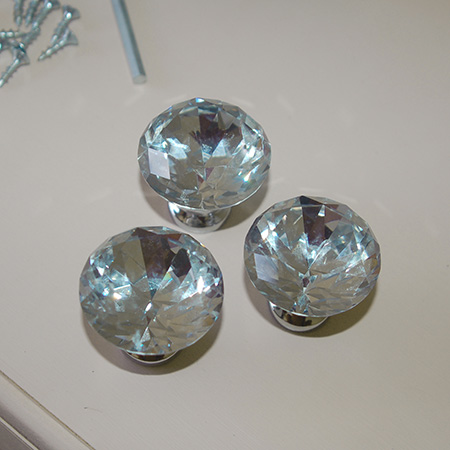
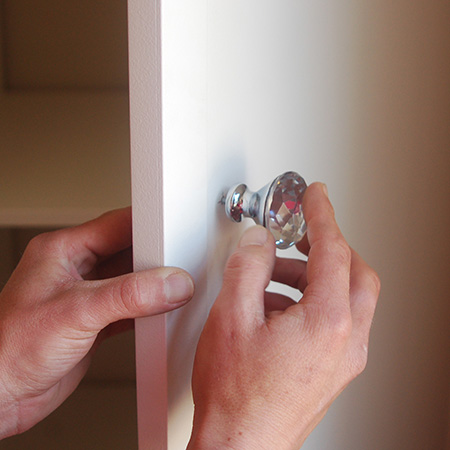
Since I will be including my Chest of Drawers in this bedroom, I added the same Gelmar crystal cone knobs to the cupboard doors.
Finally, a pull-out belt / tie holder was secured to the inside of the door of the clothes cupboard.