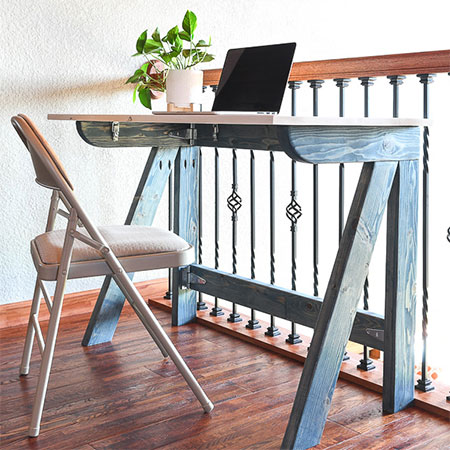
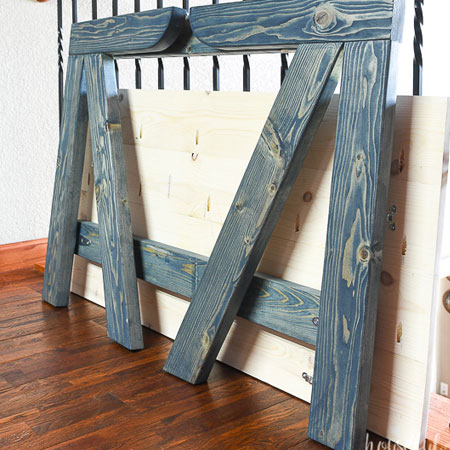
Folding Office or Study Desk
When you don't have a dedicated office or place to study, this folding office or study desk lets you set up a workspace wherever you need it.
24/06/2020
Now and again you will find some really practical project plans on BuildSomething. Their projects might not be in metric measurements and need some conversion before you can make them, but there are some great ideas if you take a look at what's on the website. This folding office or study desk is a recent project by housefulofhandmade and is a quick and easy project you can complete in a weekend.
You can make this folding desk using laminated and PAR pine that you can buy and have cut to size at Builders Warehouse, or your choice of hardware store. And you will also find Rust-Oleum Ultimate Wood Stain in a very similar colour to the one shown in this project.
When not in use, the desk top can be removed and all the pieces packed away for easy storage.
To assemble and set-up the folding desk, first, unclip the catches and fold the legs of the desk together and fully open the legs. Centre the top on the legs by lining up the catches and hook and click into position.
YOU WILL NEED:
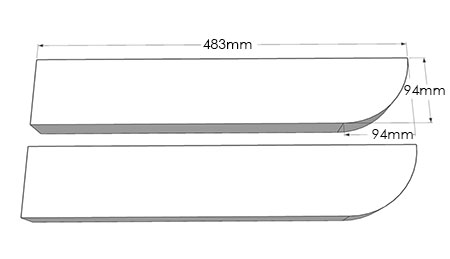
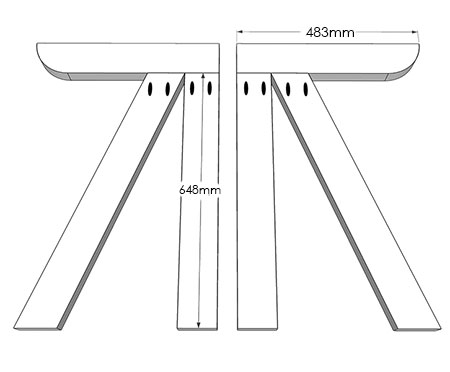
2 of 38 x 94 x 483mm PAR pine - leg, top
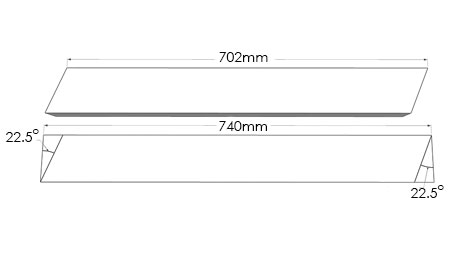
2 of 38 x 94 x 740mm PAR pine- leg, angled
2 of 38 x 94 x 648mm PAR pine - leg, back
2 of 38 x 94 x 940mm PAR pine - desk, back
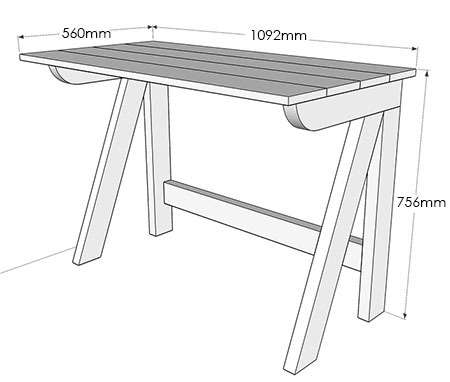
1 of 19 x 560 x 1092mm laminated pine shelving - desk, top
32 and 64mm pocket-hole screws
T-hinges [4] plus screws
Gatehouse catch [4] plus 25mm screws
Wood glue
Rust-Oleum Ultimate Wood Stain in your choice of colour
Clear polyurethane varnish
TOOLS:
Drill / Driver plus assorted bits
Kreg pocket-hole jig
Jigsaw and clean-cut blade
Multi- or orbital sander and 120- + 240-grit sanding pads
Tape measure and pencil
Not responsible for errors or omissions
HERE'S HOW:
1. Measure and mark and then use your jigsaw to cut a curve at the top of leg tops.
2. You also need to cut the angles on the angled legs. Cut a 22.5° according to the diagram below.
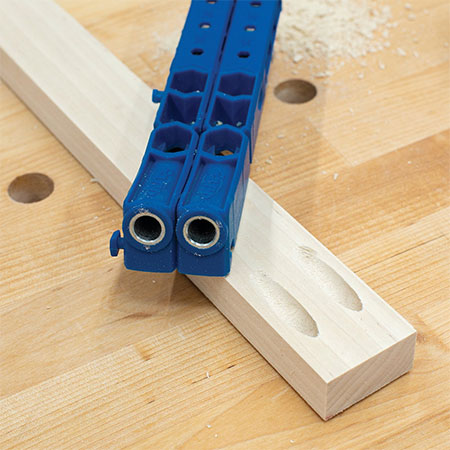
3. After setting up your pocket-hole jig for the material thickness, drill pocket-holes as shown in the diagram below. The pocket-holes must be on the inside of the legs.
4. Attach the back legs and angled legs to the top of the legs using wood glue and 64mm pocket-hole screws.
5. Take the time to sand all the pieces before staining and assembly. Apply your choice of stain to the frame section and clear polyurethane to the desk top and frame section.
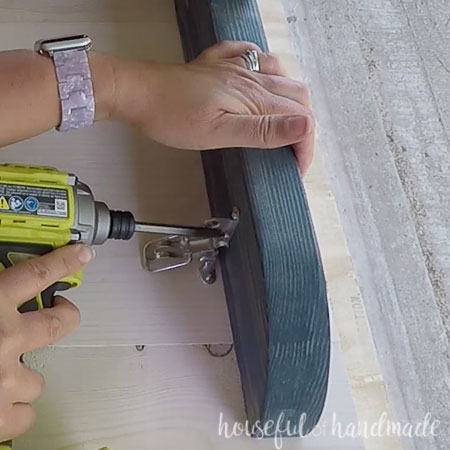
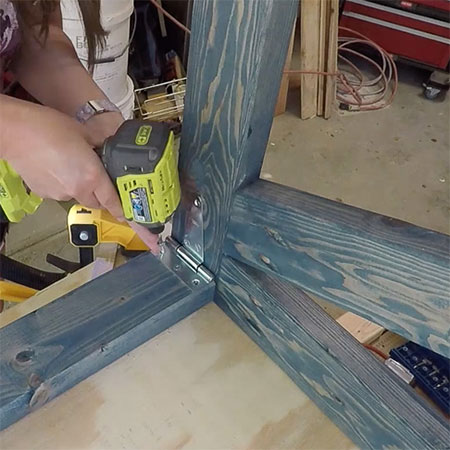
6. Now you can use the T-hinges to secure the back section to the top of the leg pieces, as shown below. Position the long section of the hinge along the top leg piece. Attach a second desk back piece with a T-hinge 130mm up from the bottom of the leg piece. Note: The longer section of the hinge is on the back piece - opposite.
7. Finally, attach the [4] catches used to secure the desk top to the frame. Flip the top upside down on your workbench or work surface and centre both legs to allow for a 38mm overhang at each side and the top is flush at the back. Secure [2] catches on the top of the back legs about 150mm in from the sides - and [1] on the inside of the side legs about 150mm in from the front. Fasten the hook part of the catch to the bottom of the desk and the catch to the legs so they pull the desk top into place and hold securely. Secure with 16mm screws.